
Hey there, fellow primates! 🐵 Ever felt like your digital life is a jungle of files? Well, I’m here to show you how to swing from vine to vine with ease using WinZip. Extracting files is as easy as peeling a banana, and I promise, by the end of this guide, you’ll be zipping and unzipping like the king or queen of the jungle!
Table of contents
- How To Install WinZip
- How To Install WinZip on Windows
- How To Install WinZip on Mac
- How To Zip Files Using WinZip On Windows
- How To Zip Files On Mac Using Winzip
- How To Unzip Using WinZip On Windows
- How To Unzip Files On Mac With Winzip
- How To Create Multipart ZIP Files Using WinZip On Windows
- How To Open Multipart ZIP Files Using WinZip On Windows
- How To Create SFX Files Using WinZip
- How To Add Password To Zip File Using WinZip On Windows
- How To Open a Password-Protected Zip File Using WinZip On Windows
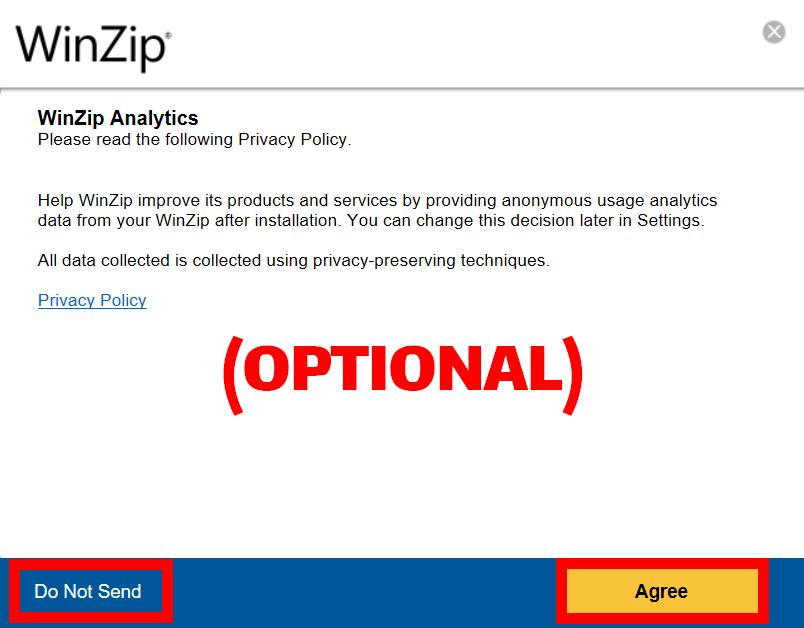
How To Install WinZip
Before we start monkeying around with files, let’s get WinZip installed.
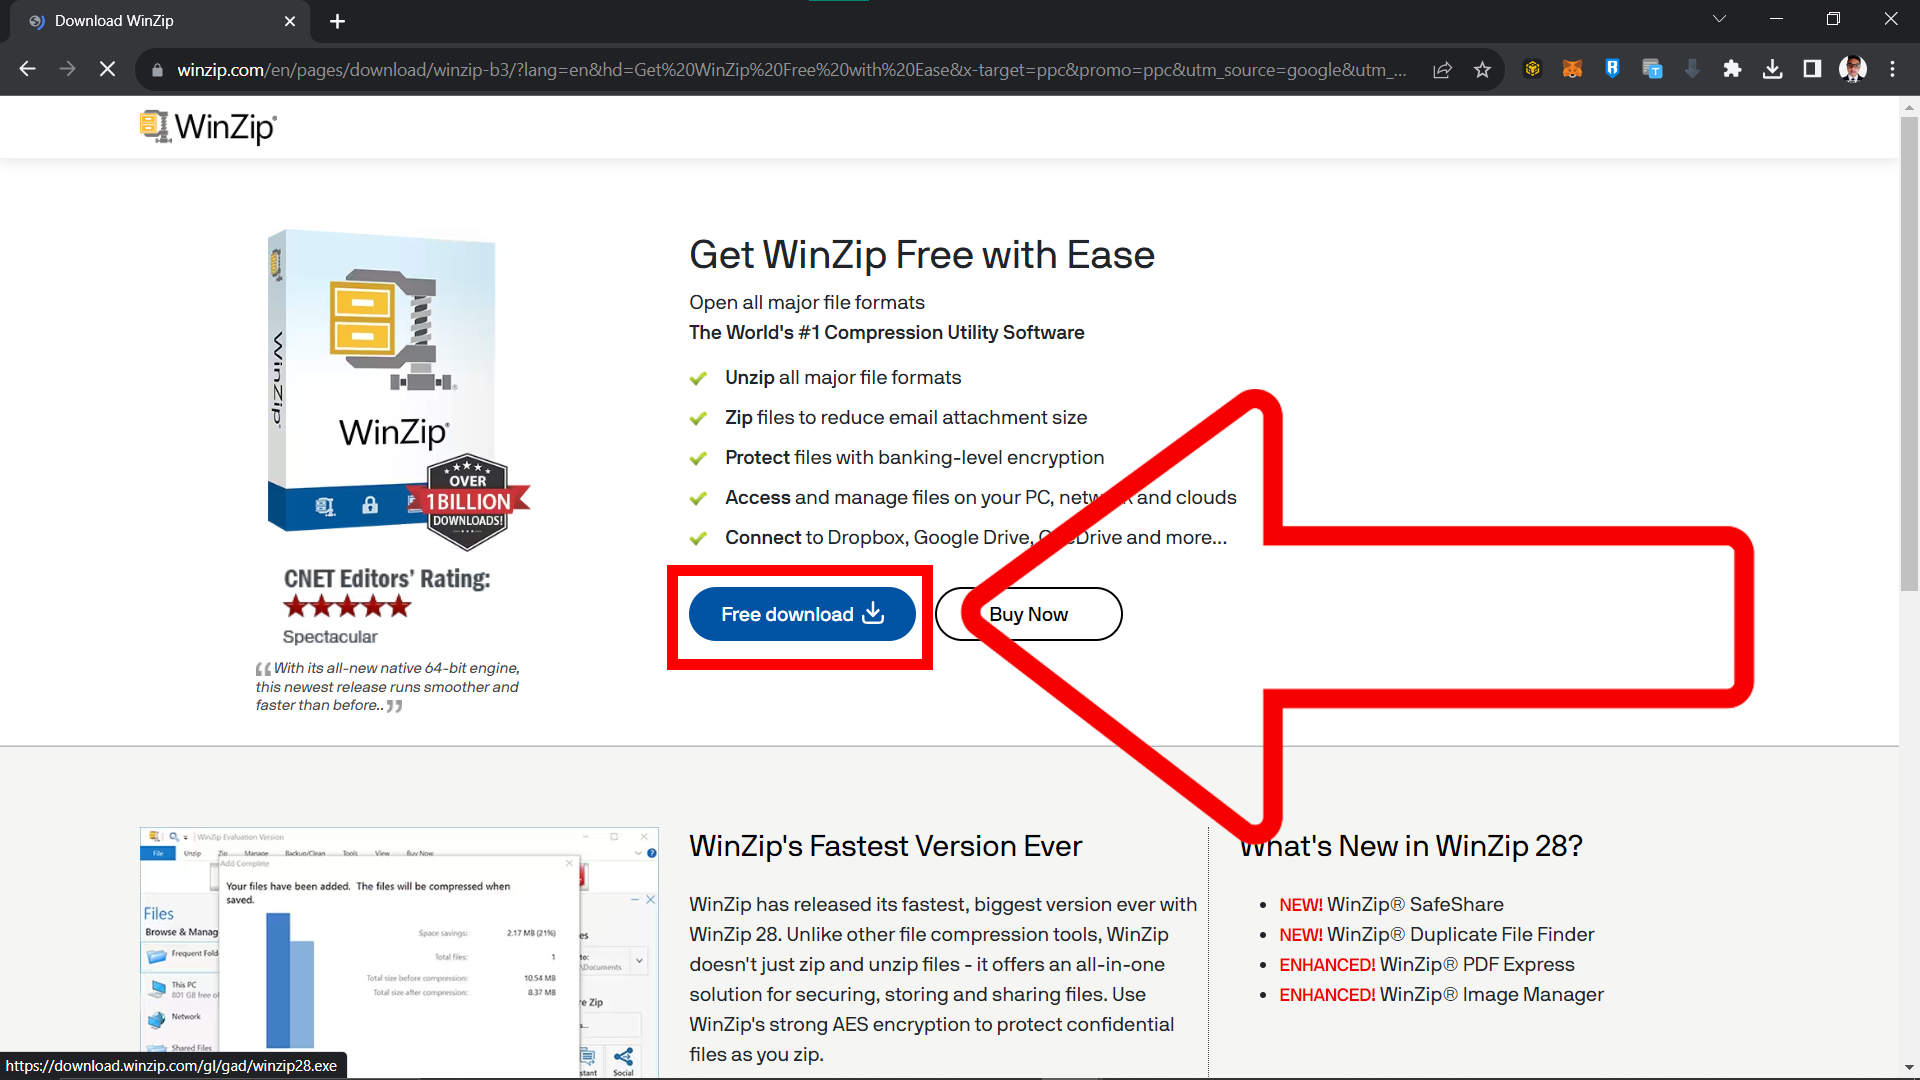
- Download: Head over to the official WinZip website and grab the latest version. No bananas required for payment, just your usual method!
How To Install WinZip on Windows
Navigating the digital jungle on a Windows PC? Let’s get you set up with WinZip to make file management a breeze.
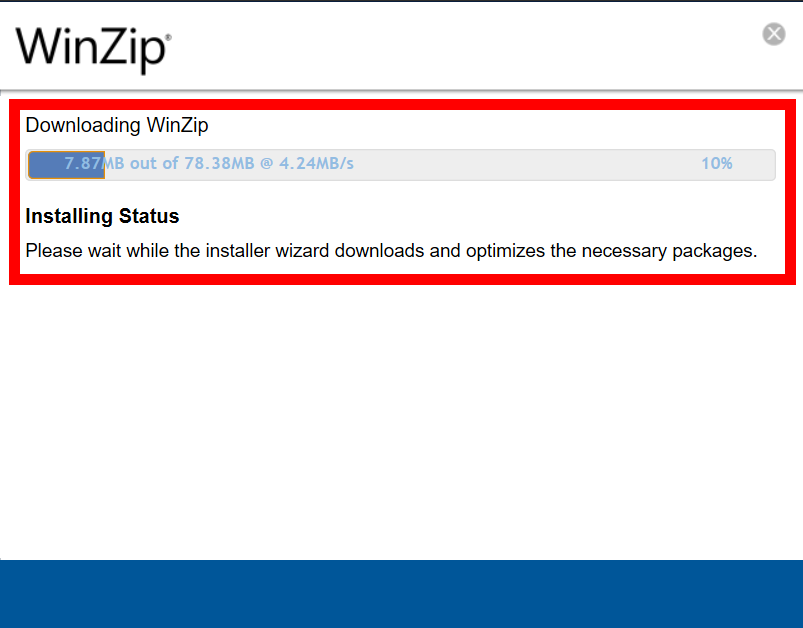
- Locate Installer: Once the download is complete, locate the .exe file (usually in your ‘Downloads’ folder)
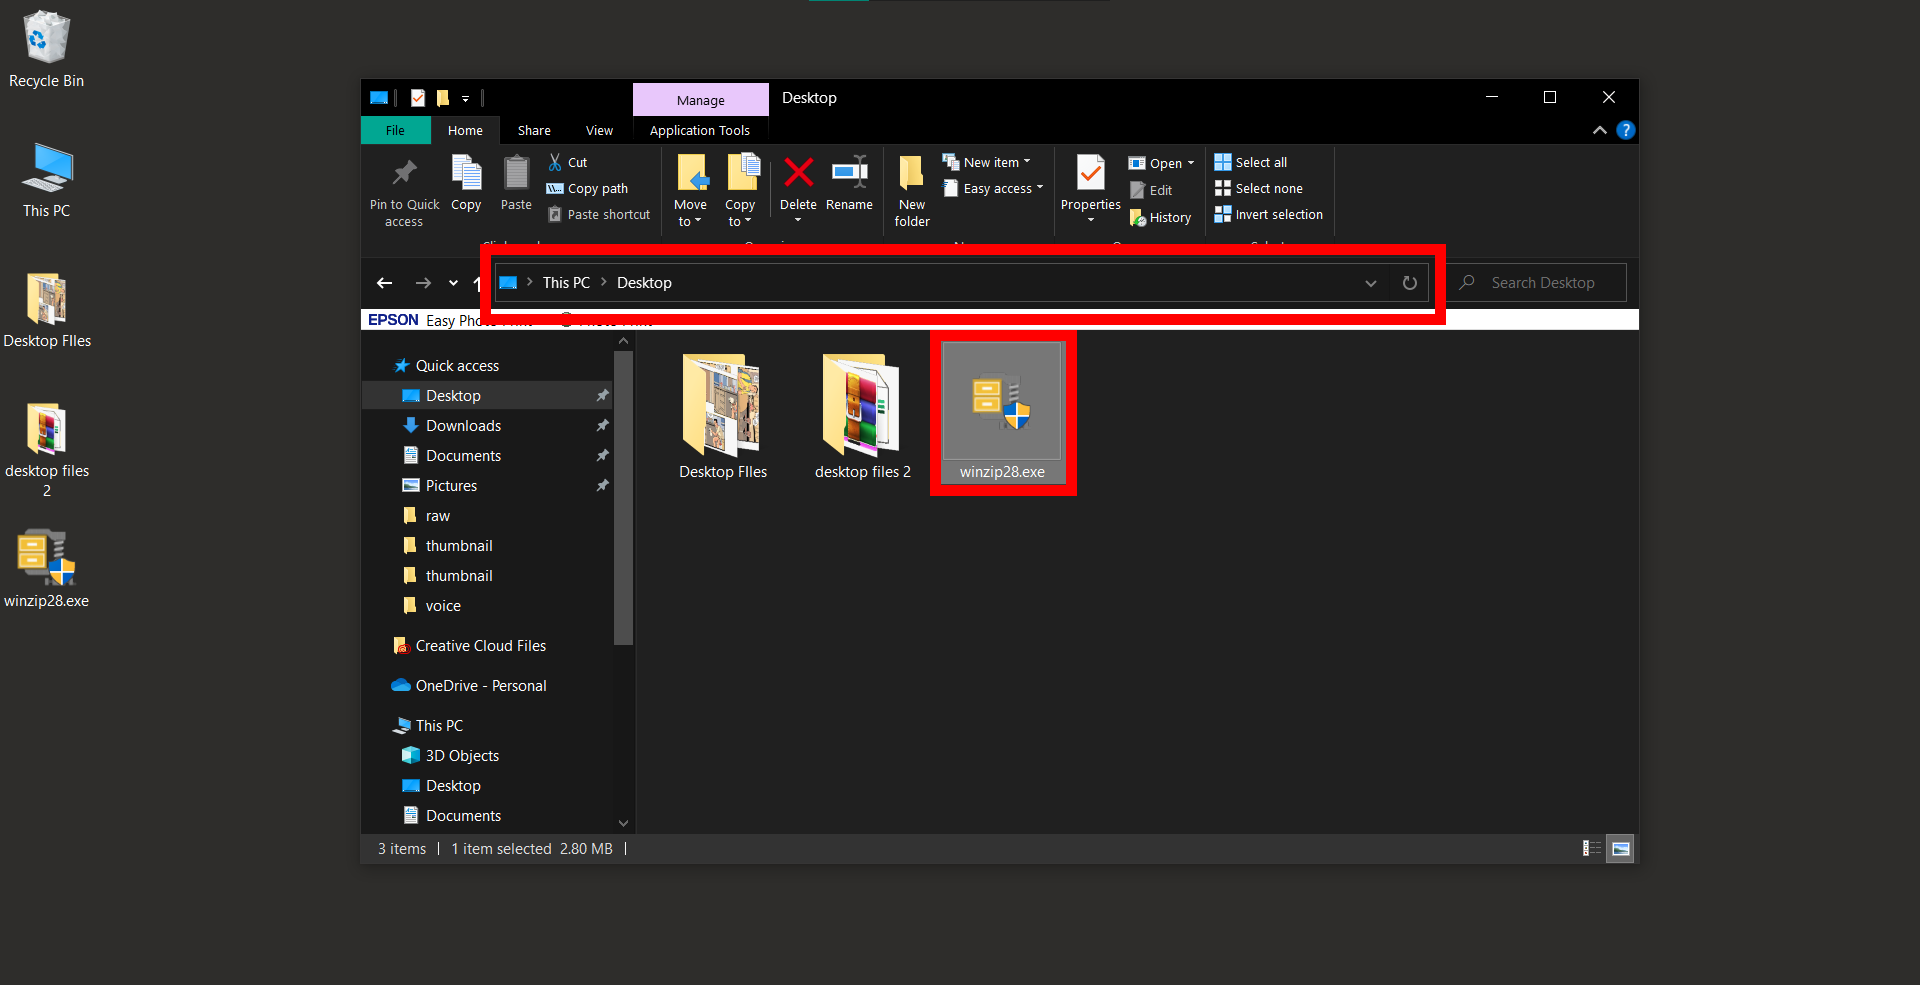
- Run Installer: Click on the installer and let it do its magic. It’s like watching a fellow monkey find a hidden banana stash.
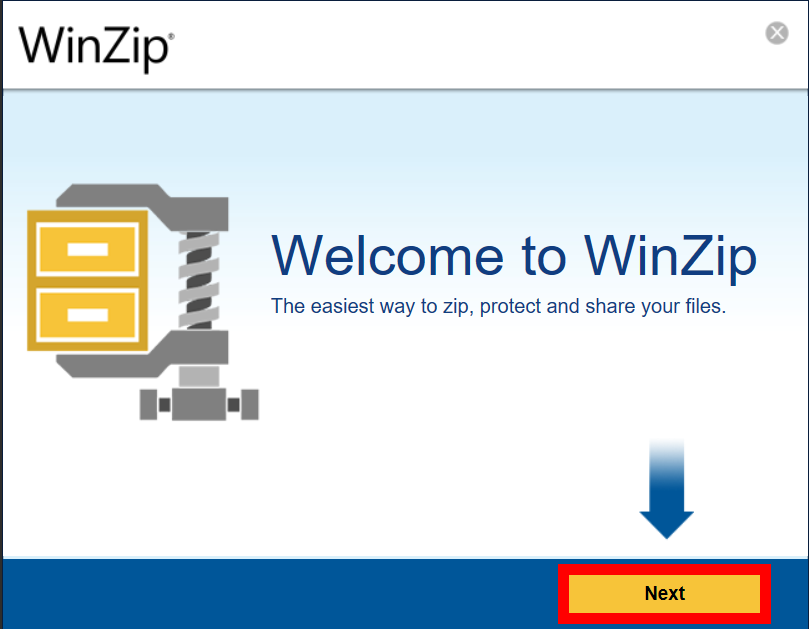
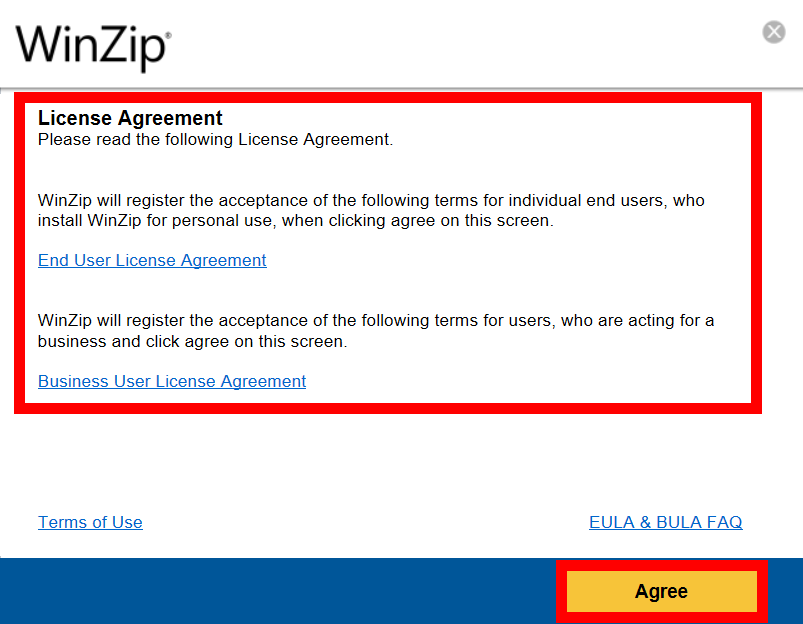
- Follow Prompts: The installer will guide you through a few steps. Just click “Next” until you’re done. Easy, right?
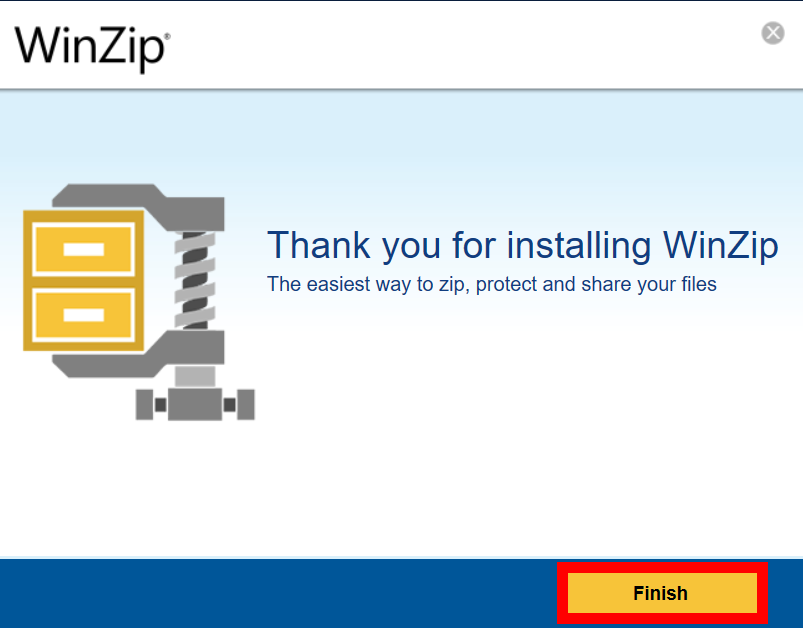
- Finish Installation: Click “Finish” once the installation is complete. Voila! WinZip is now ready to zip and unzip your files.
How To Install WinZip on Mac
If you’re swinging through the digital trees of a Mac, here’s how to get WinZip installed and ready to tackle those files:
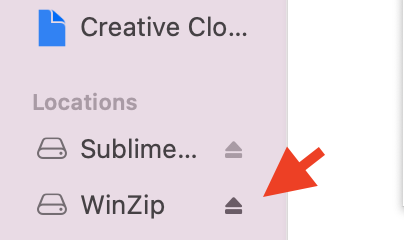
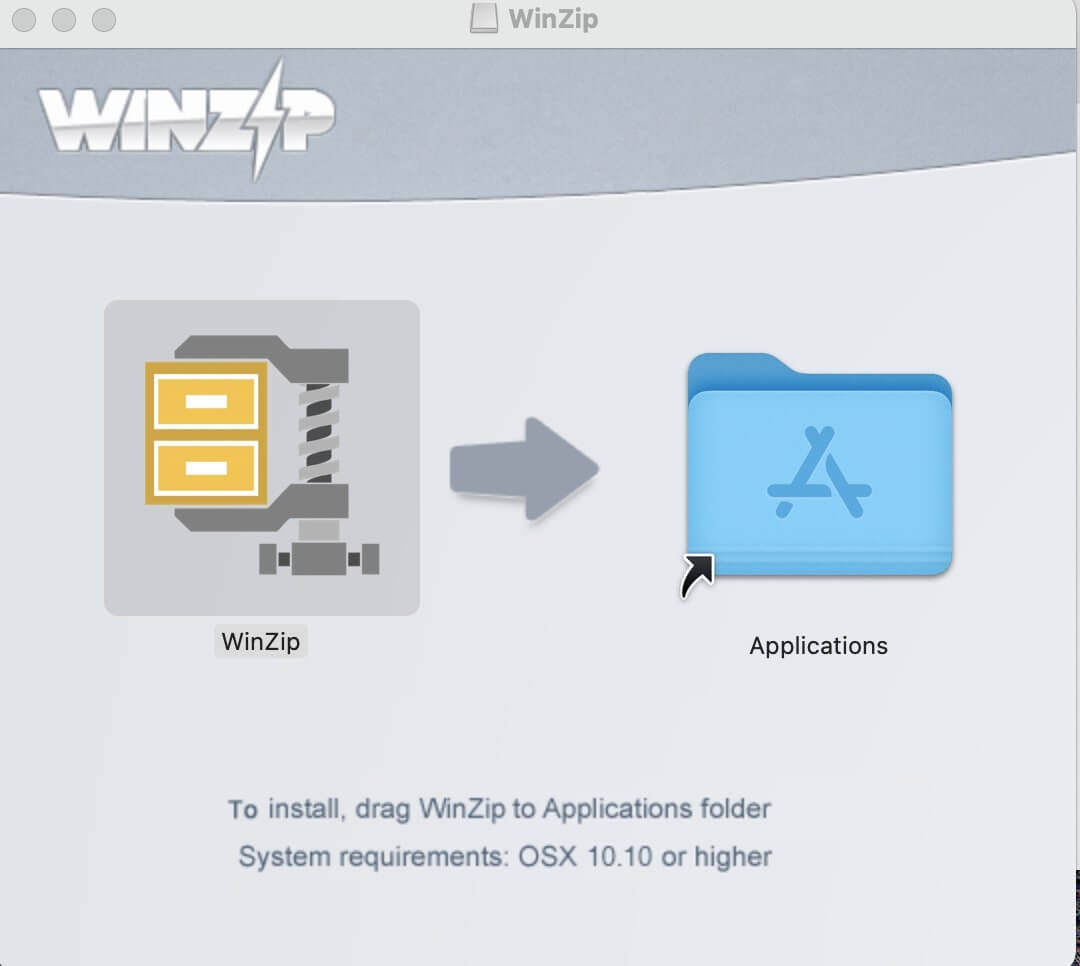
- Find Installer: Once downloaded, locate the WinZip .dmg file.
- Open Installer: Double-click the .dmg file to mount the WinZip disk image.

- Drag to Applications: Inside the window that appears, drag the WinZip icon to your Applications folder.
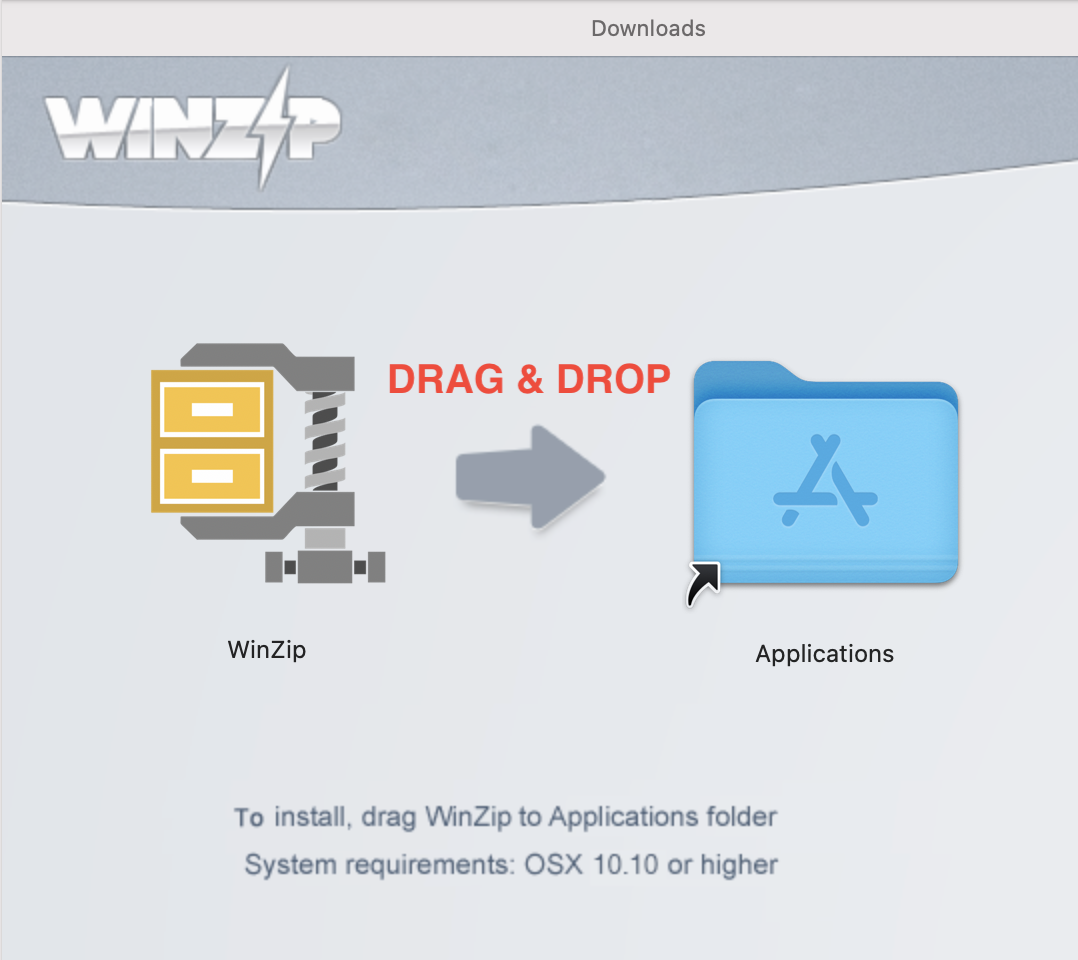
- Eject Disk Image: Once done, right-click the WinZip disk image in Finder and select “Eject.”
- Launch WinZip: Navigate to your Applications folder, find WinZip, and open it to start compressing!

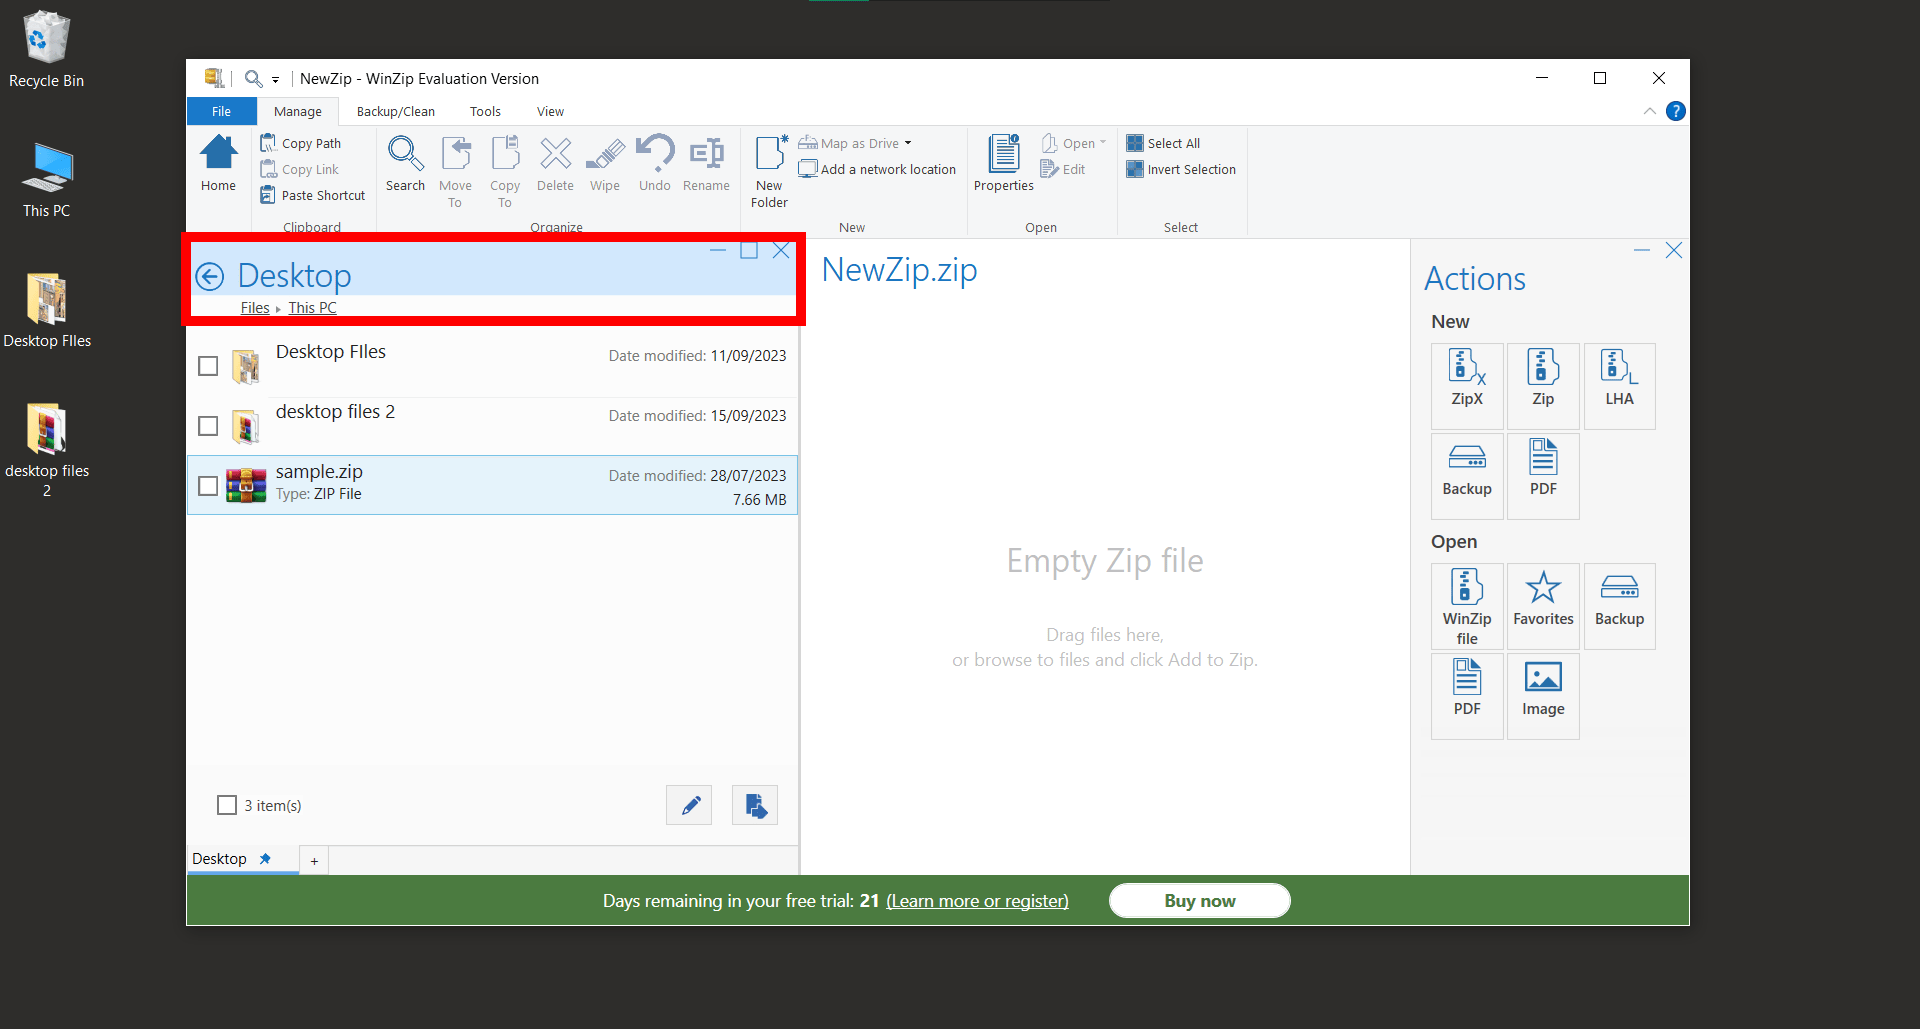
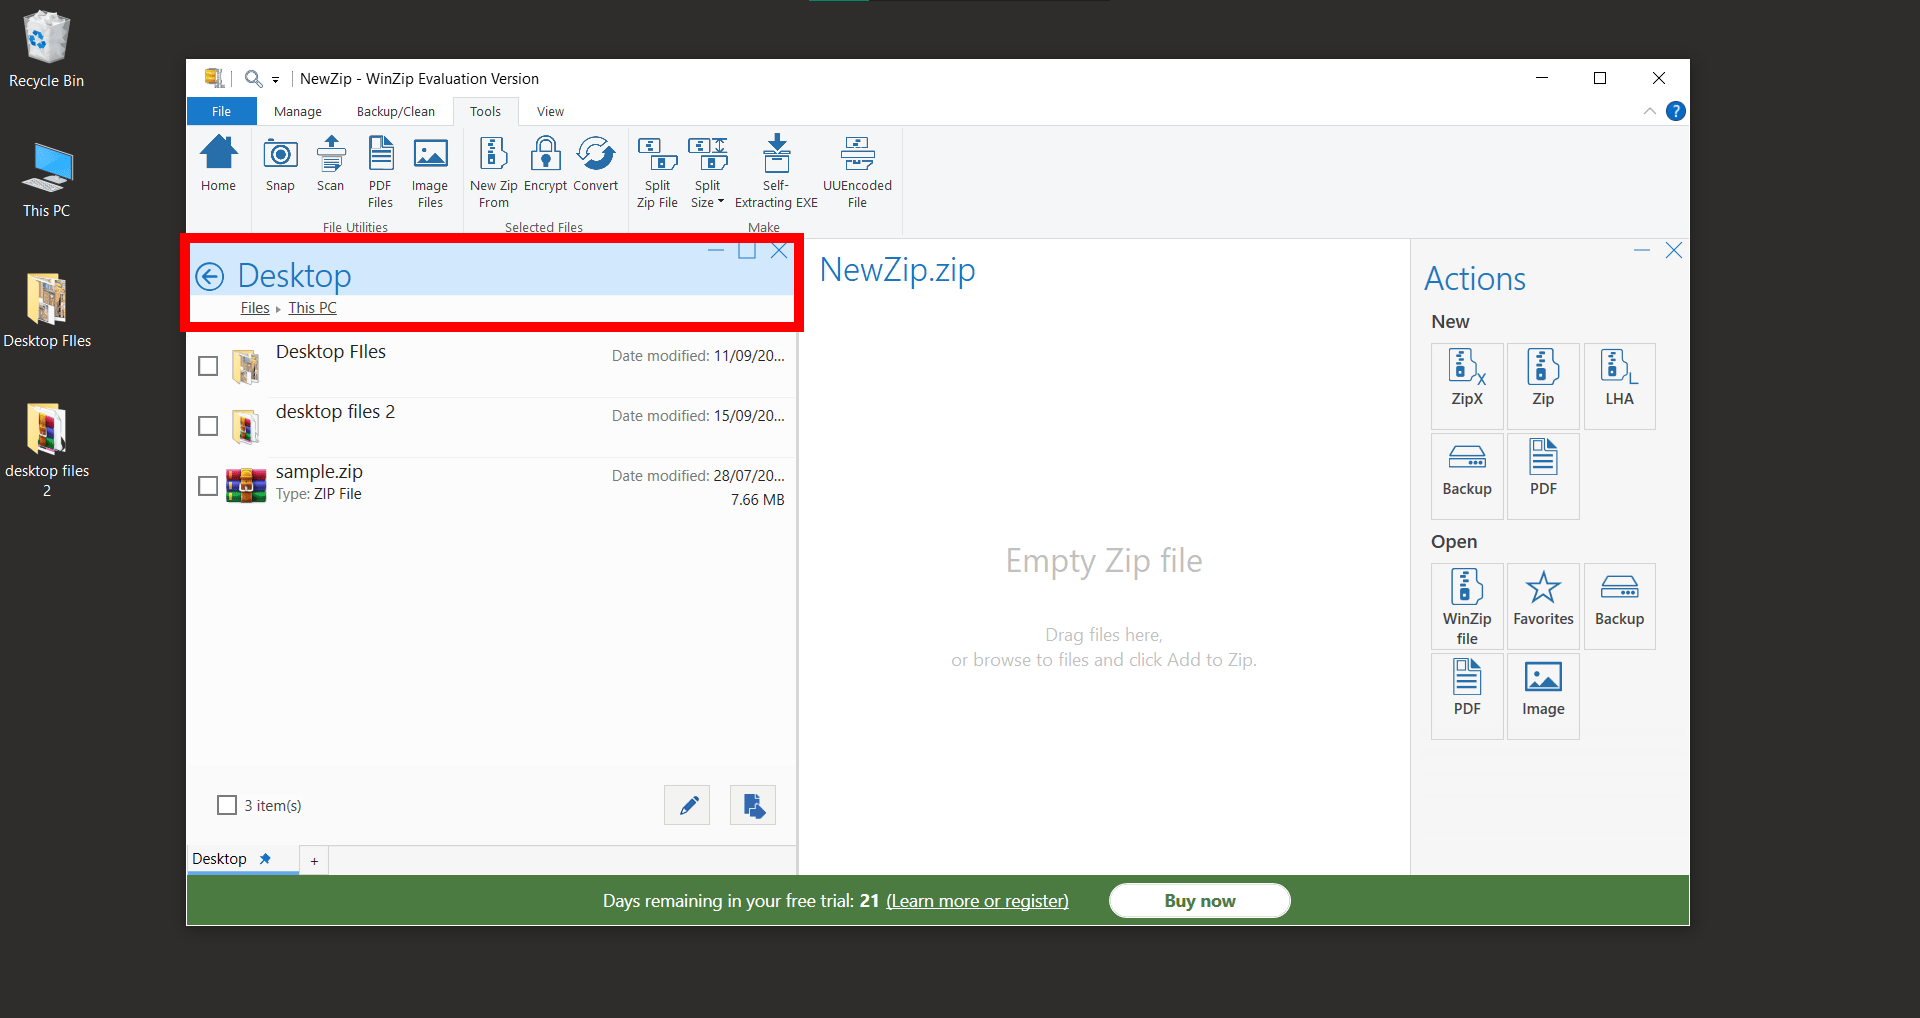
How To Zip Files Using WinZip On Windows
Zipping files with WinZip is like bundling a bunch of bananas together – it keeps everything neat, tidy, and easy to handle. 🍌 Here’s your step-by-step guide:
- Download & Install WinZip: Follow the steps above to download and install WinZip on your computer.
- Click on ‘Tools’: Highlight your file. In the toolbar, click on “Tools”. Then, select ‘Zip’ and choose the files or folders you wish to zip.
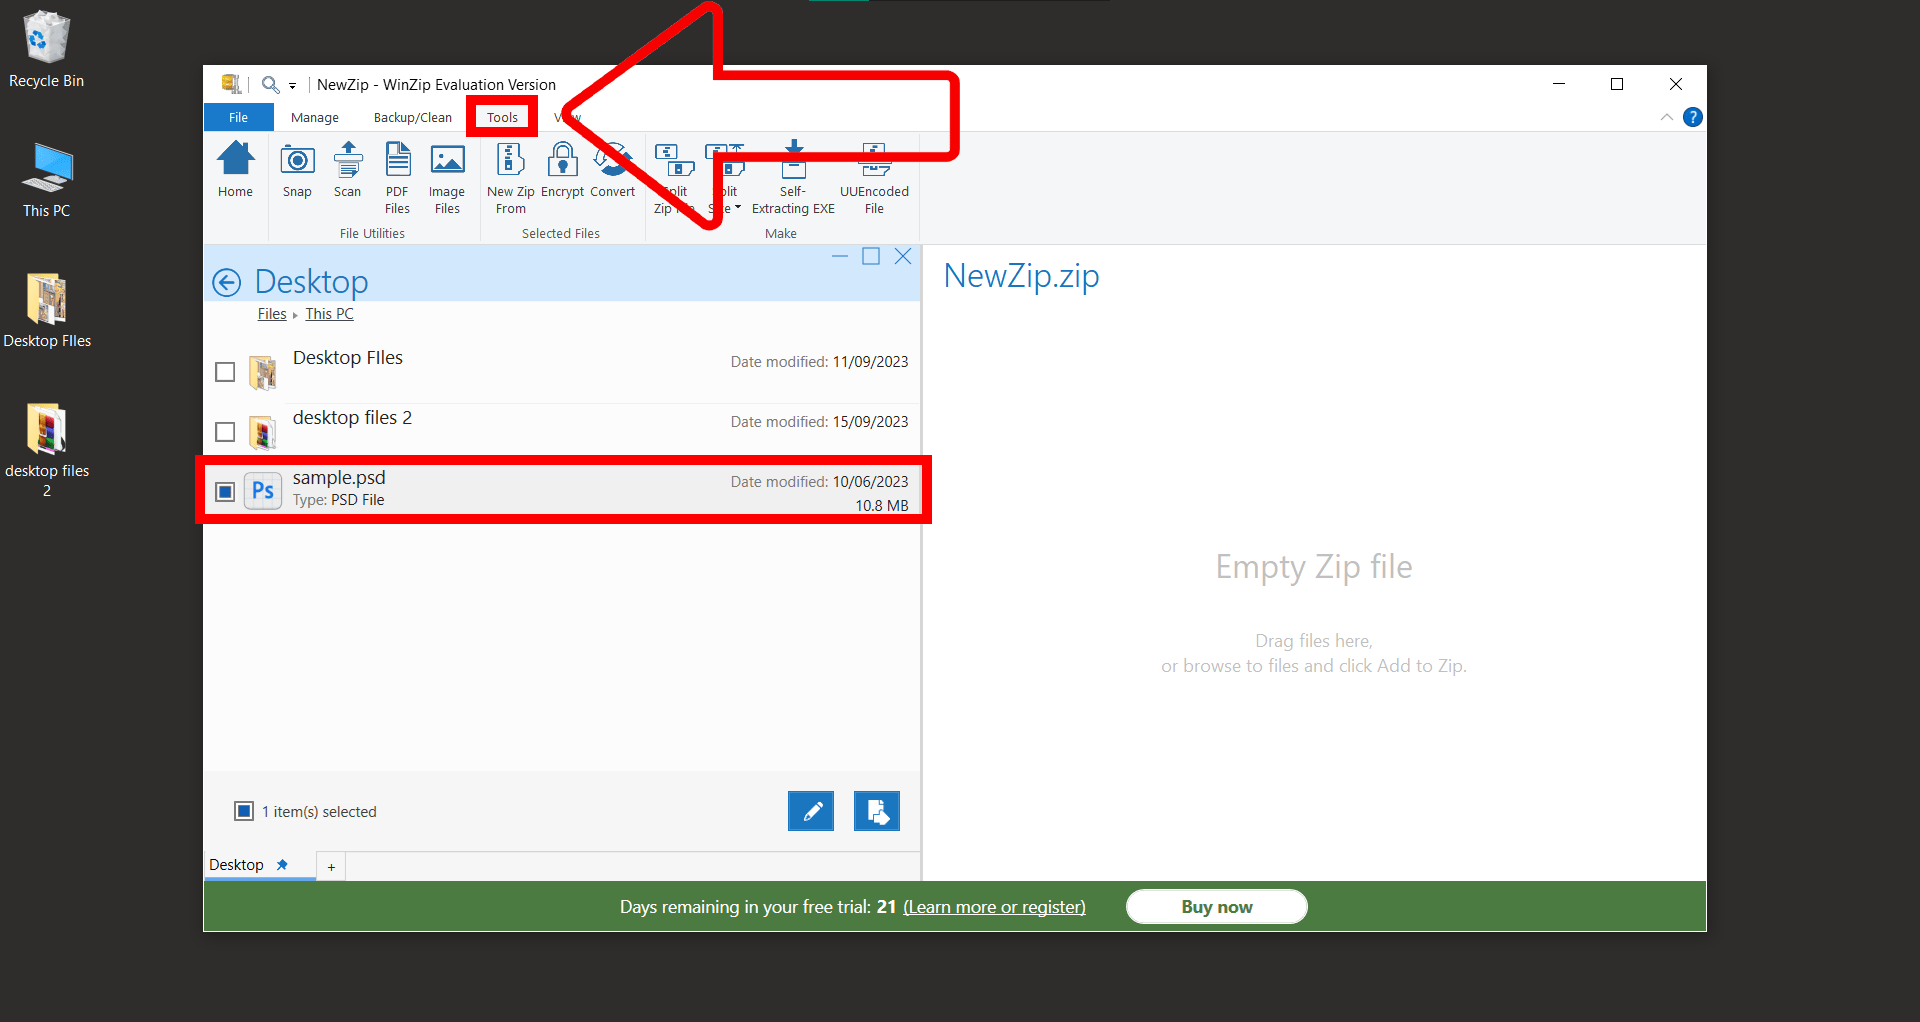
- Click on ‘New ZIP From’: In the “Tools” menu, click on “New ZIP From”.
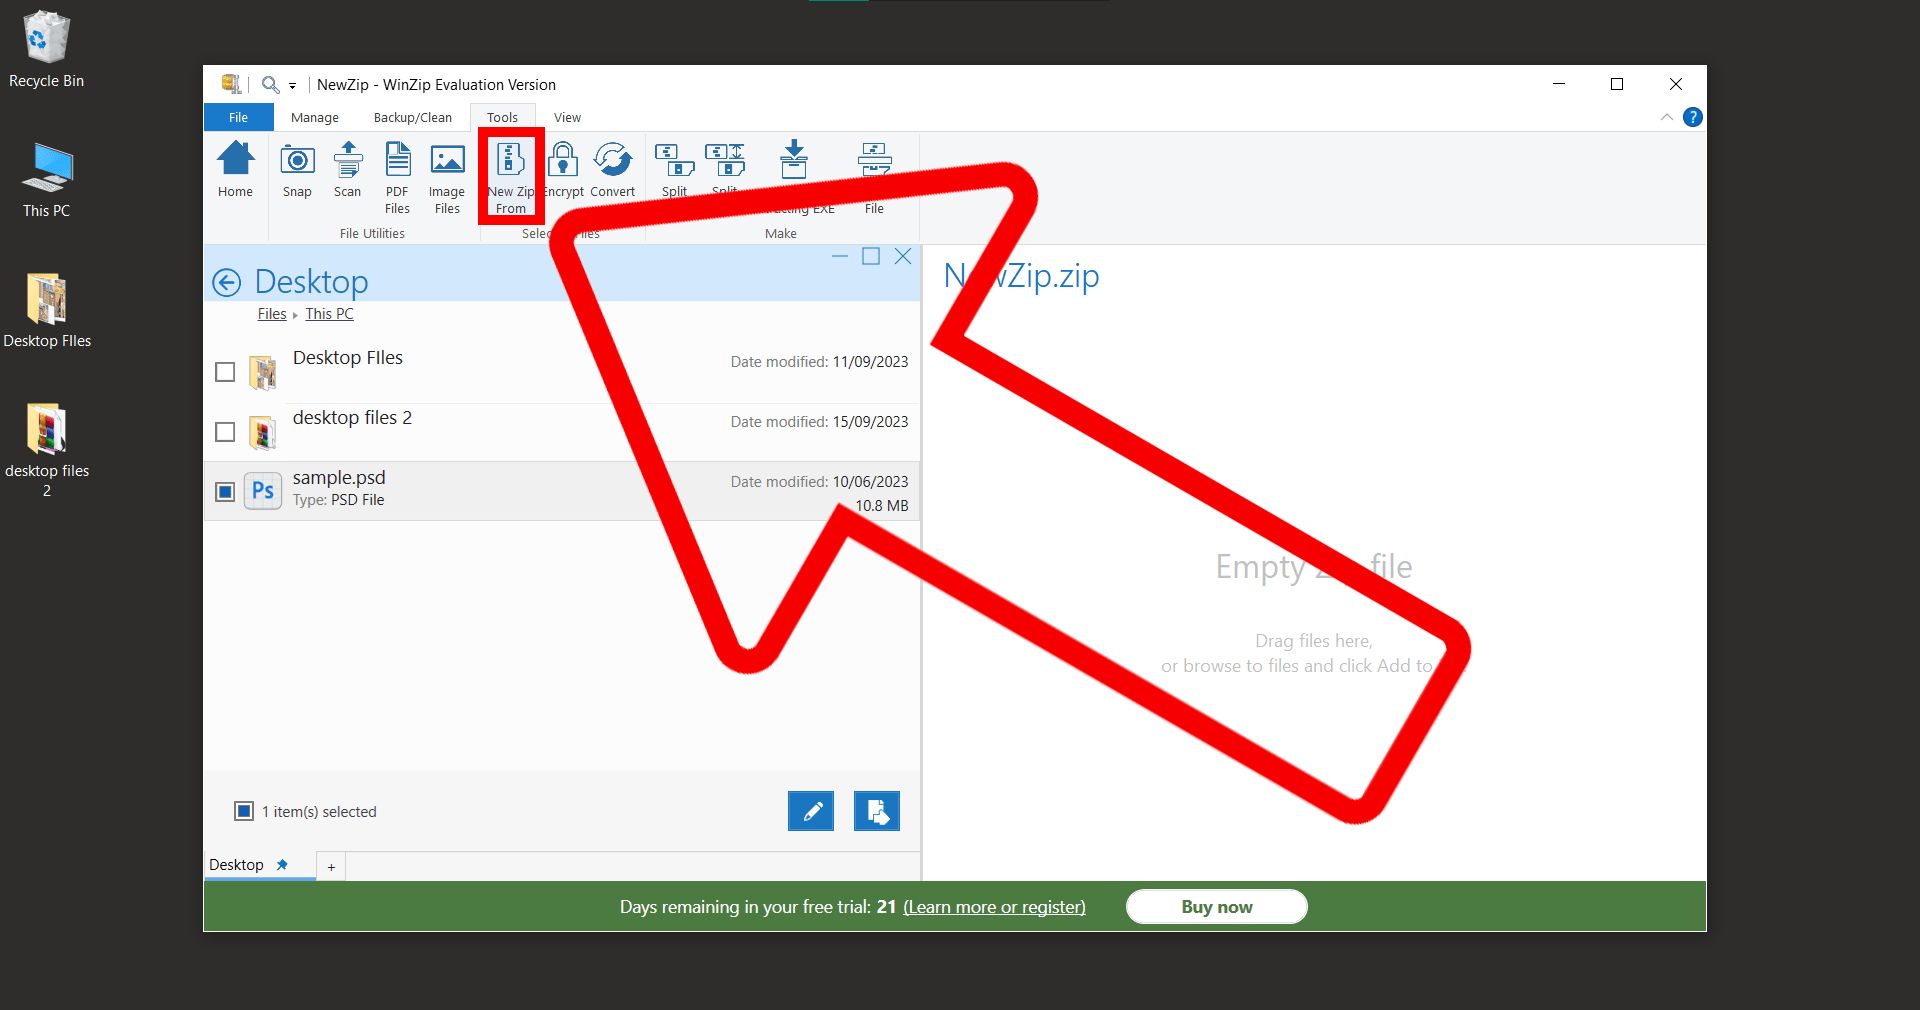
- Choose Zip Location: Decide where you’d like to save your zipped file. Maybe a spot next to your digital banana stash? Then click “Create”.
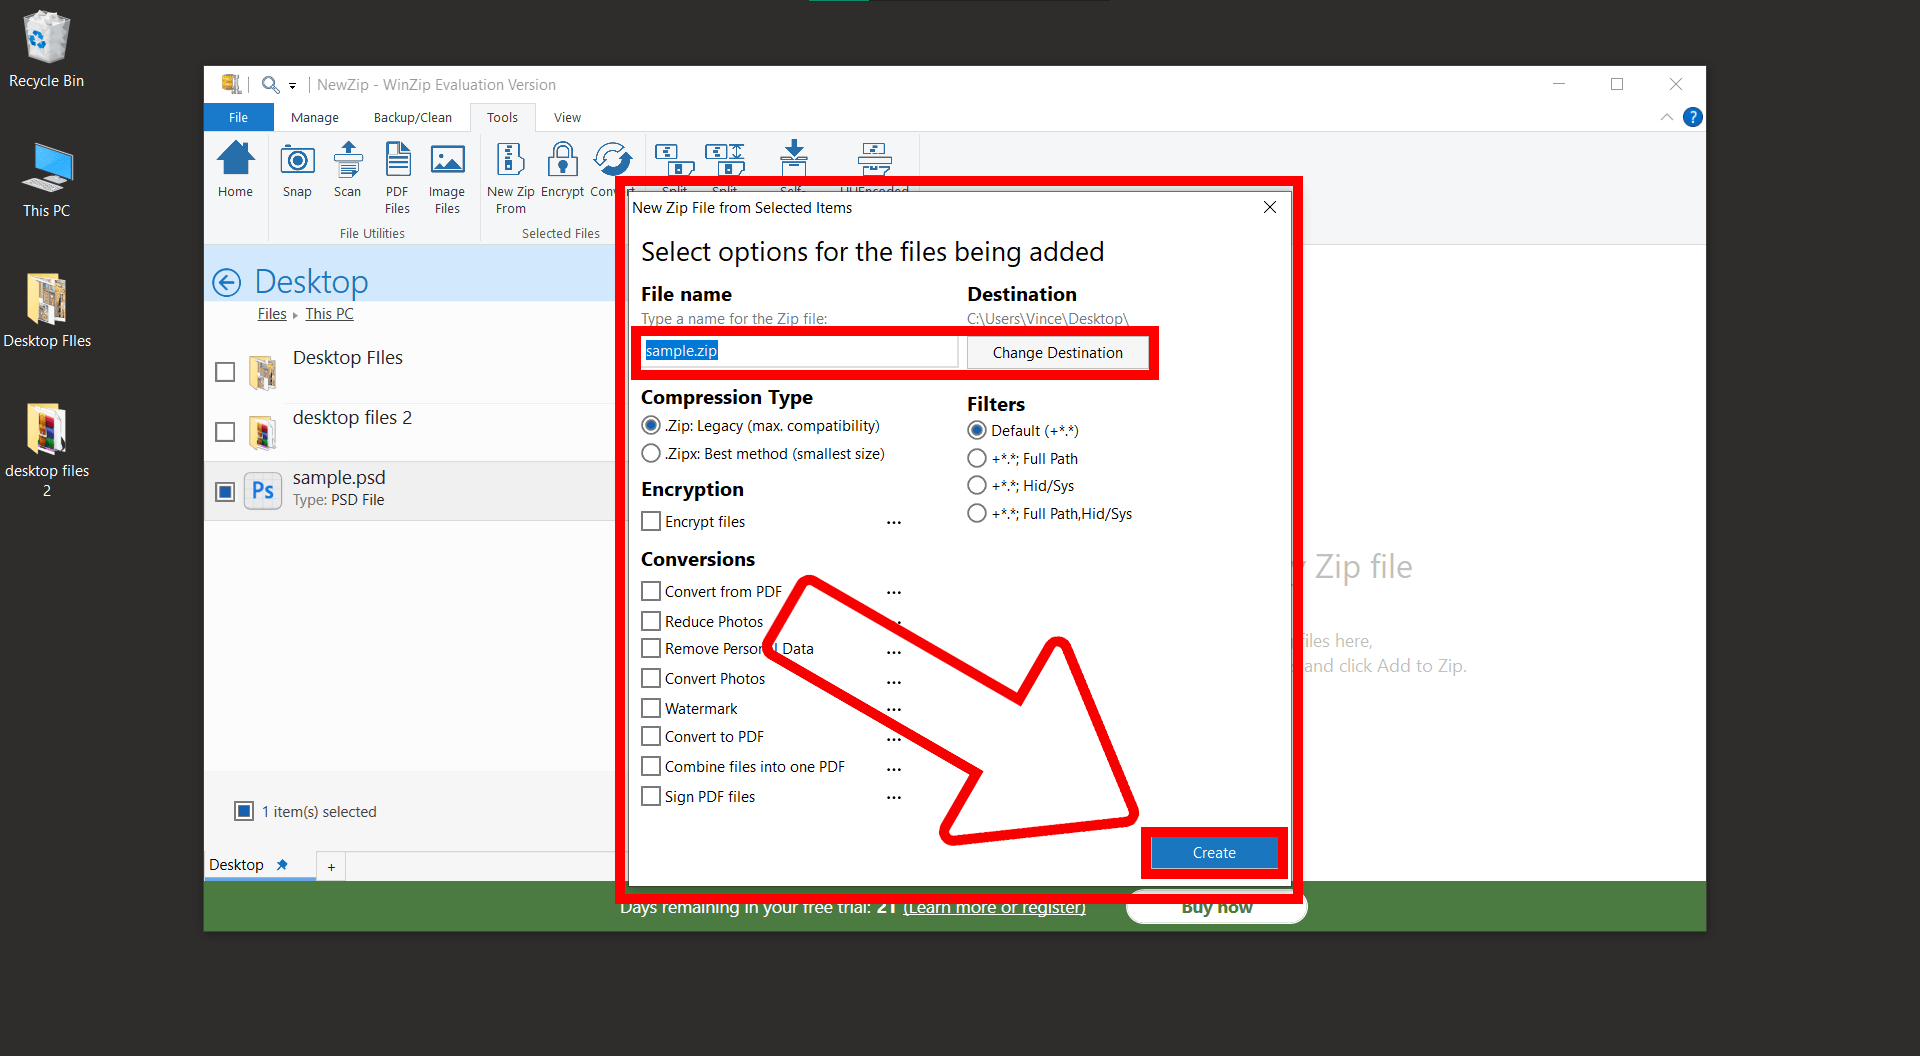
- Zip It Up: Click ‘OK’. WinZip will zip those files faster than a monkey can swing from tree to tree!
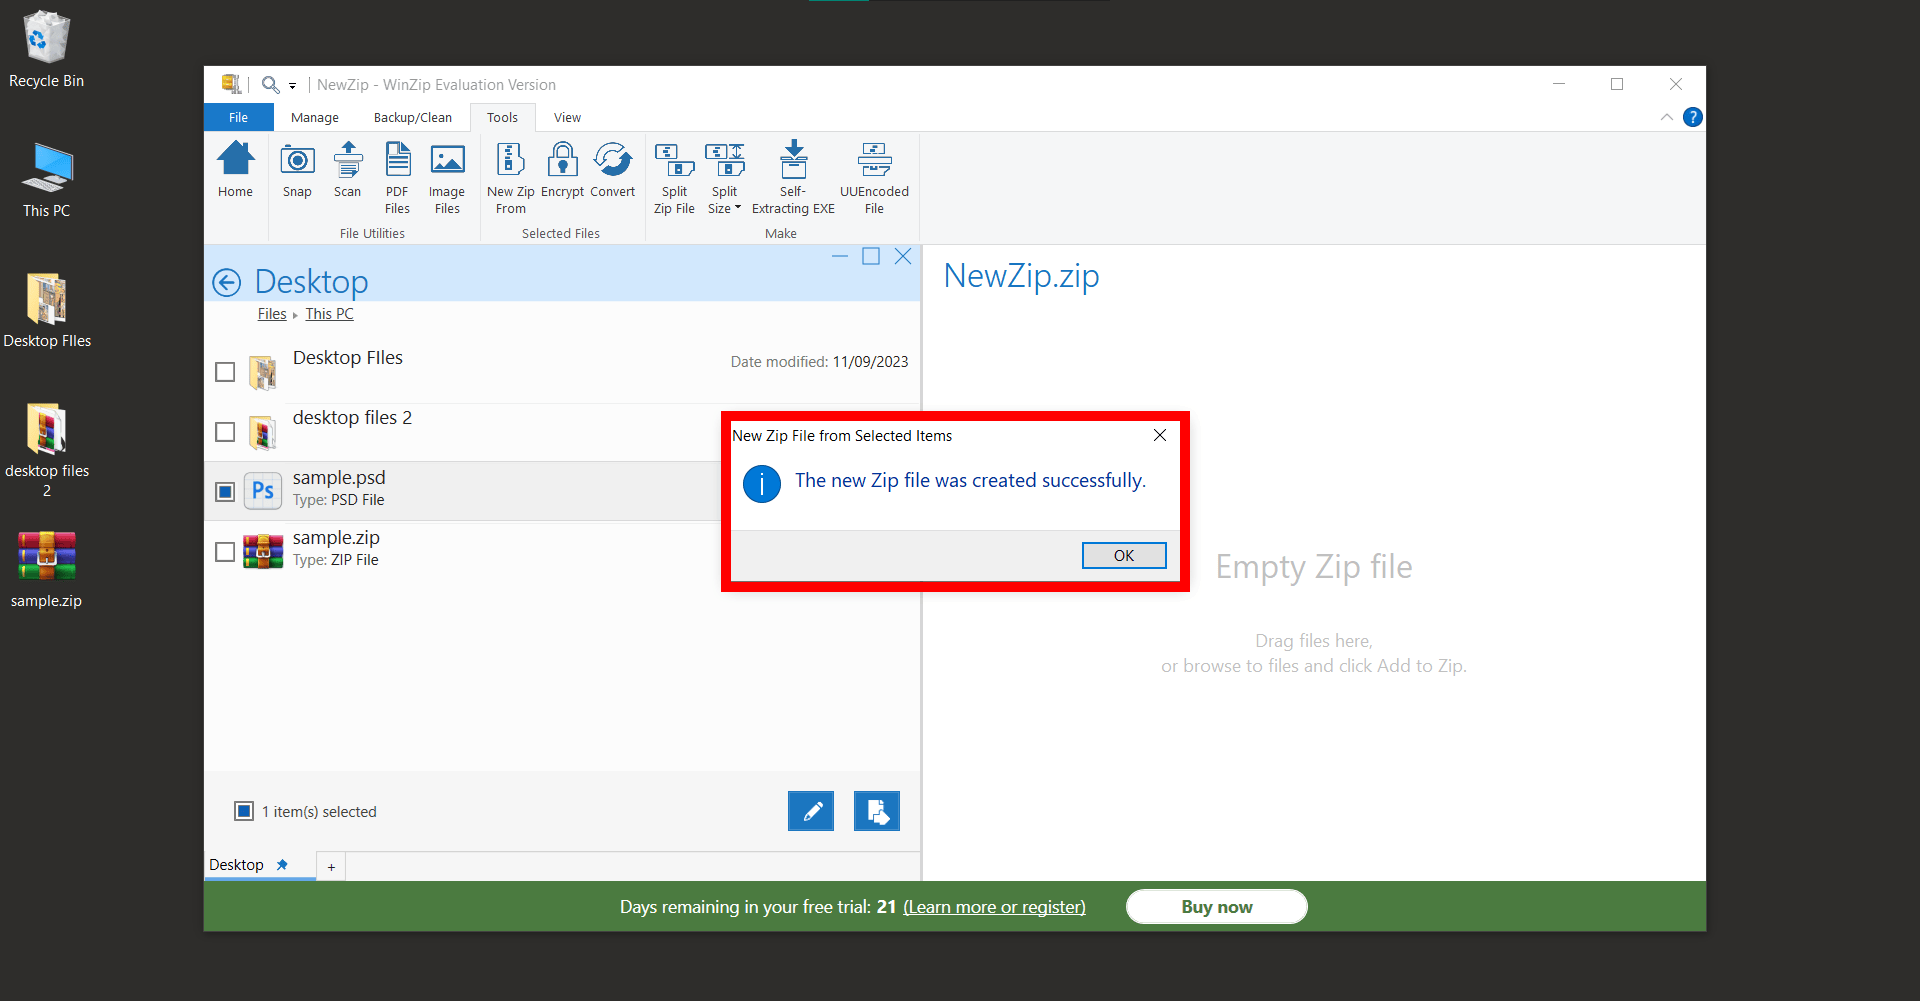 Zipping files with WinZip is that simple! It’s a great way to save space, organize your digital workspace, and share multiple files at once. Happy zipping!
How To Zip Files On Mac Using Winzip
Zipping files on a Mac with WinZip is like bundling up bananas for a chilly day in the jungle. 🍌 It’s efficient, neat, and super easy. Let’s get started:
-
Download and Install Winzip: Check out the steps above to download and install Winzip on your computer.
-
Launch Winzip: After installation, open the Winzip application by locating it in your Applications folder or using Spotlight search.
-
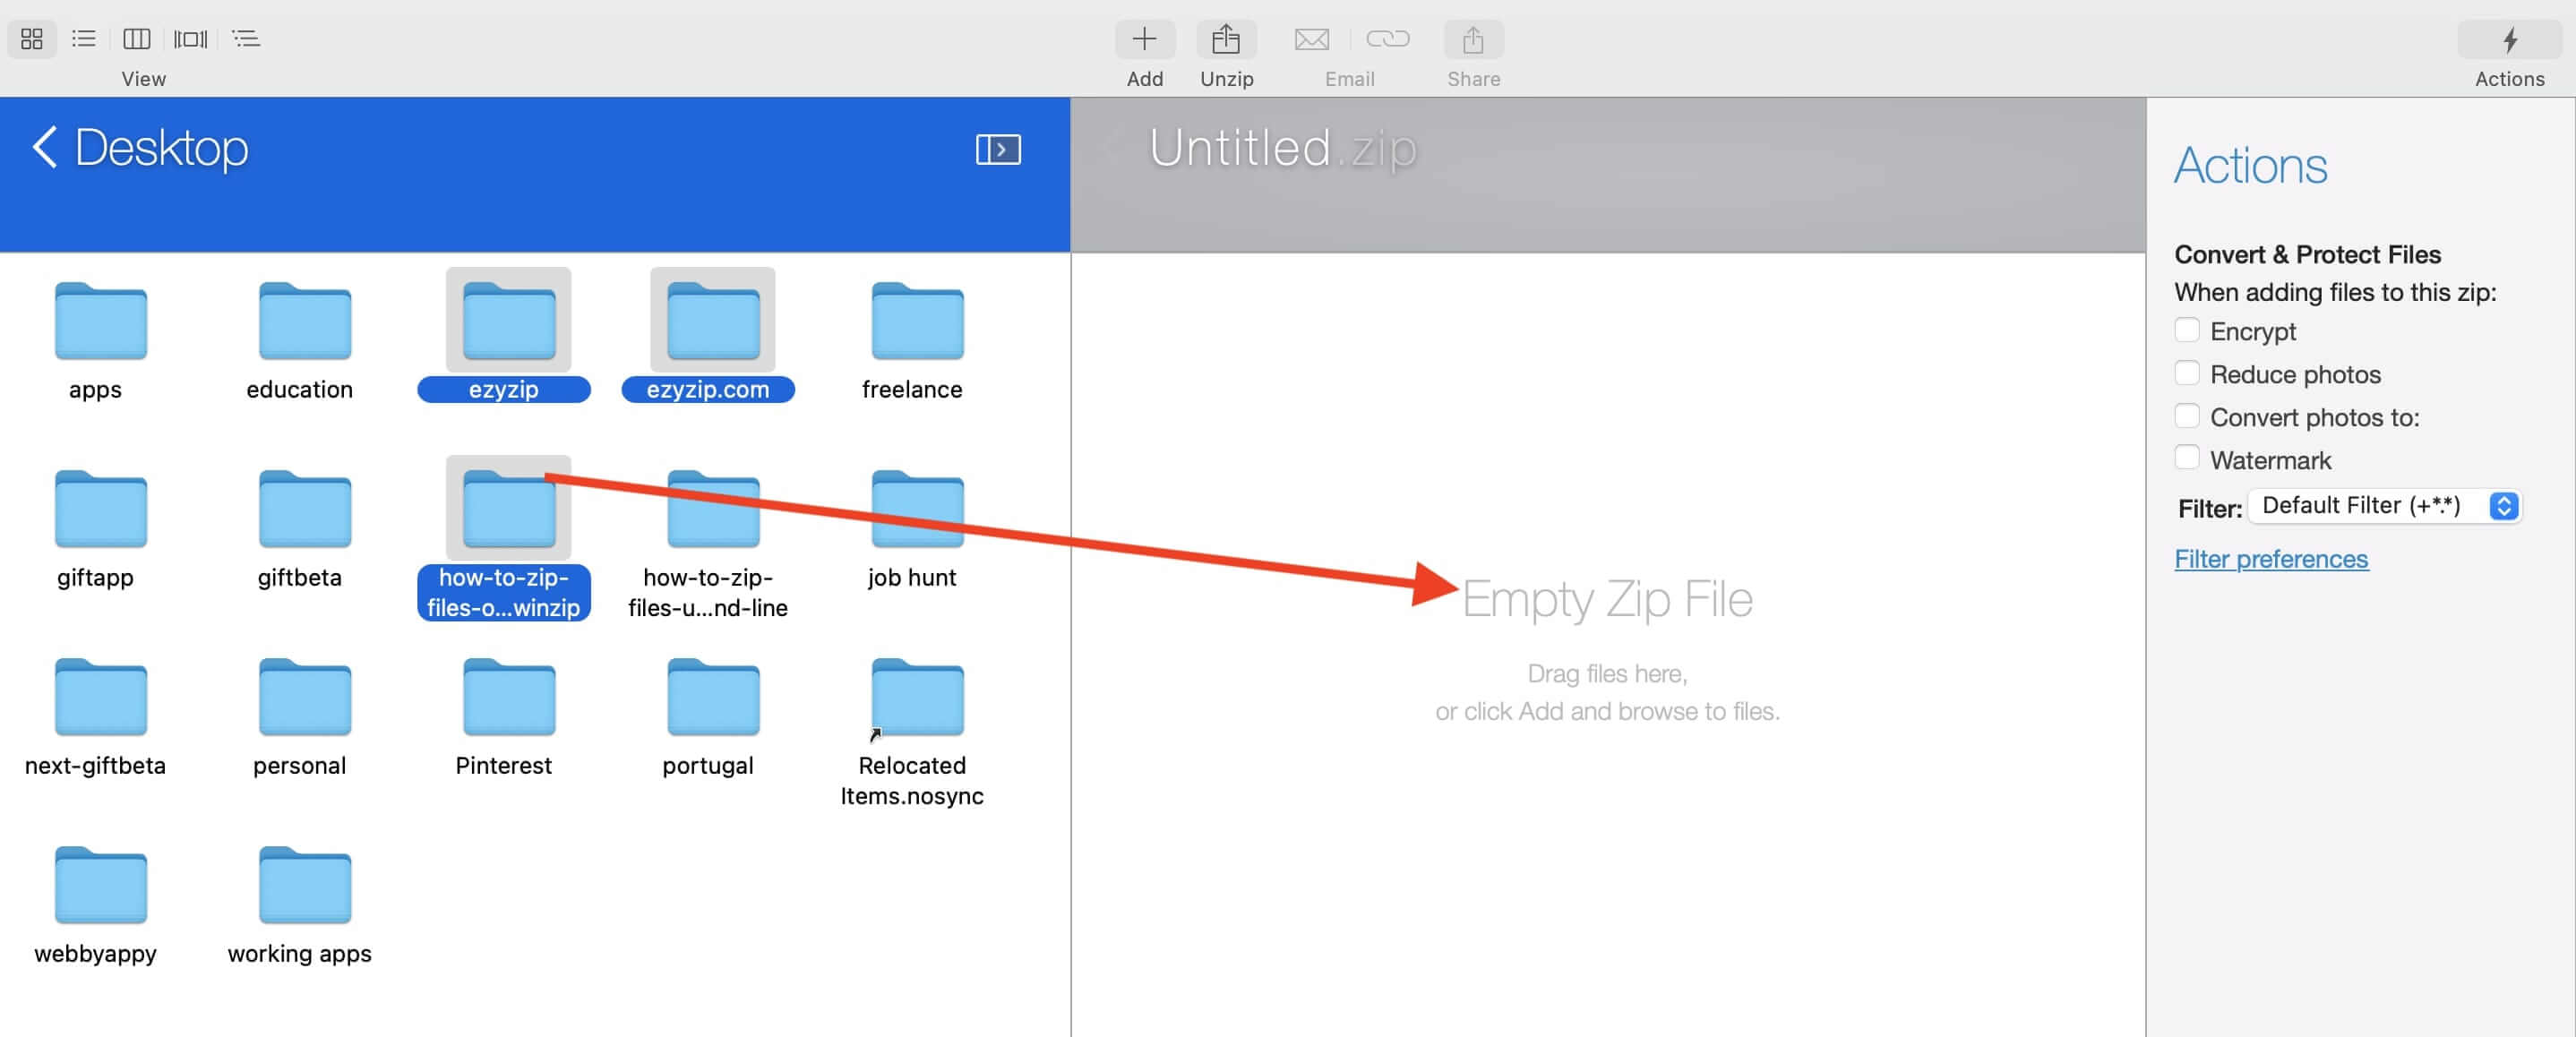
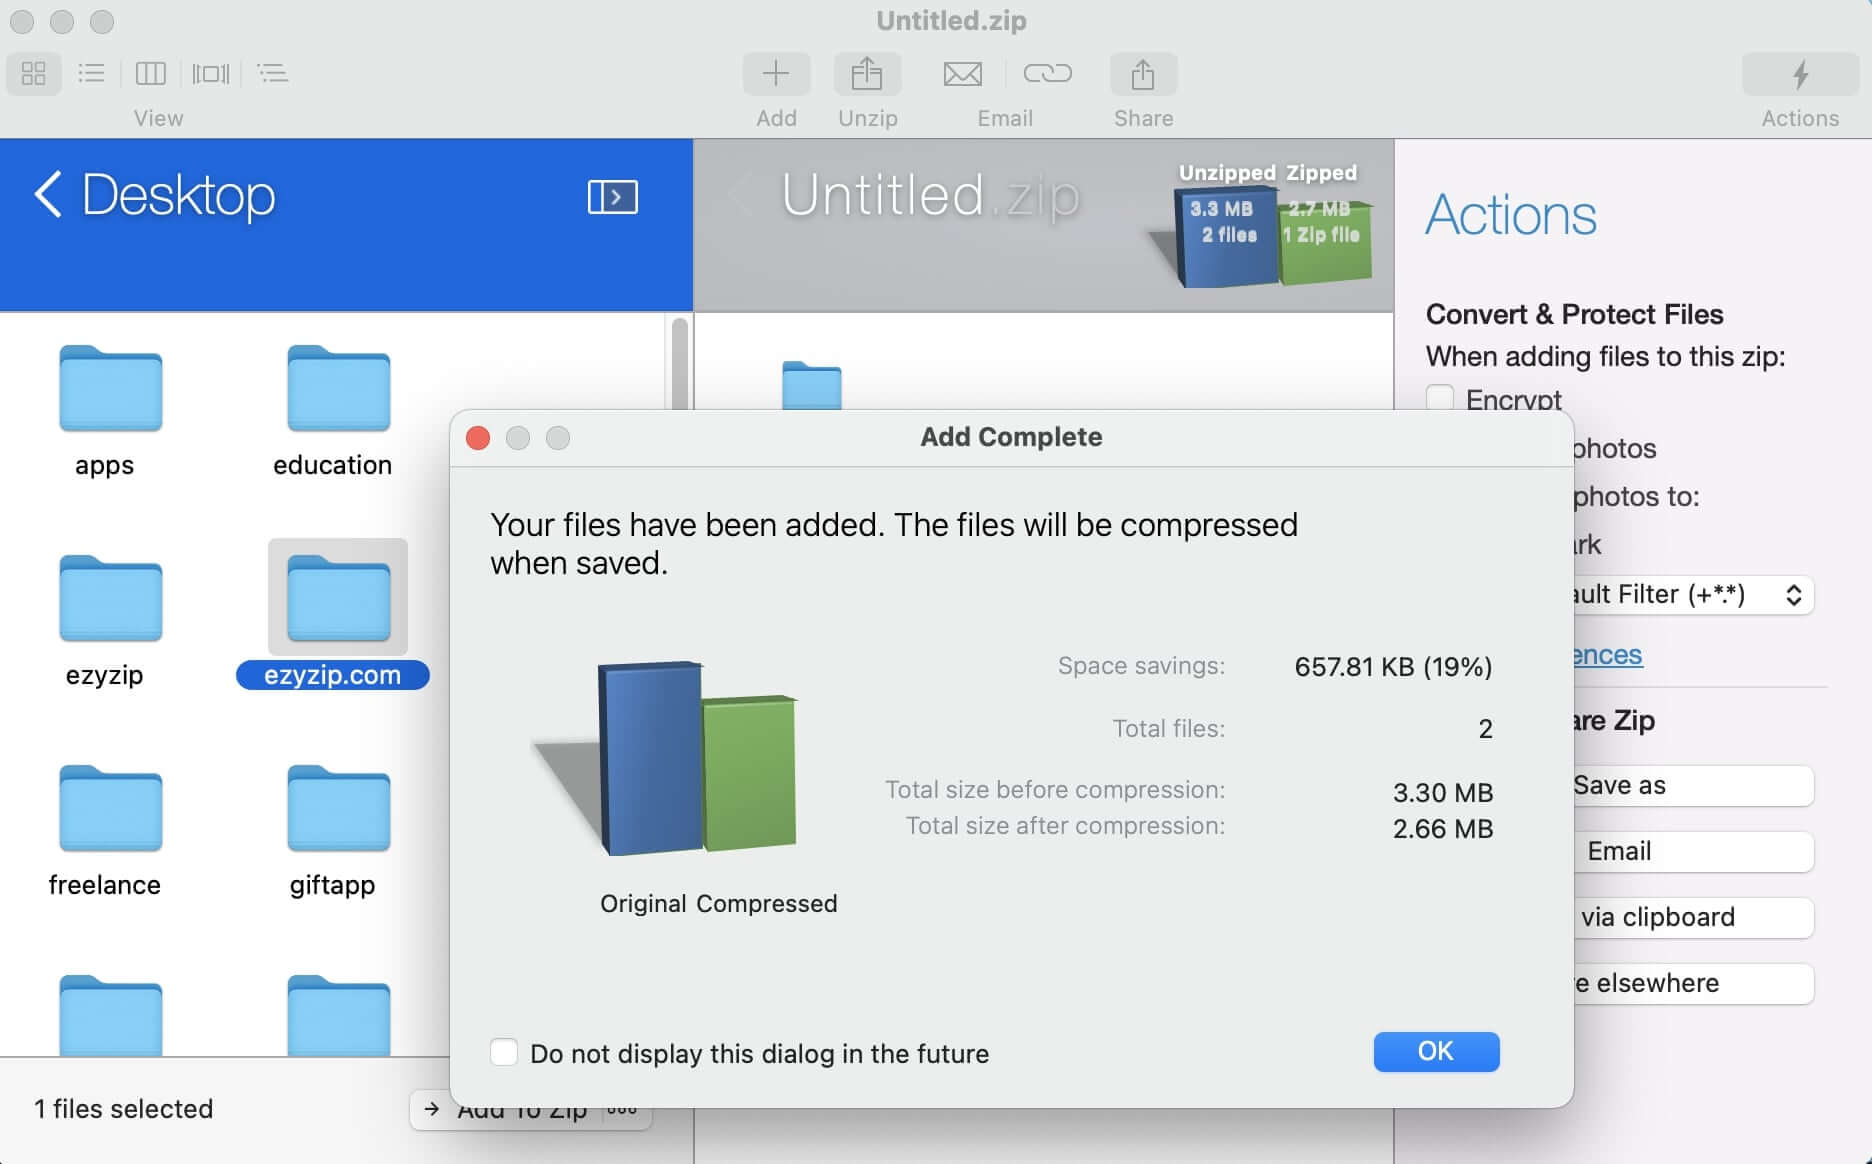
Select Files or Folders: In the Winzip interface, navigate to the location where your files or folders are stored. Select the items you want to include in the zip archive. You can hold down the Command key to select multiple items. Drag the items into the box.
-
Click the “OK” Button: Once you have selected the files or folders, click on the “OK” button in the Winzip toolbar. This will start the zipping process.
-
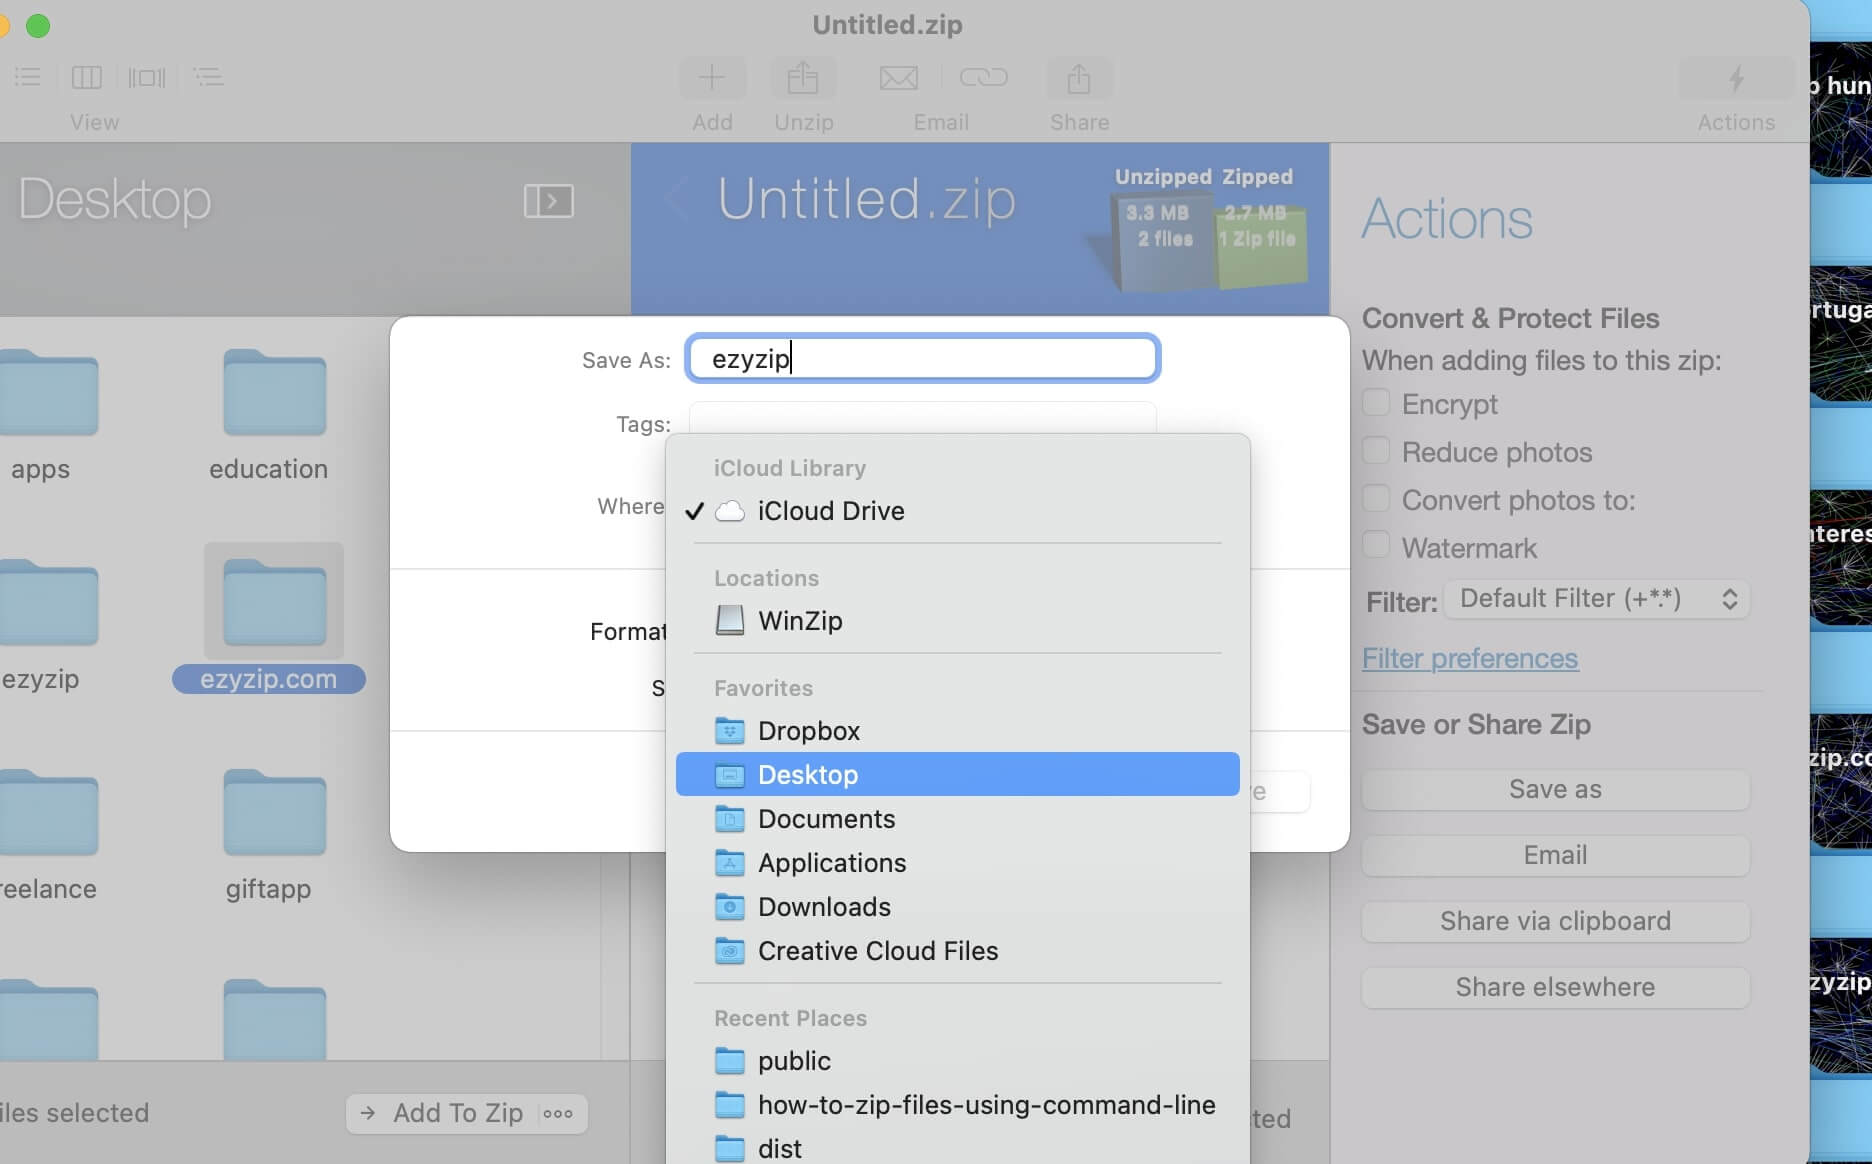
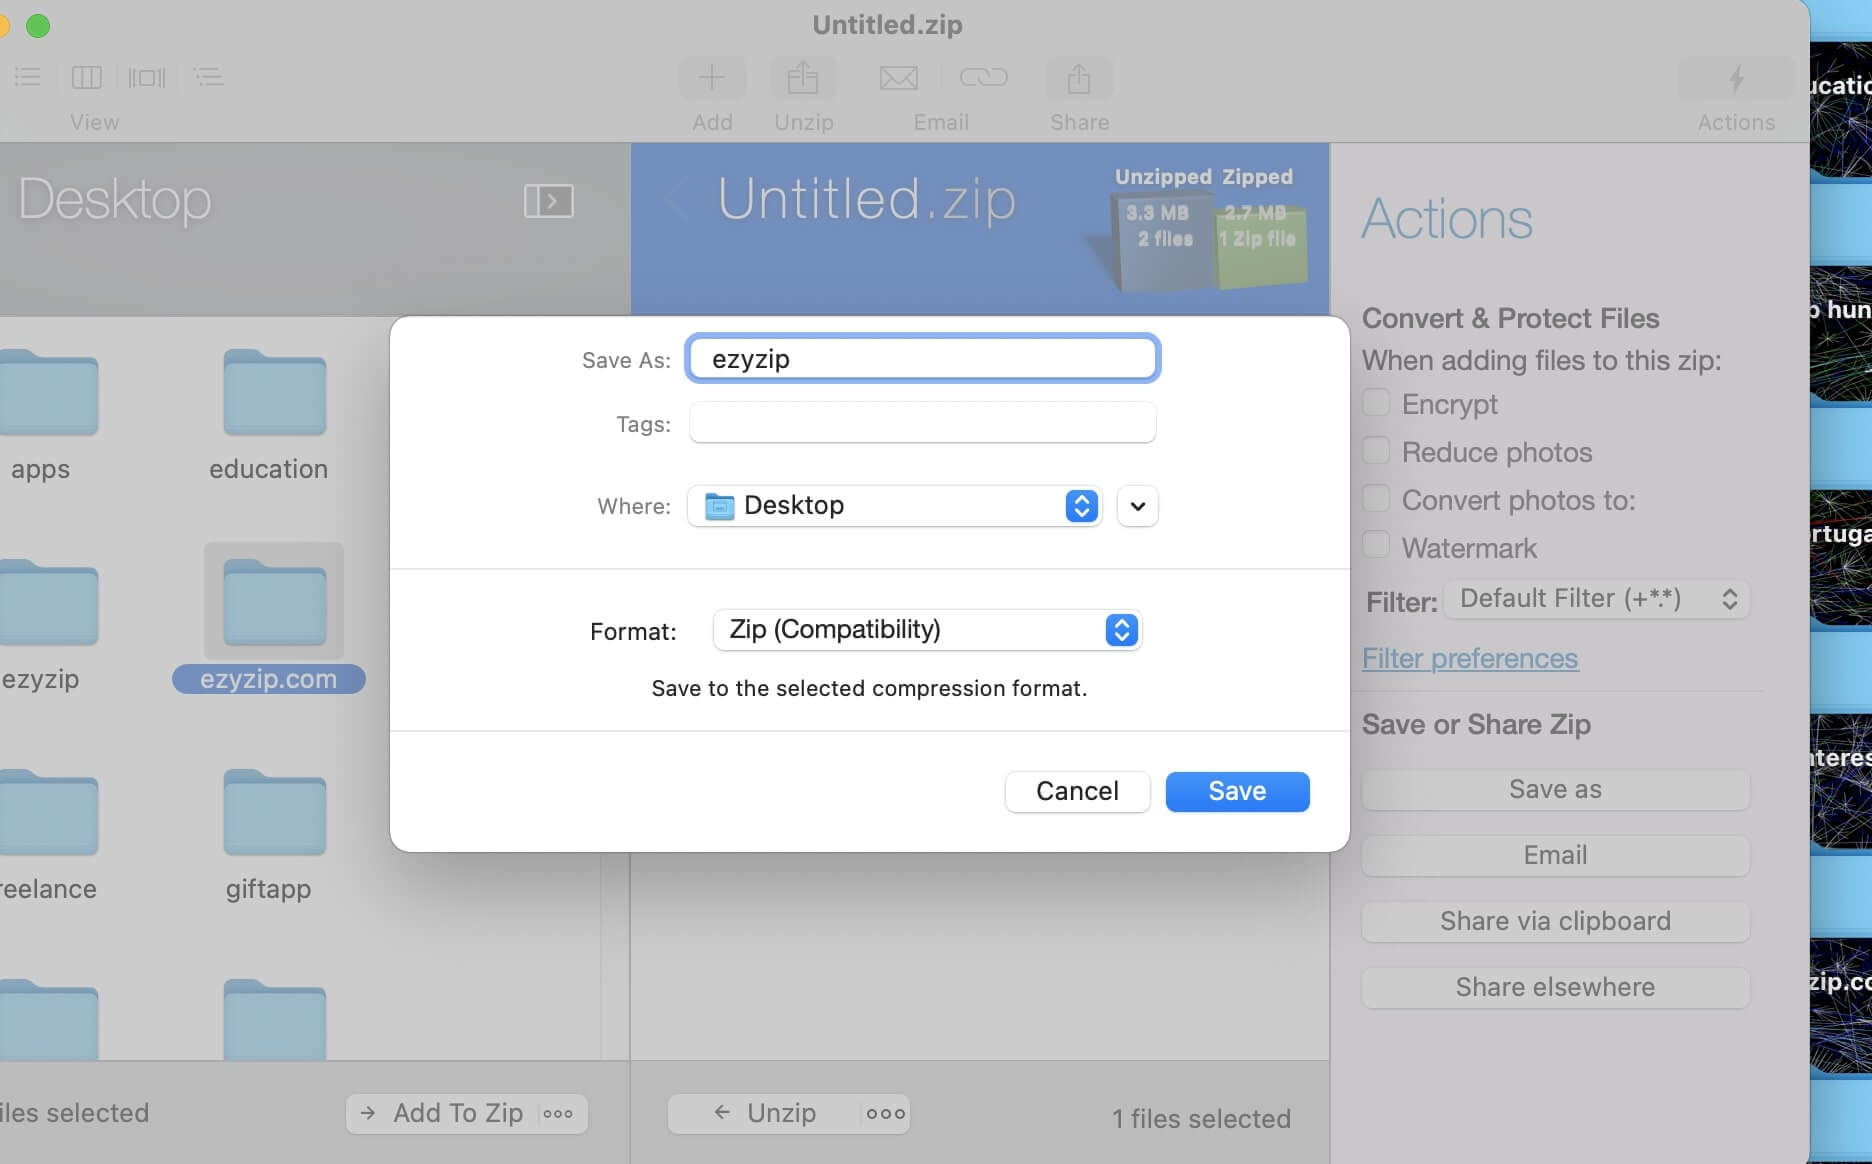
Choose Zip Archive Name and Location: A window will appear where you can specify the name and location for the zip archive. Enter the desired name and select the destination folder.
-
Configure Compression Options: You can optionally configure the compression options by clicking on the gear icon. Here, you can choose the compression level, encryption settings, and other advanced options. Then click “Save” to create the zip file.
-
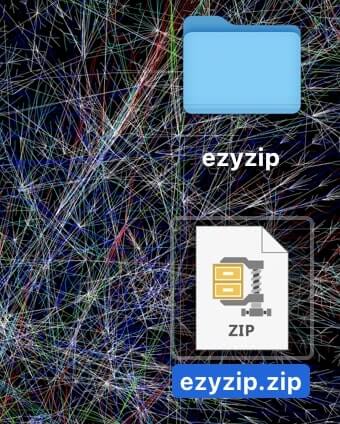
Locate the files: Winzip will compress the selected files or folders into a zip archive and save it to the specified location.
And there you have it! With WinZip on your Mac, zipping files is as easy as swinging from tree to tree. Enjoy your organized digital jungle!
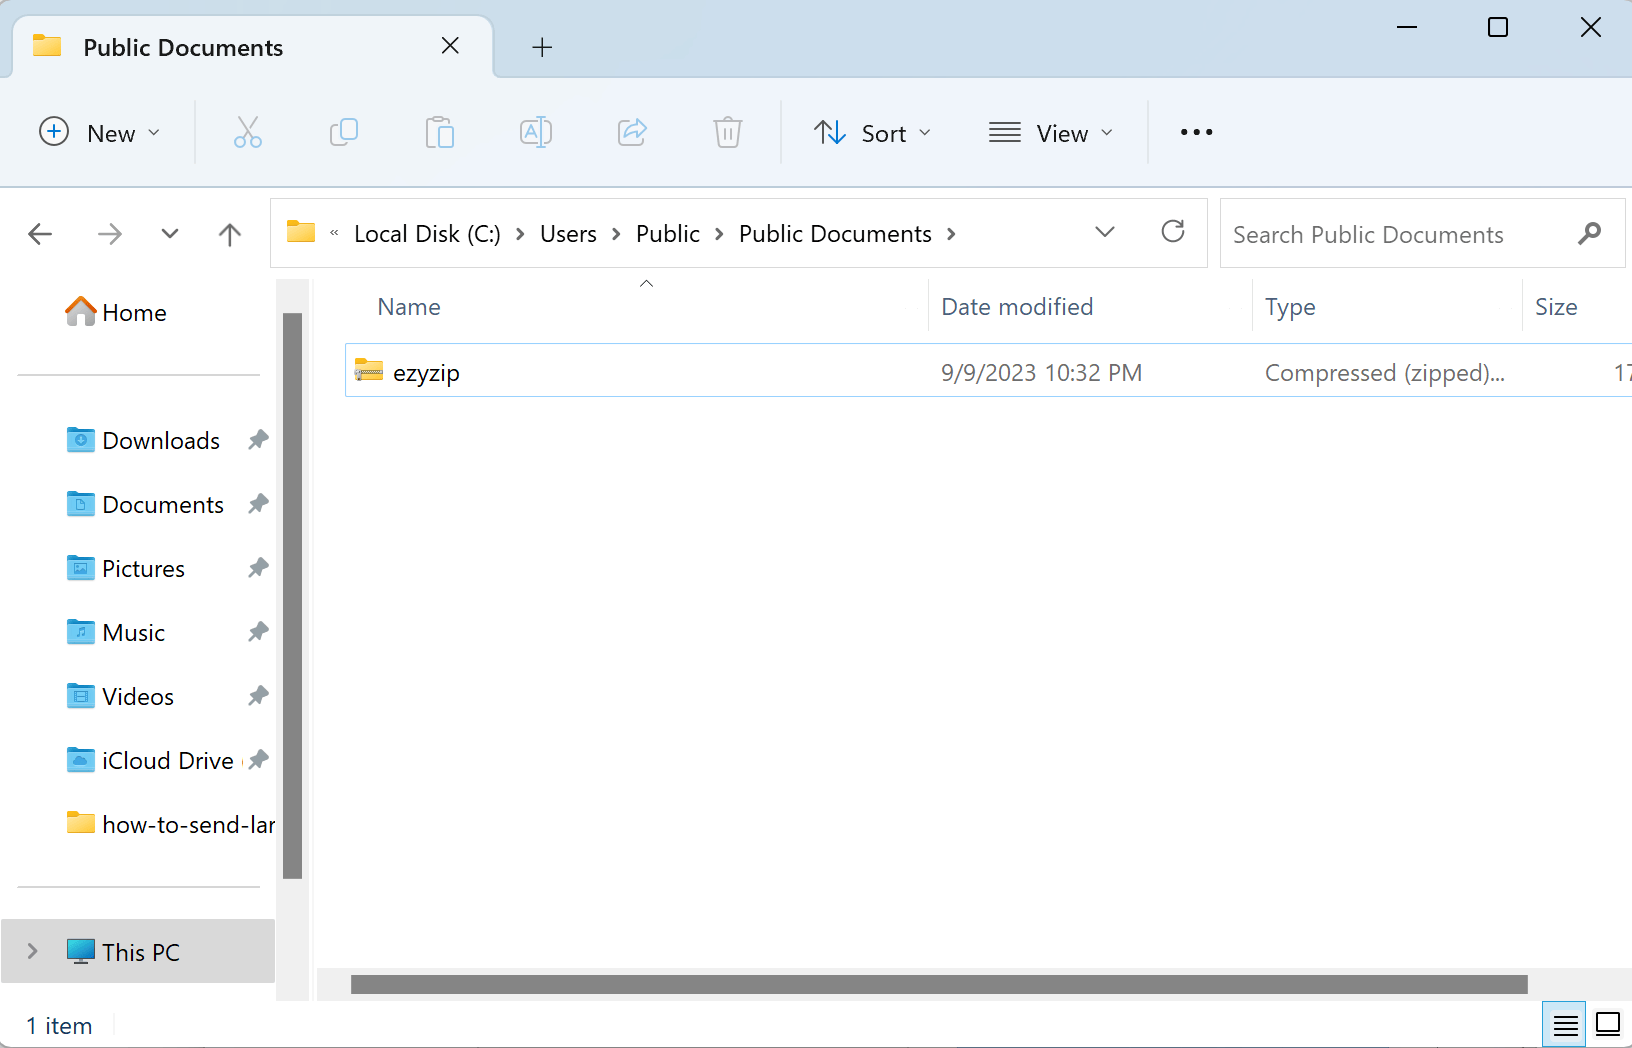
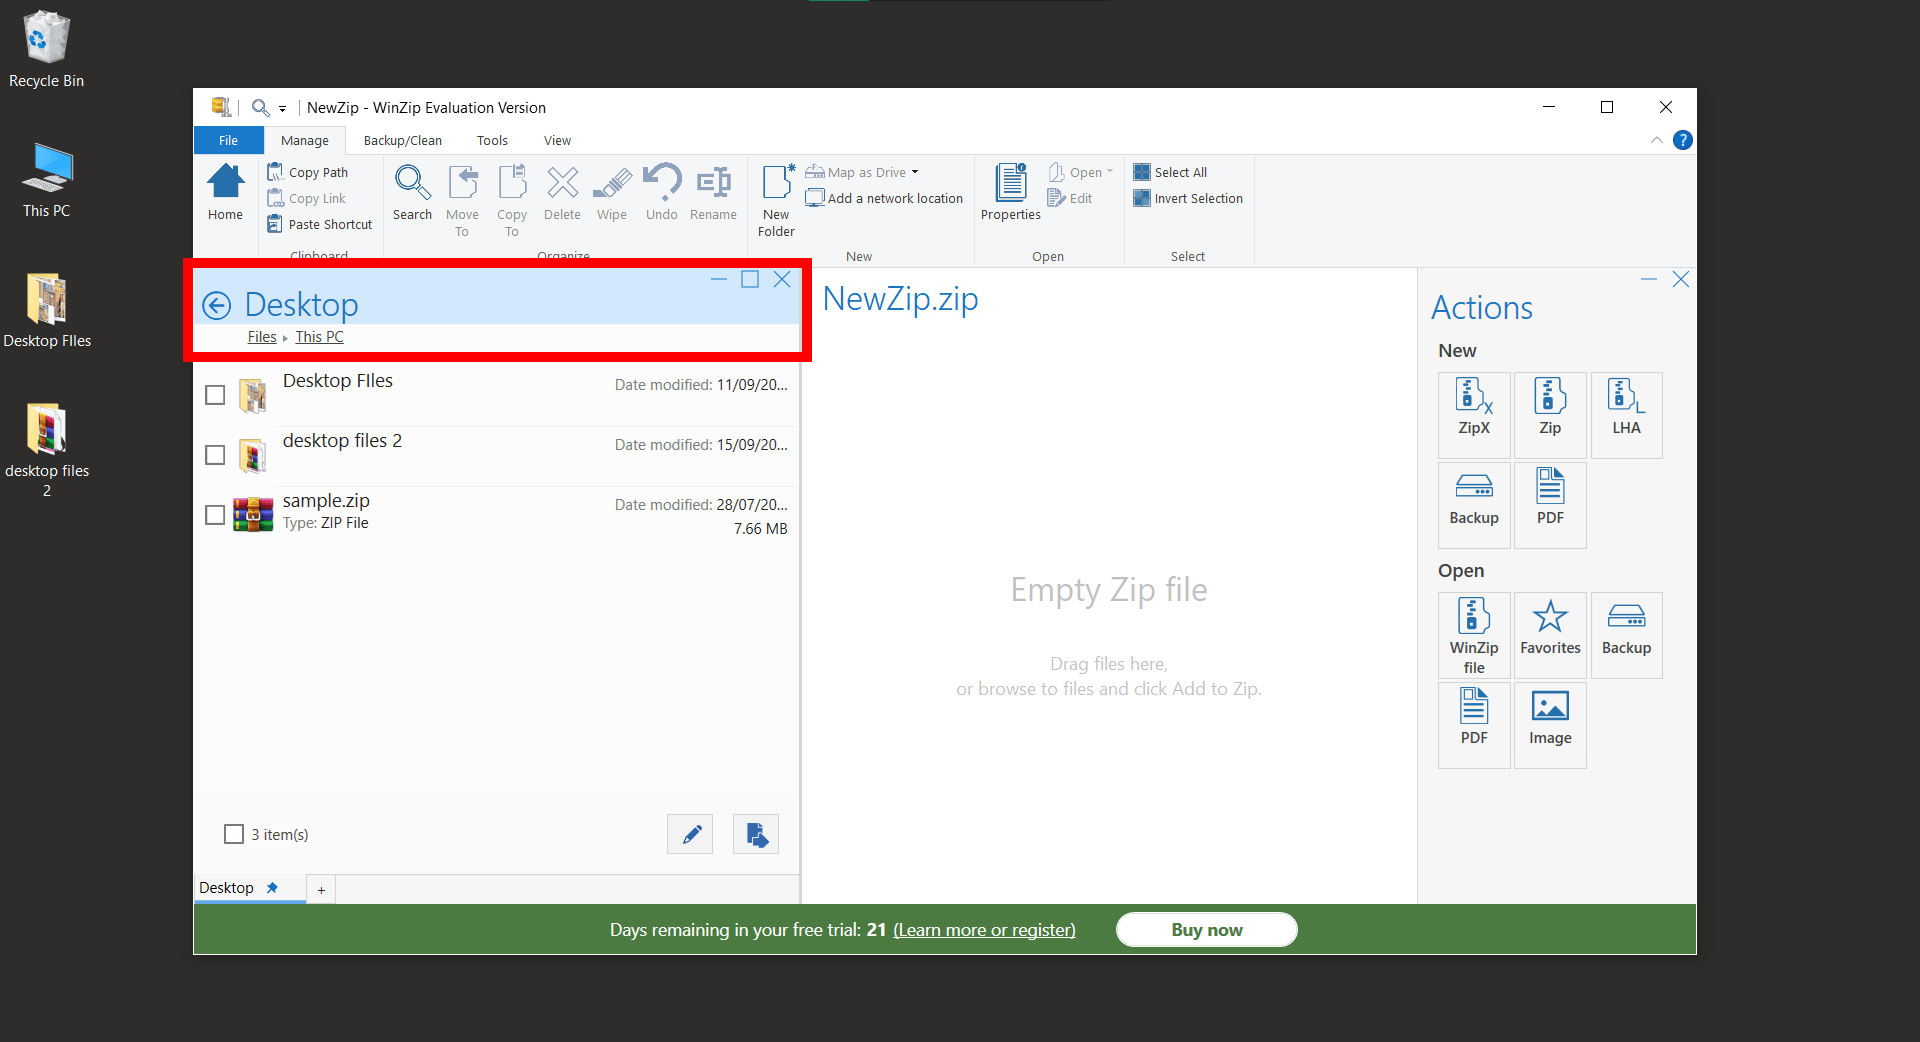
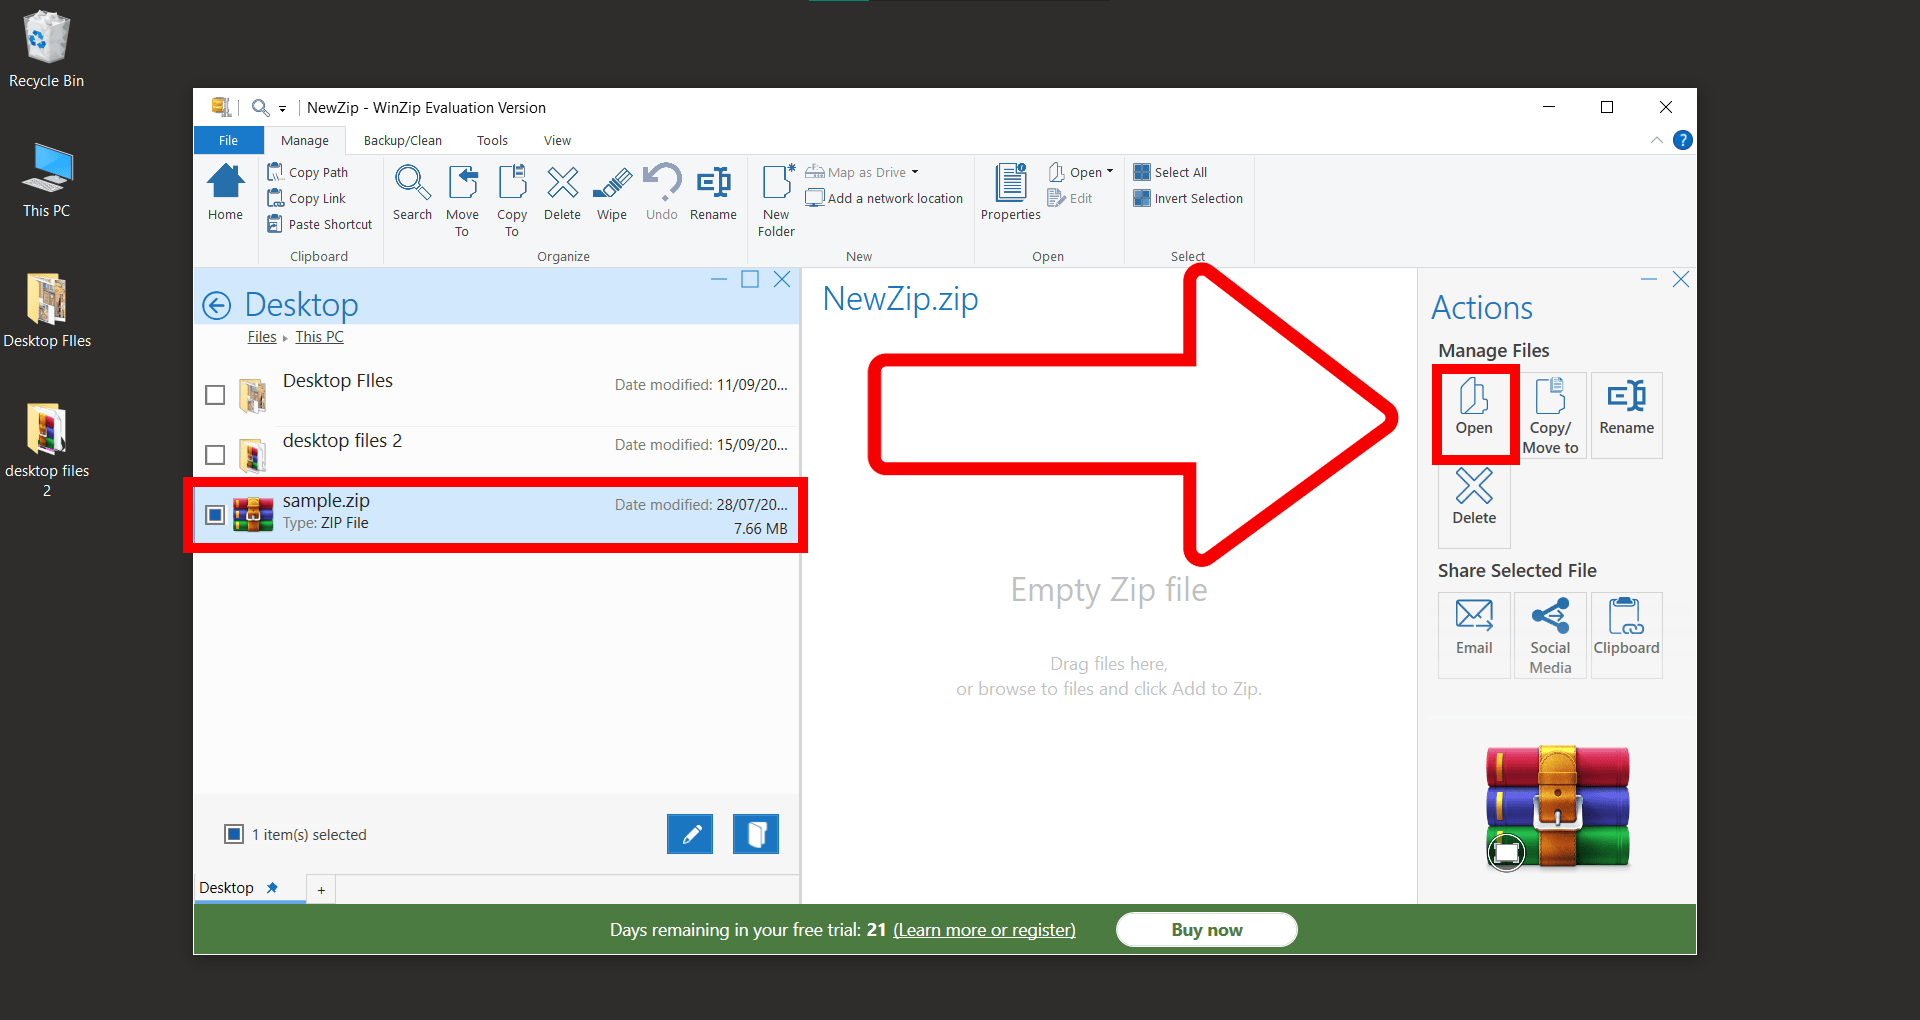
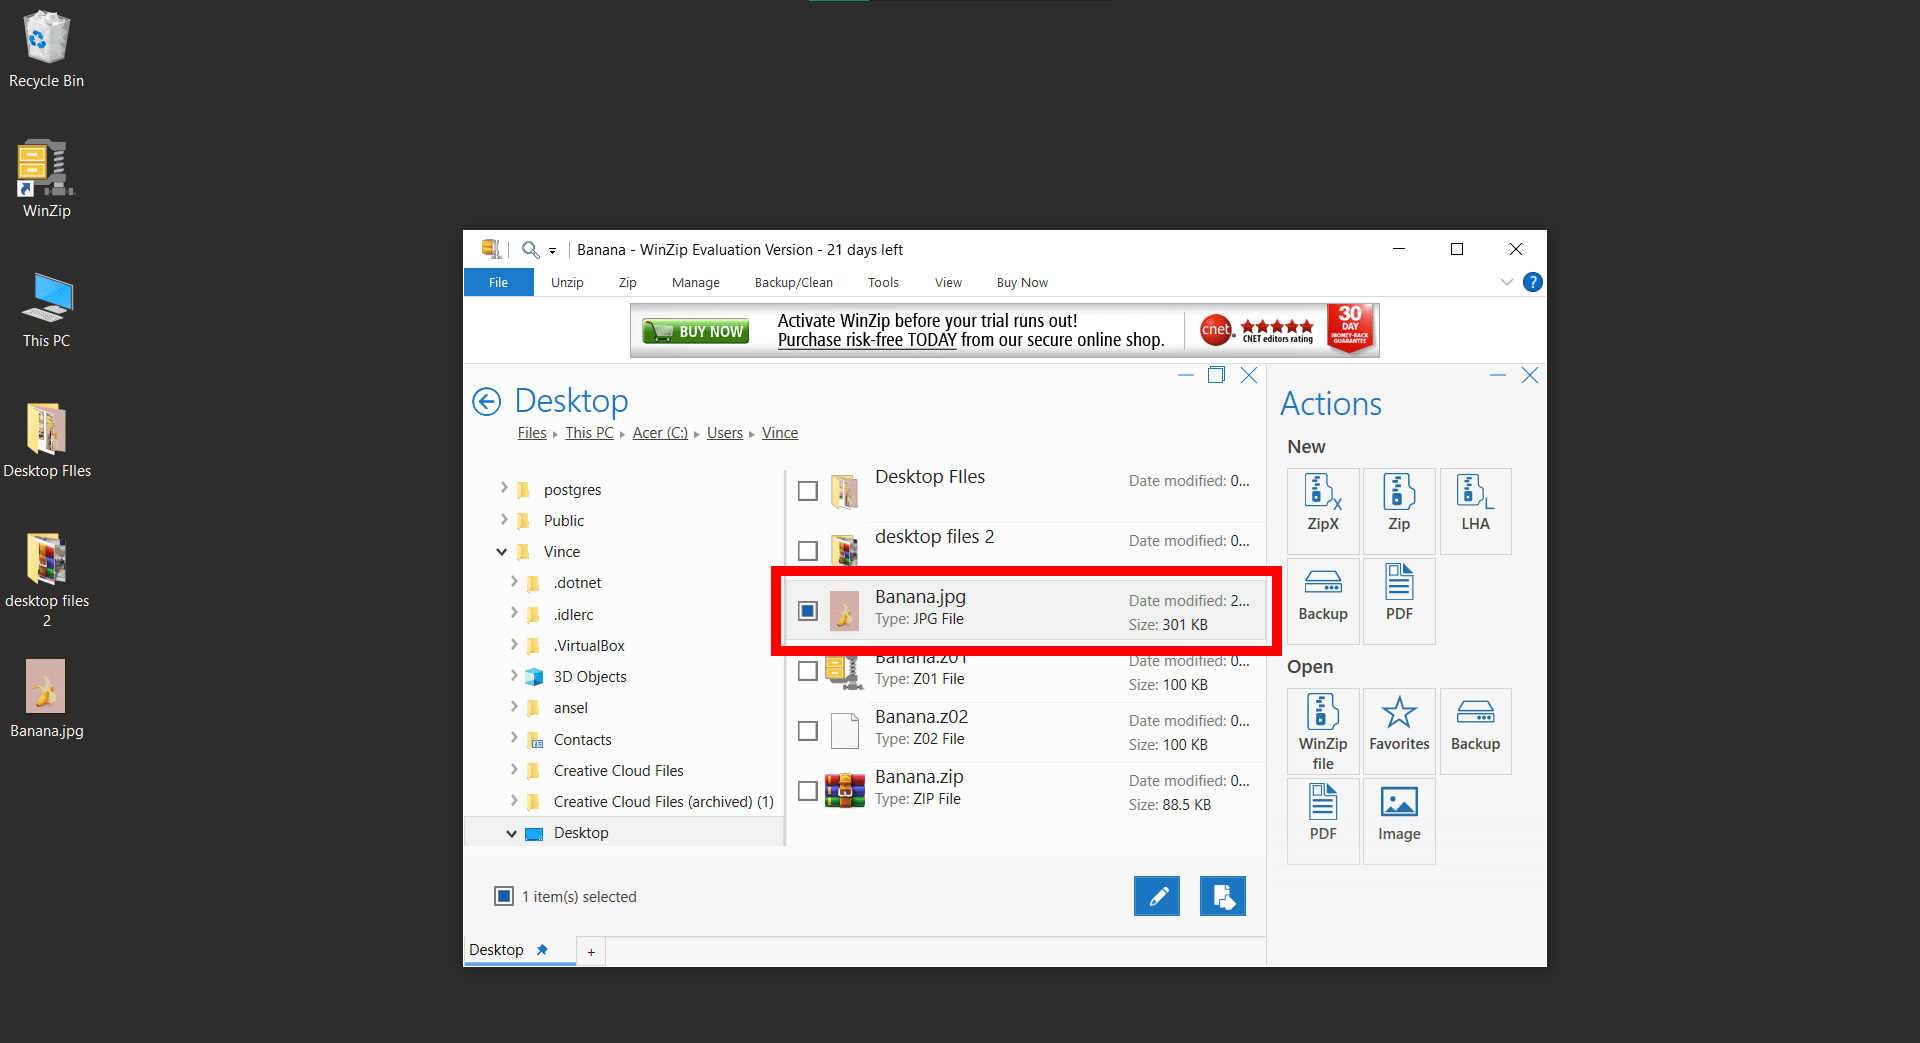
How To Unzip Using WinZip On Windows
Unzipping files with WinZip on Windows is like revealing the delicious banana inside its peel. 🍌 It’s straightforward and quick. Here’s your guide:
- Download & Install WinZip: Shimmy over these steps above to download and install WinZip on your computer.
- Find Your Zipped File: Swing through your digital jungle and spot that zipped file.
- Right Click: With a precise monkey move, right-click on that file and select “Open With > WinZip”. (You might need to click on “Show more options” first)
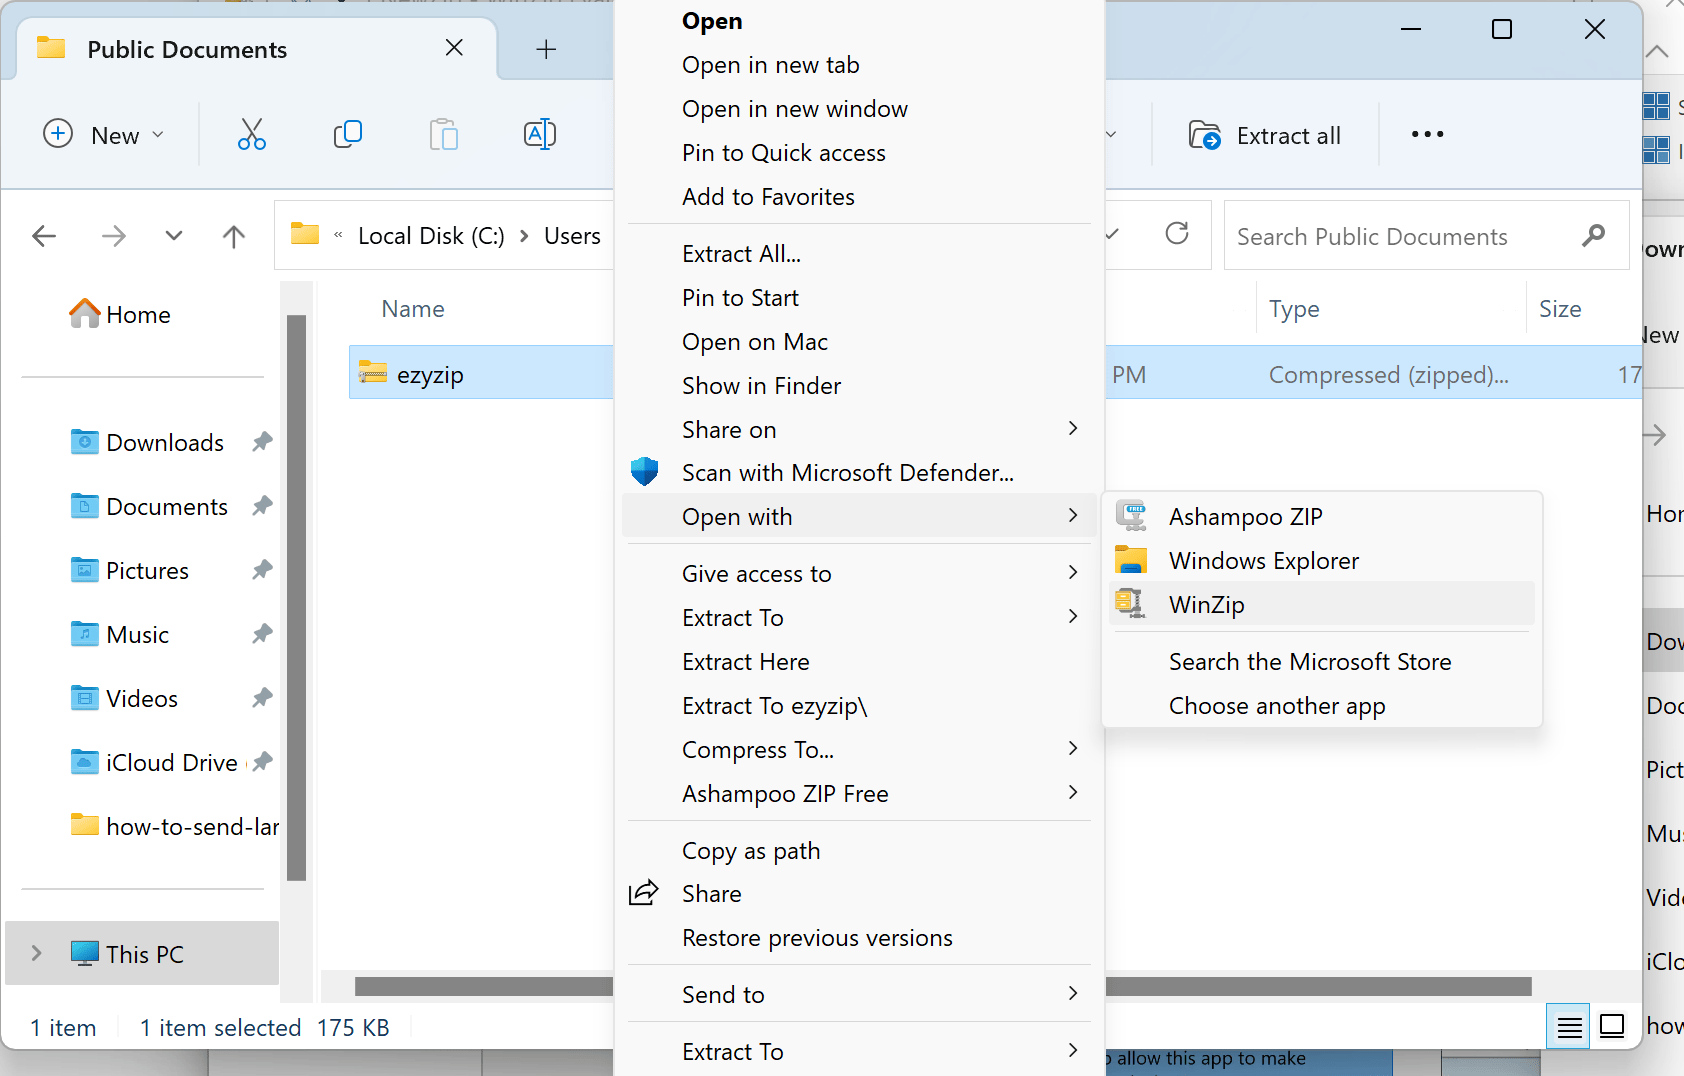
- Unzip with WinZip: You will be presented with option to unzip into Documents, a folder of your choosing or just preview the contents without unzipping. Decide where you want to release those files, and voilà!
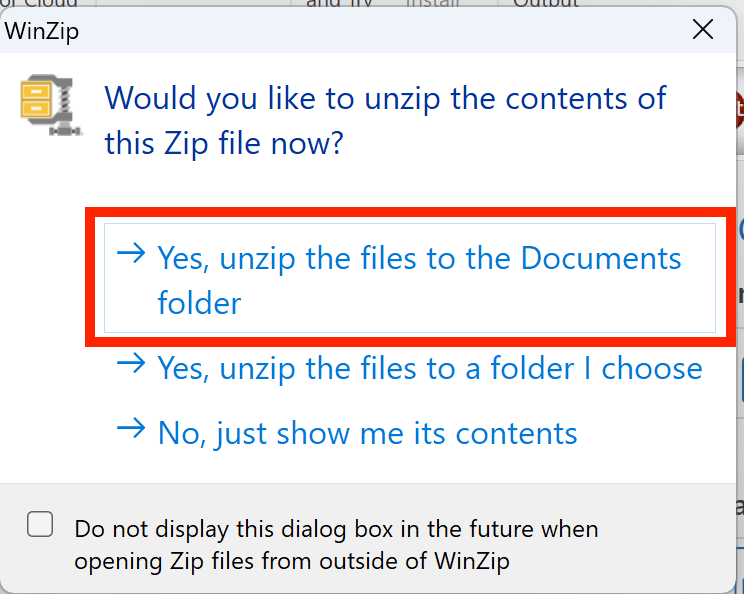 And that’s it! With WinZip on Windows, you can easily peel open any ZIP file and access its contents. Happy unzipping!
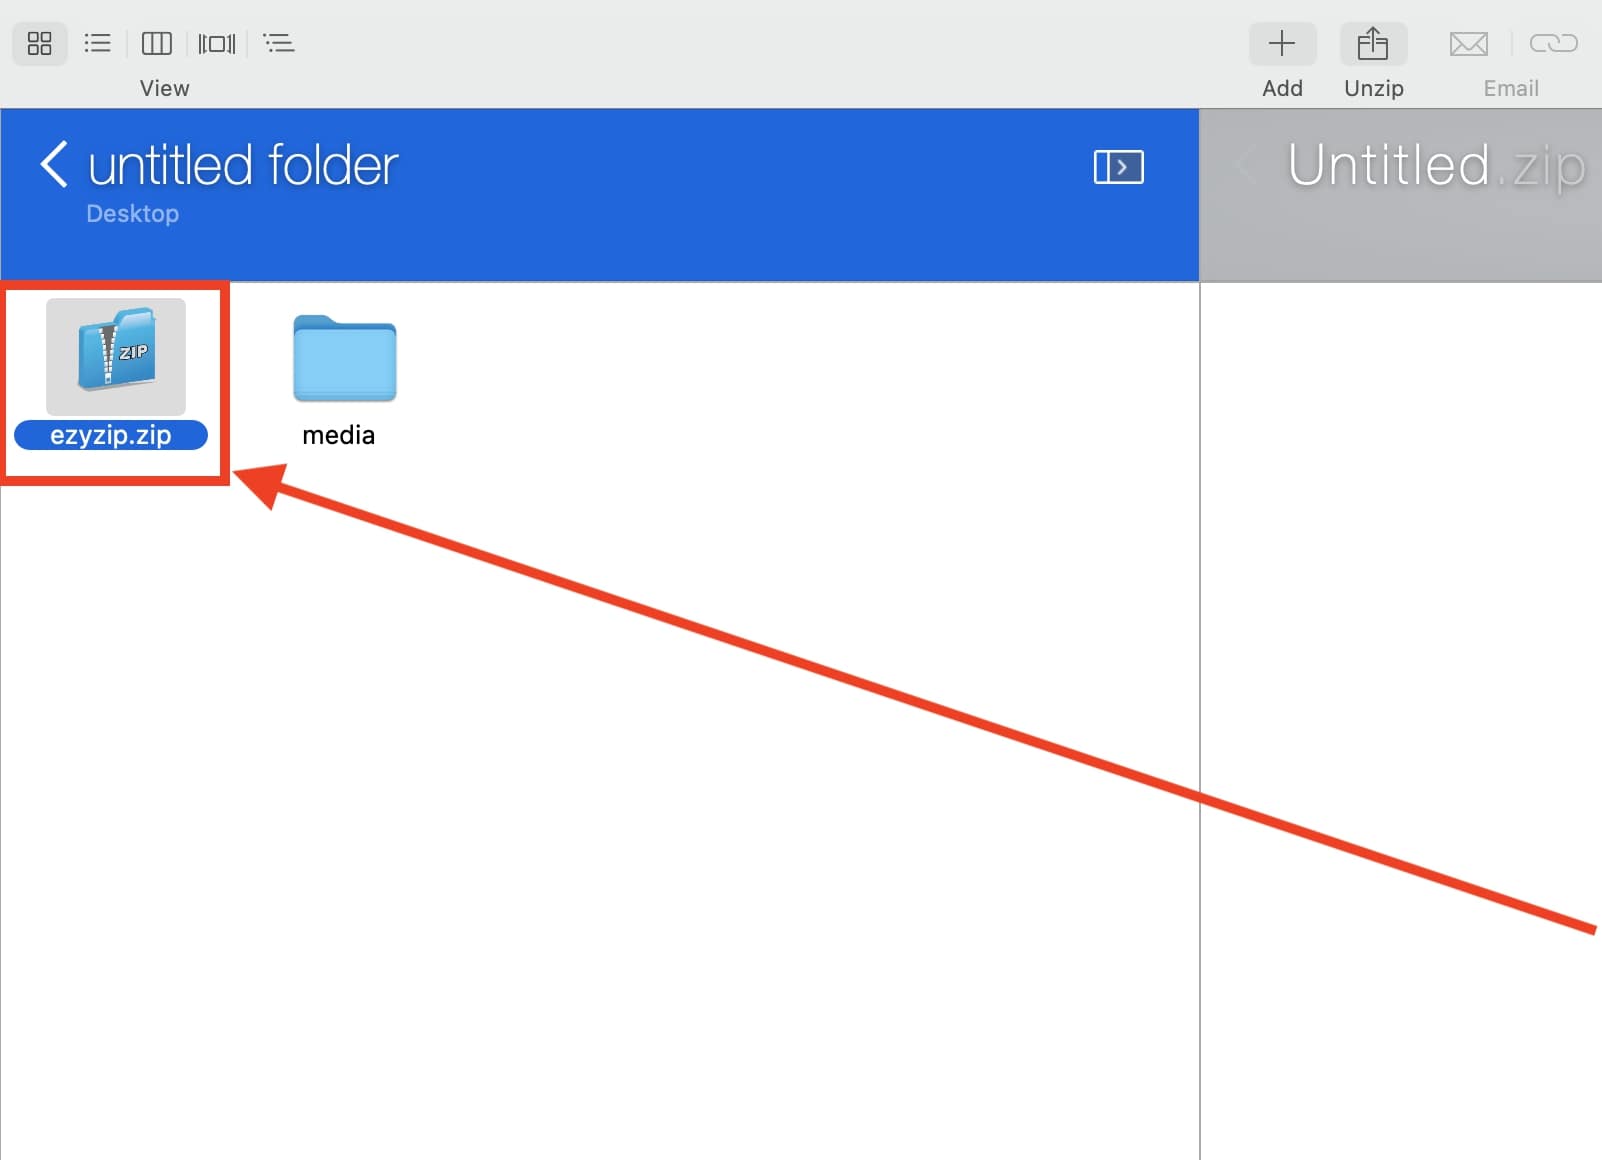
How To Unzip Files On Mac With Winzip
Unzipping files on a Mac with WinZip is like peeling a banana to reveal its sweet treasure inside. 🍌 Here’s how to do it step by step:
- Download and install Winzip: Download and install Winzip on your Mac by following the steps above.
- Open the zip file: Choose files from the left panel or click “Add” from the top to add files.
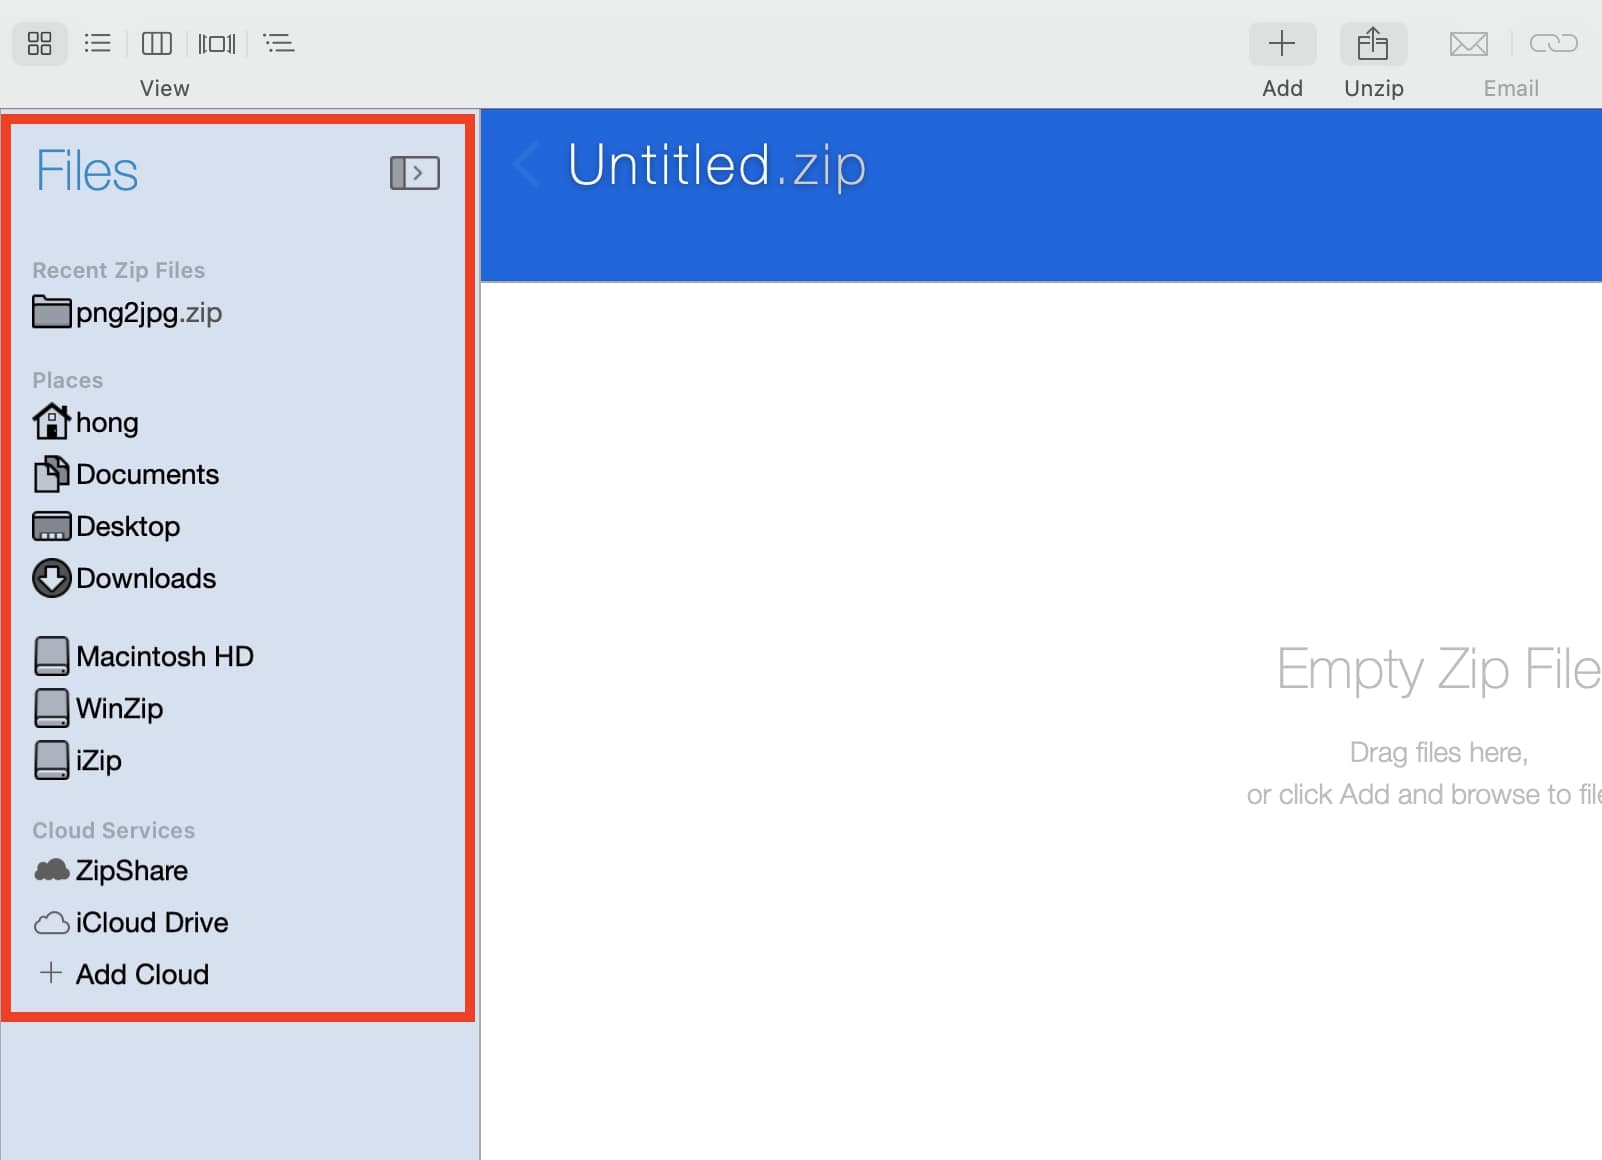
- Locate and select the zip file you want to unzip.
- Select the location: Choose the destination folder for extracting the zip file contents under “Unzip all files to” then click “Unzip” at the bottom of panel.
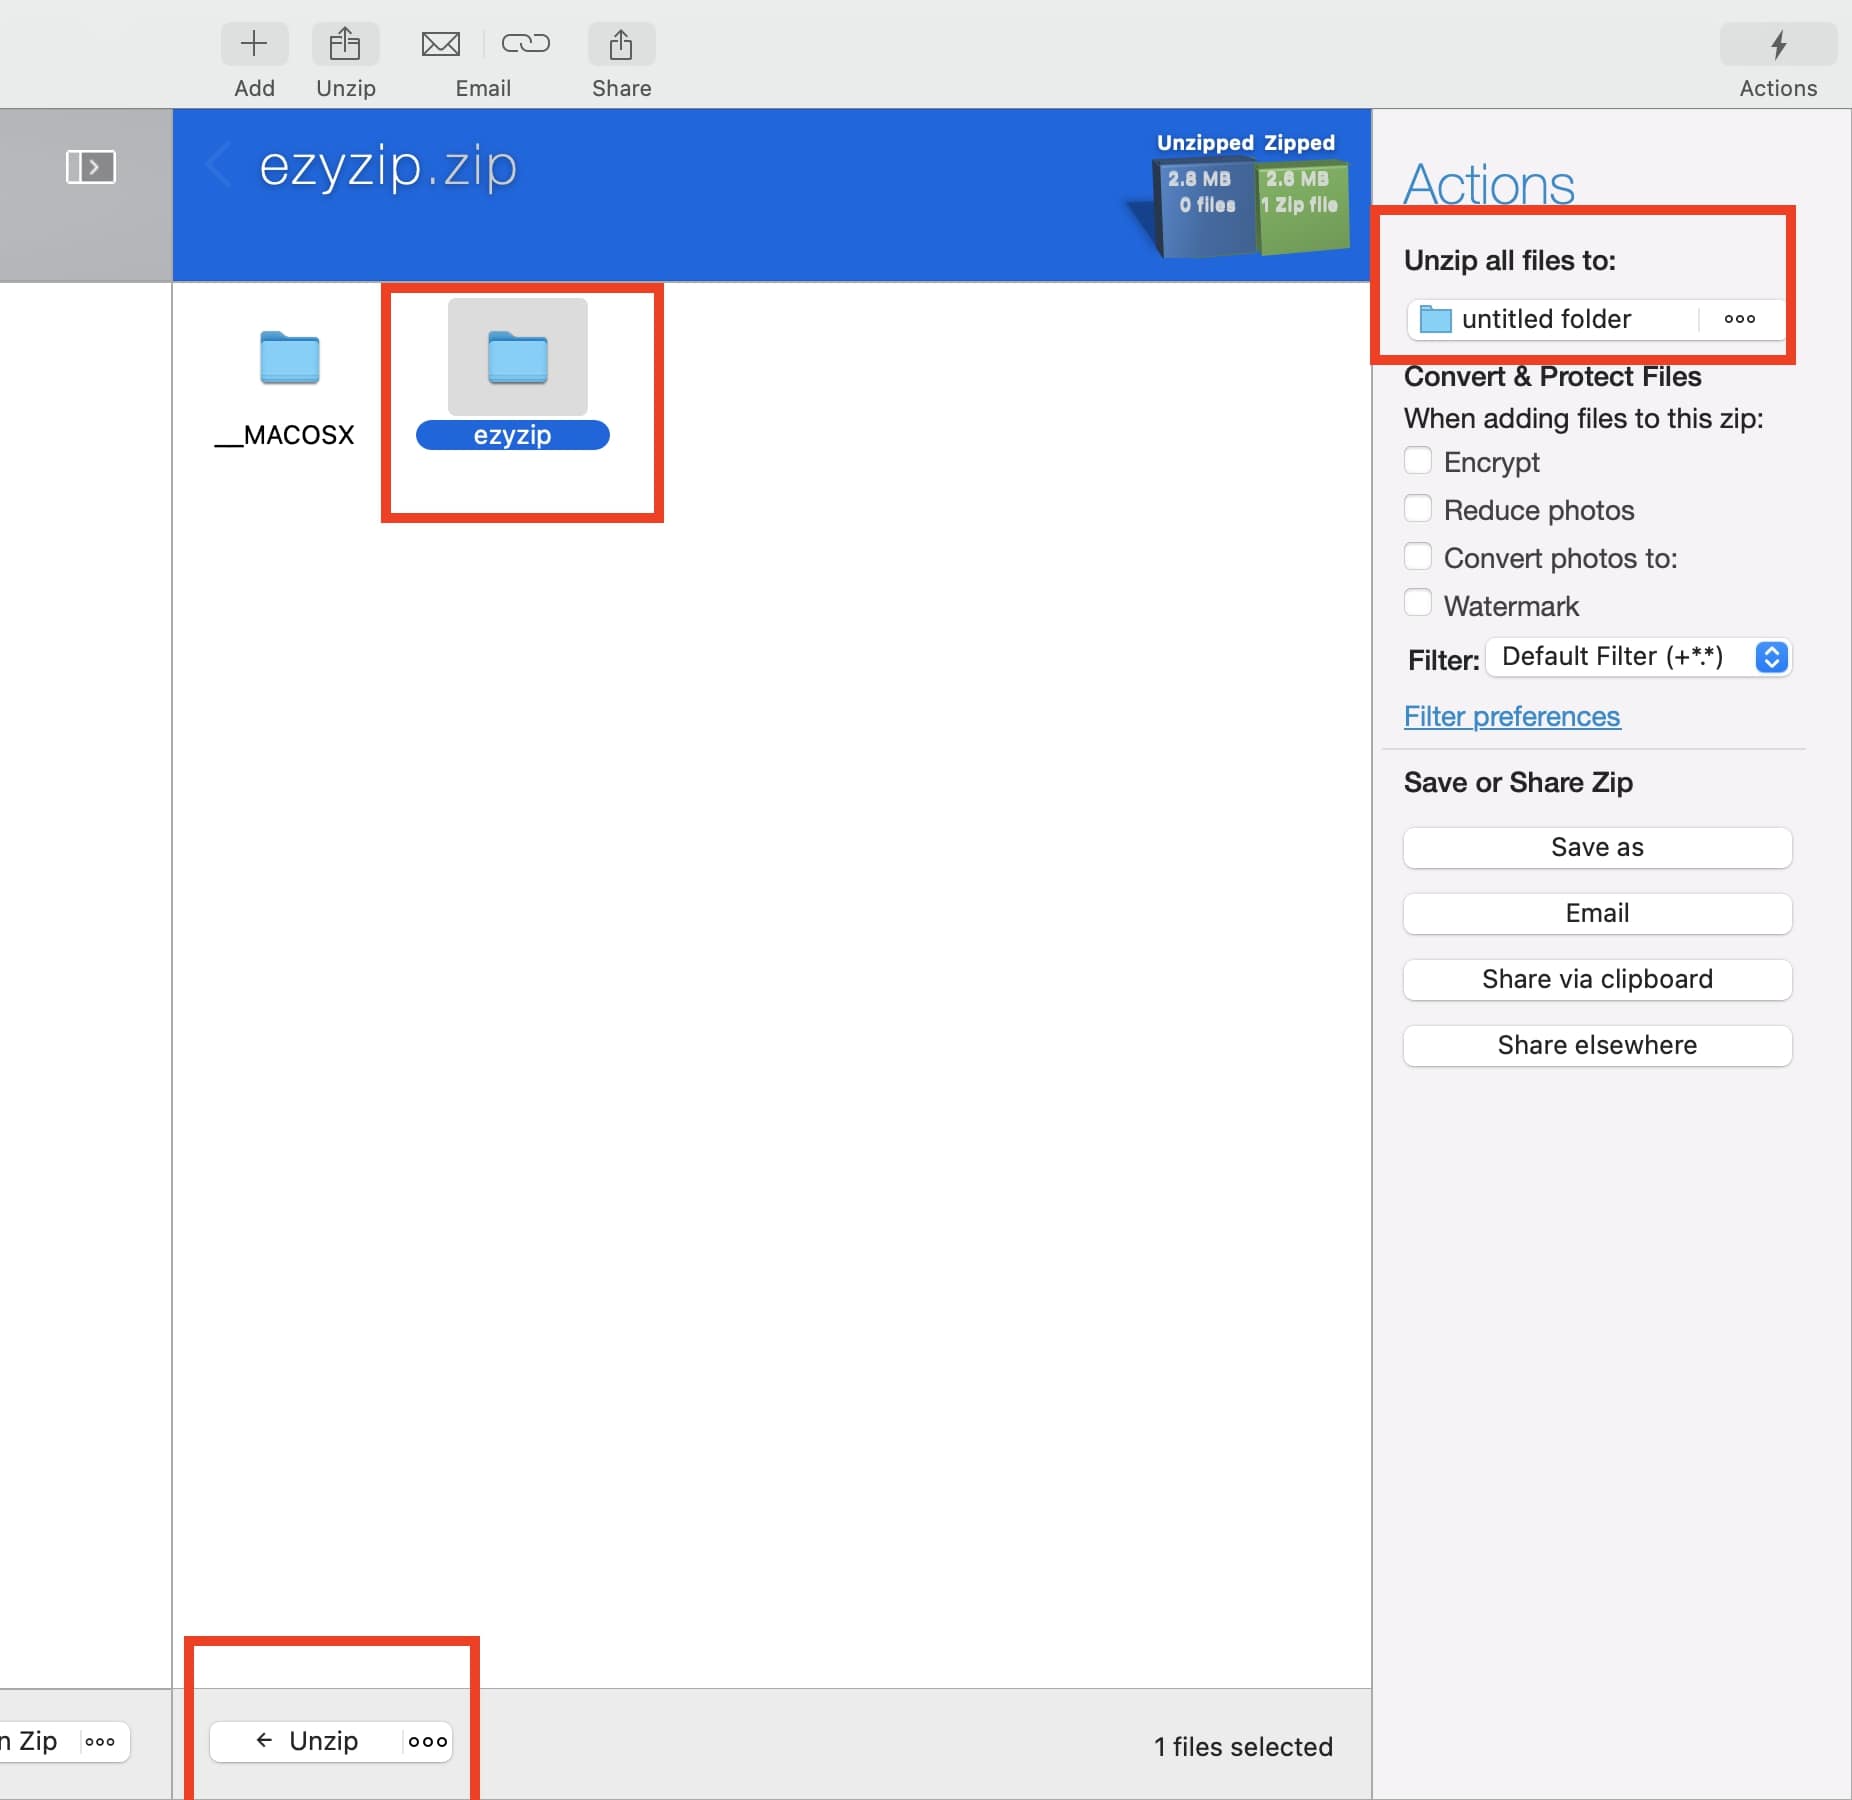
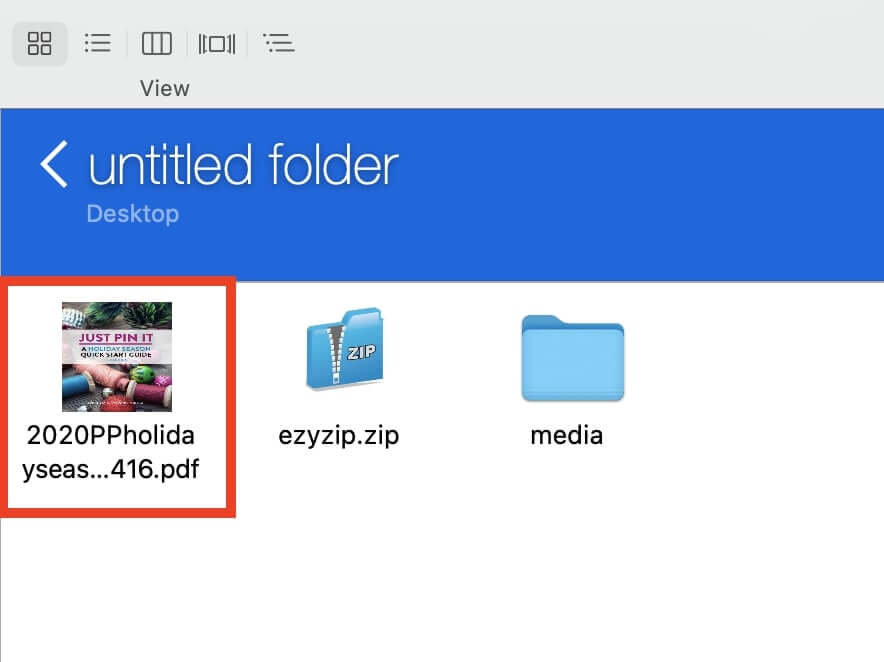
- Find your files: Your extracted file(s) should show in the destination folder.
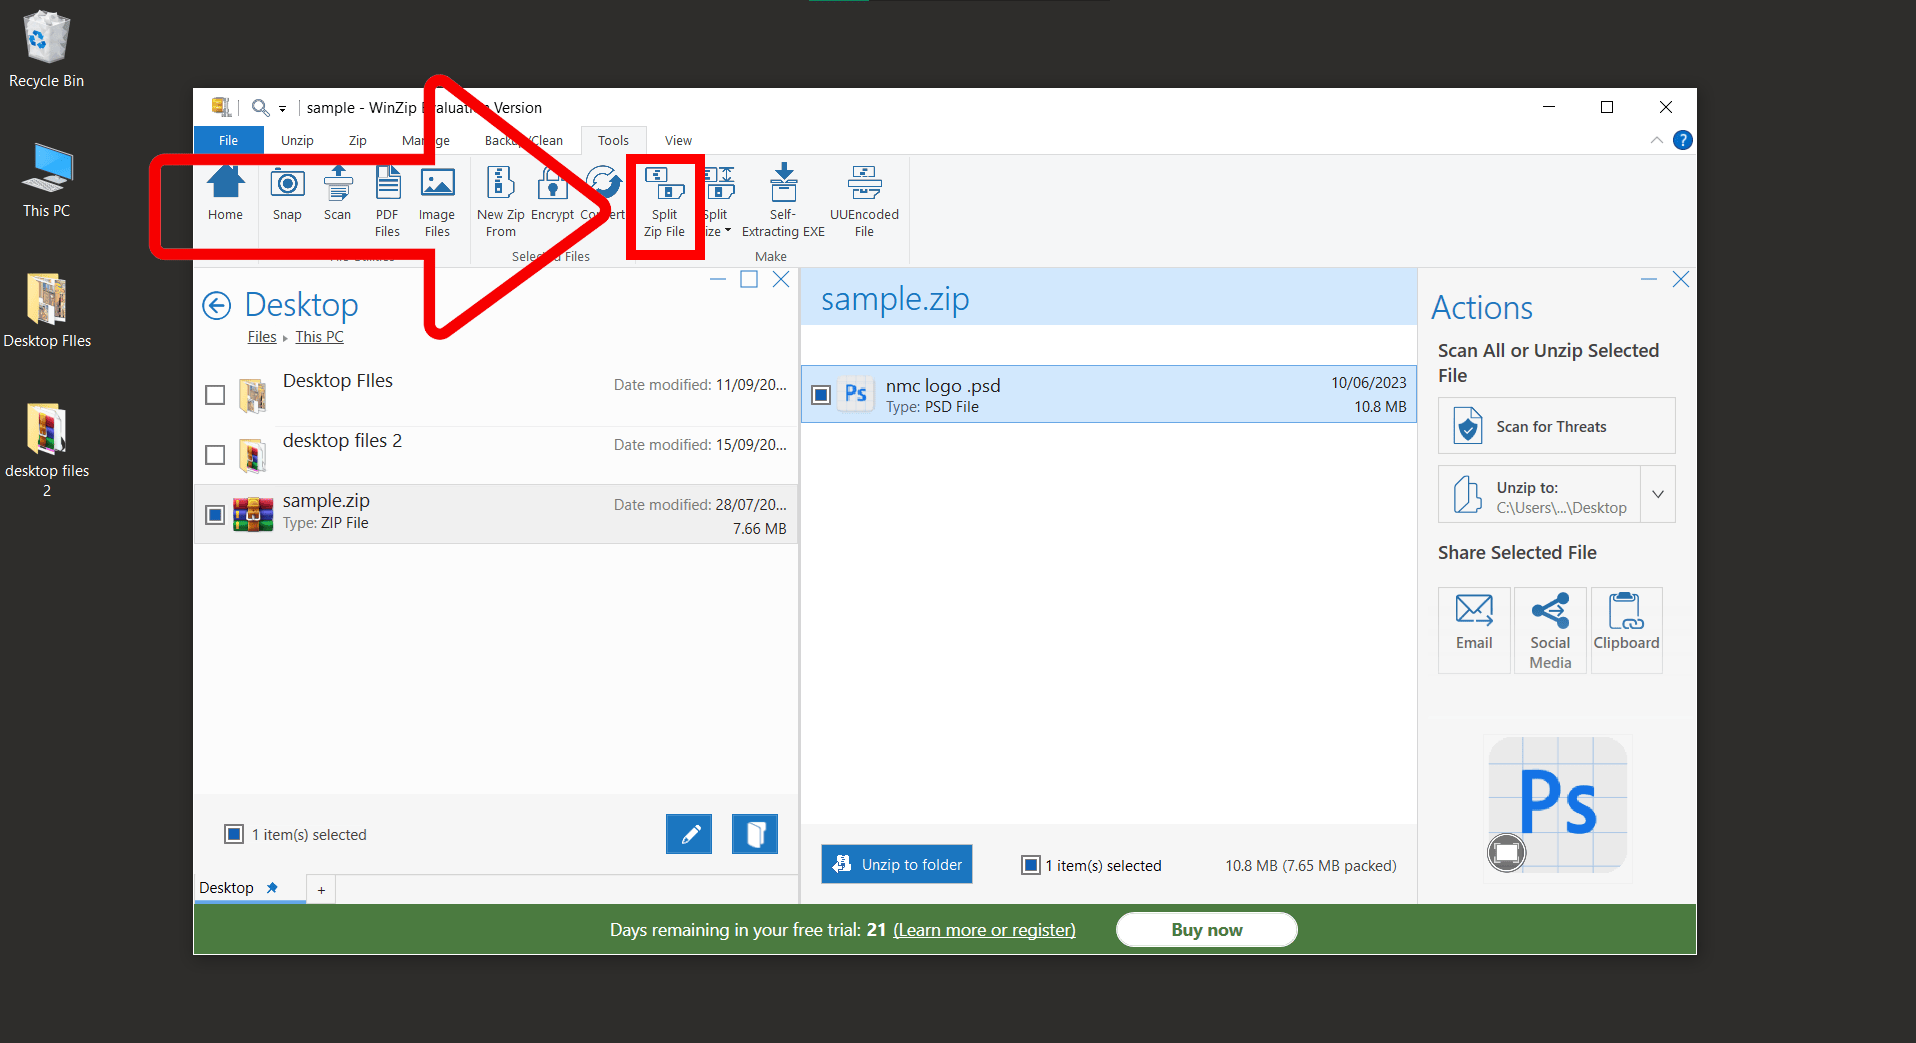
How To Create Multipart ZIP Files Using WinZip On Windows
Creating multipart ZIP files is like splitting a big banana bunch into smaller, more manageable bunches. It’s especially handy when you need to share or store large files in more digestible chunks. Let’s see how you can do this with WinZip:
- Download and Install WinZip: Follow the steps above to download and install WinZip on your computer.
- Open Zip File: Locate, select your password-protected Zip file then click ‘Open’.
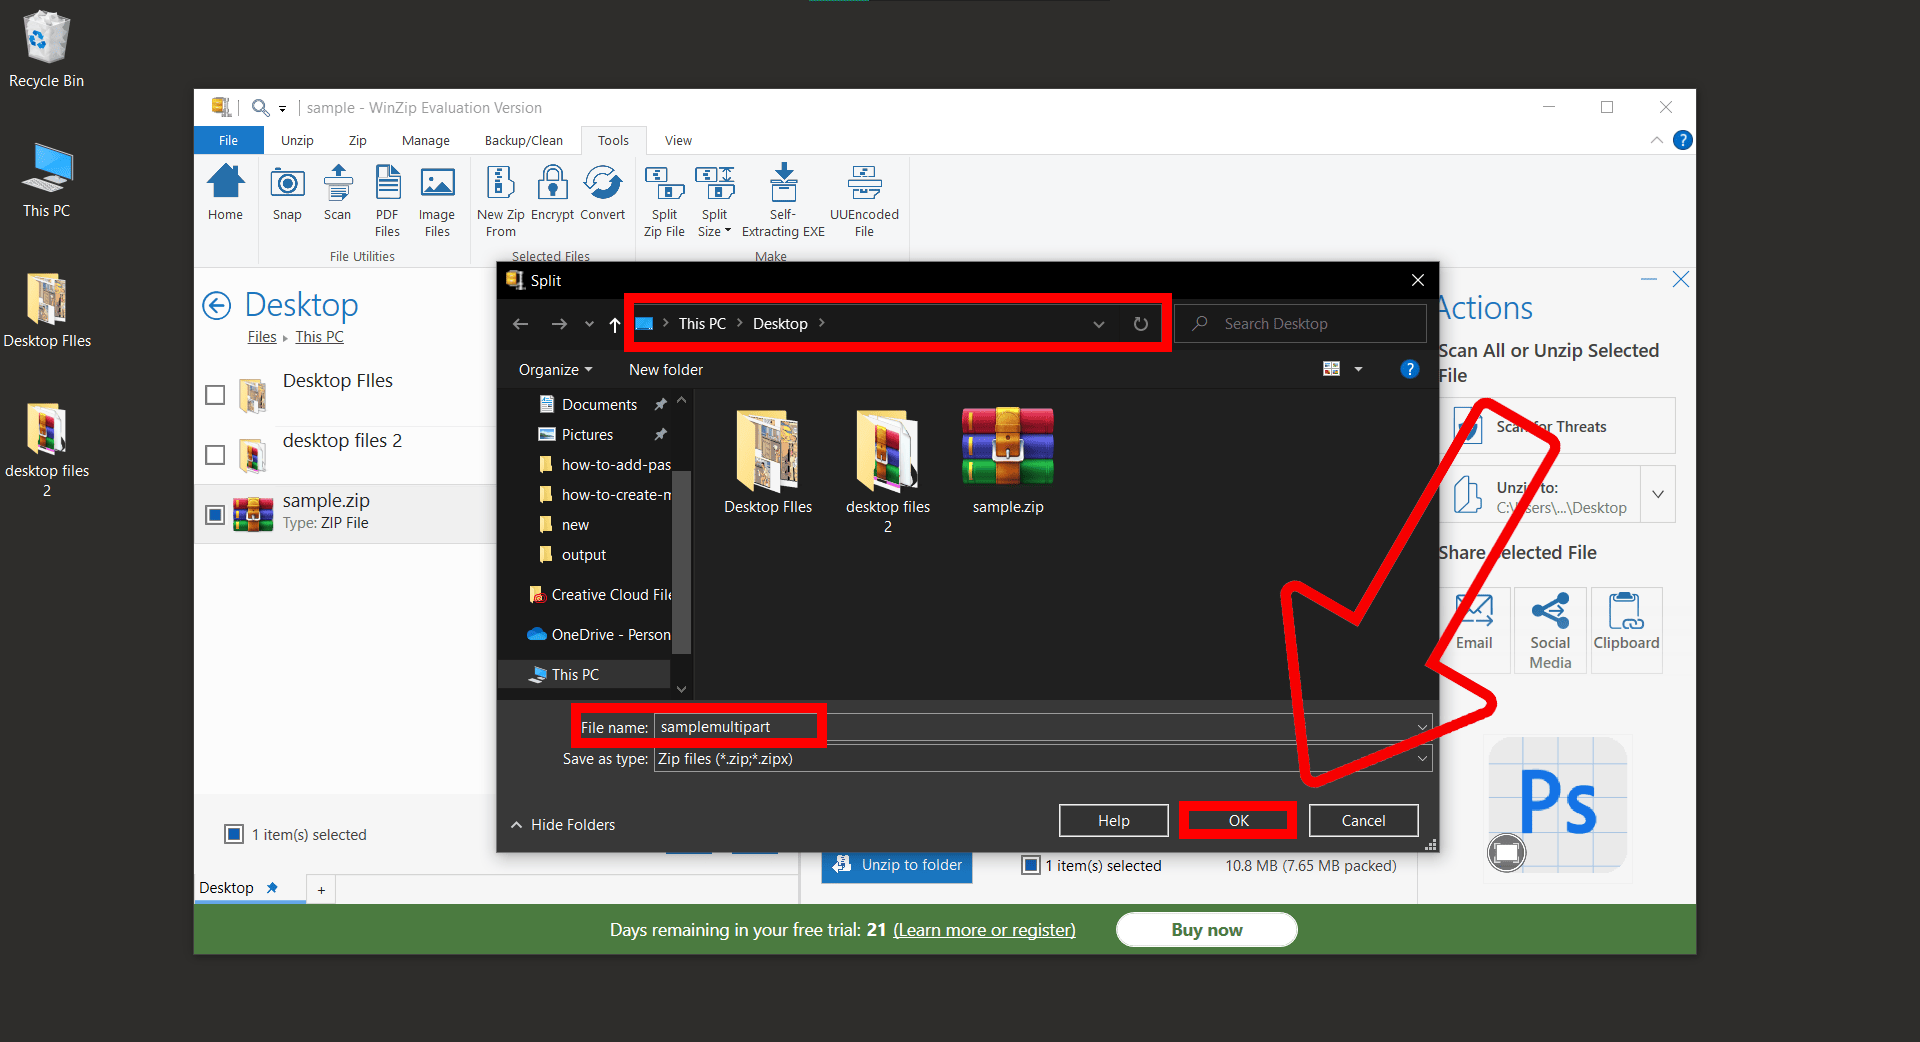
- Split Option: Before splitting, click on ‘Tools’ and choose on ‘Split size’.
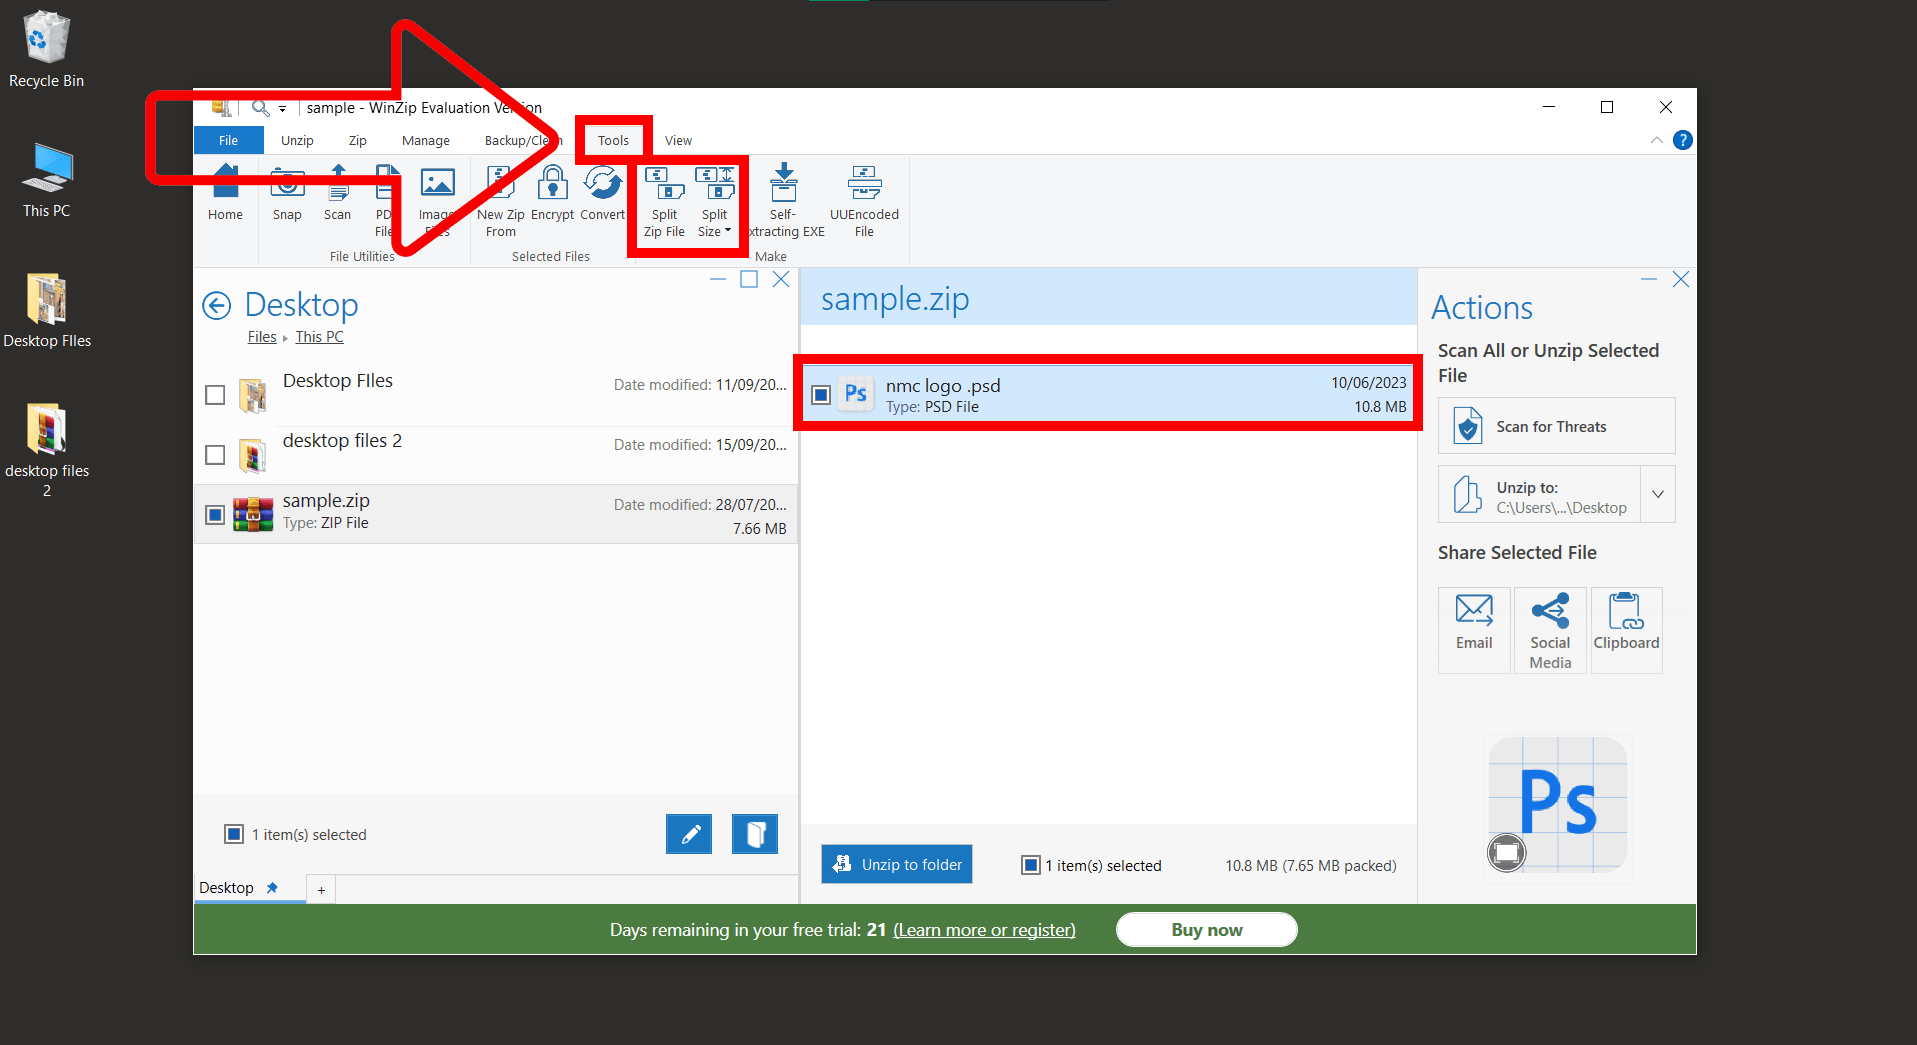
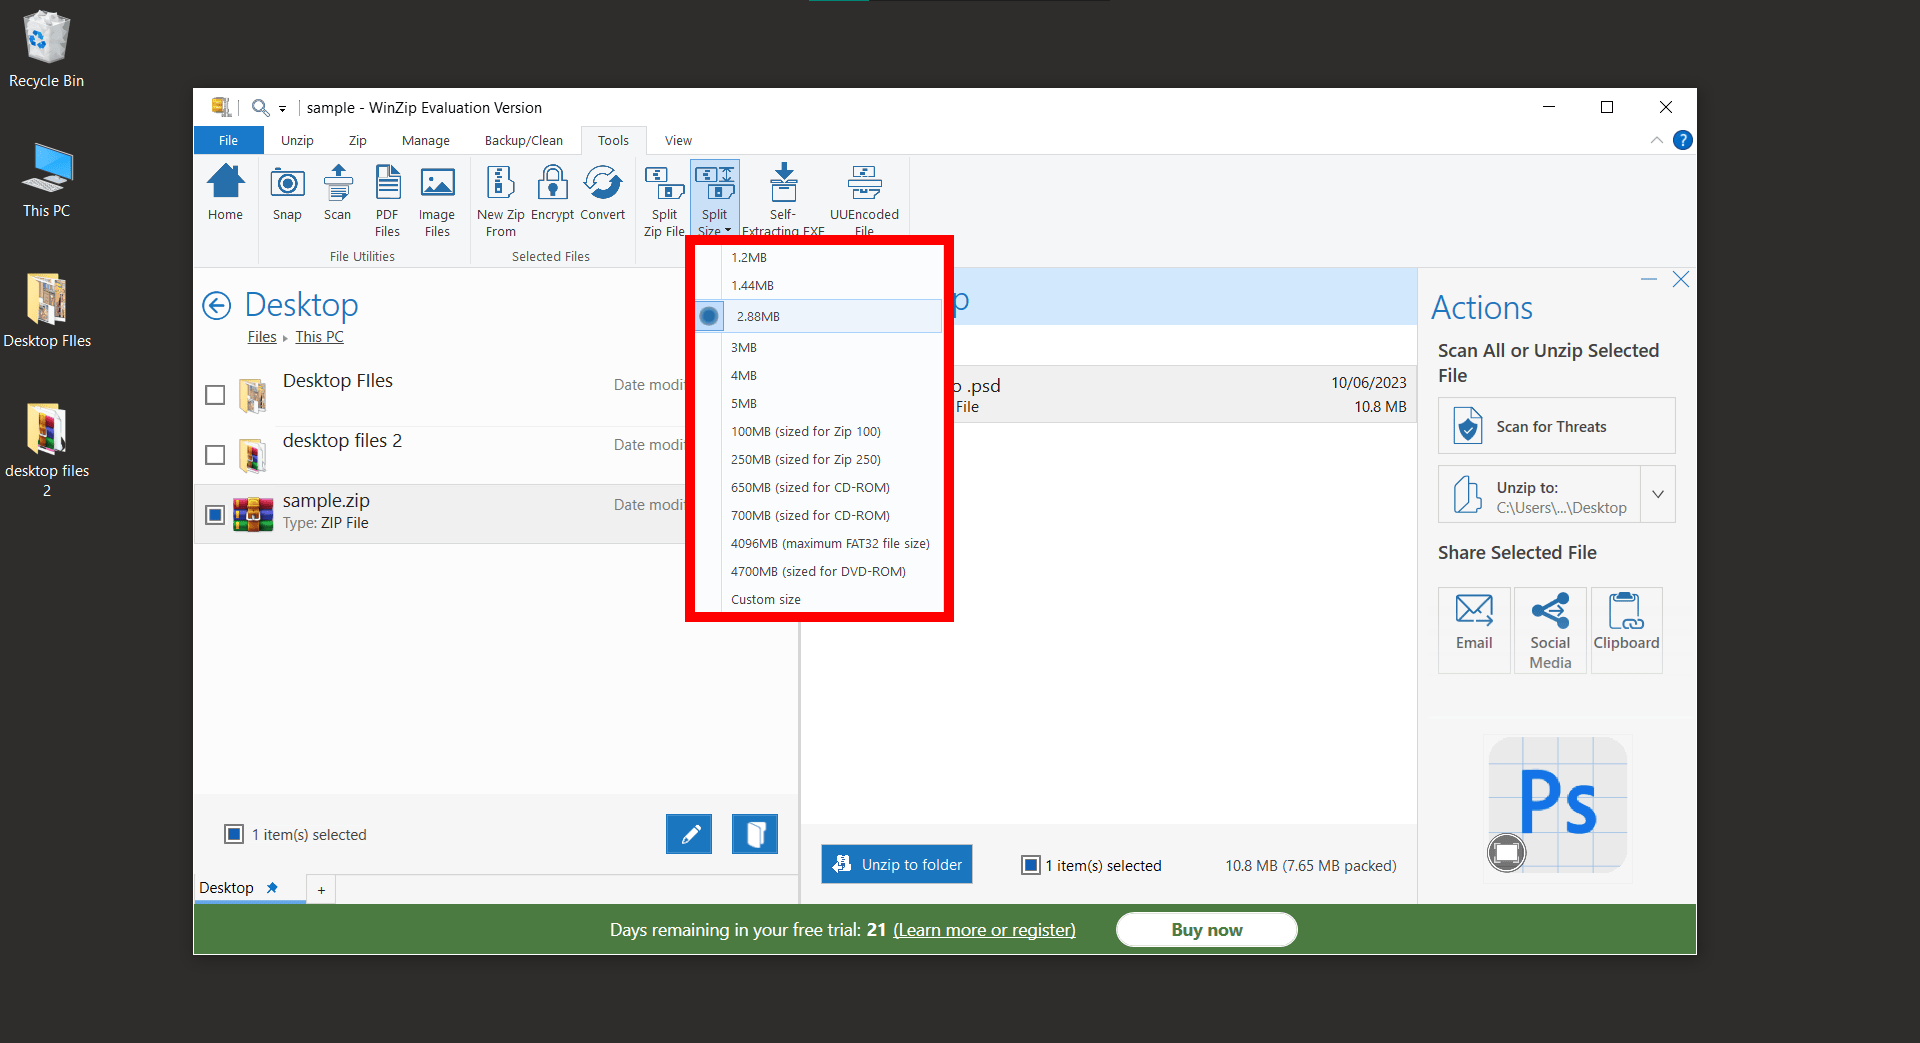
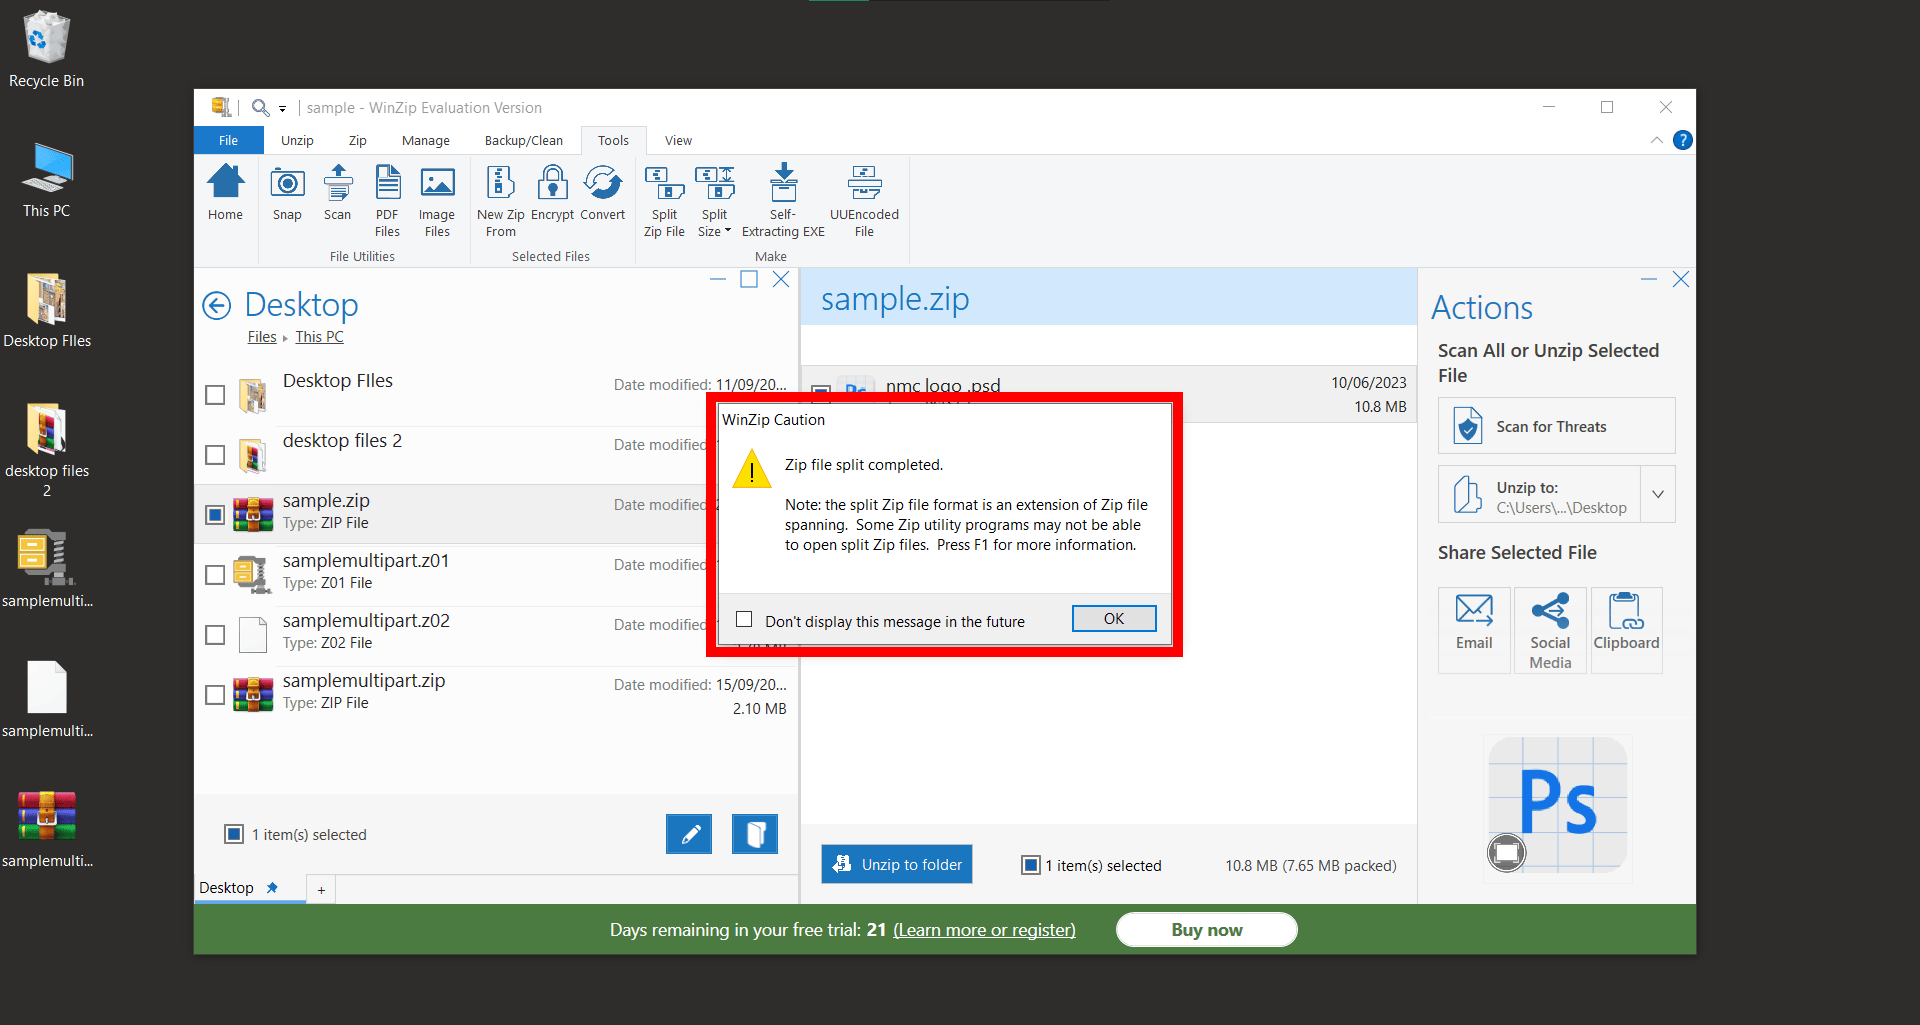
- Split the file: Once you specified the size for each part of the multipart ZIP. (This is the maximum size each split file will be). Hit the “Split ZIP FIle” button to split your zip file.
- Access Files: Once the files have been splitted, there will be a pop-up prompt. After that you can access the split Zip file.
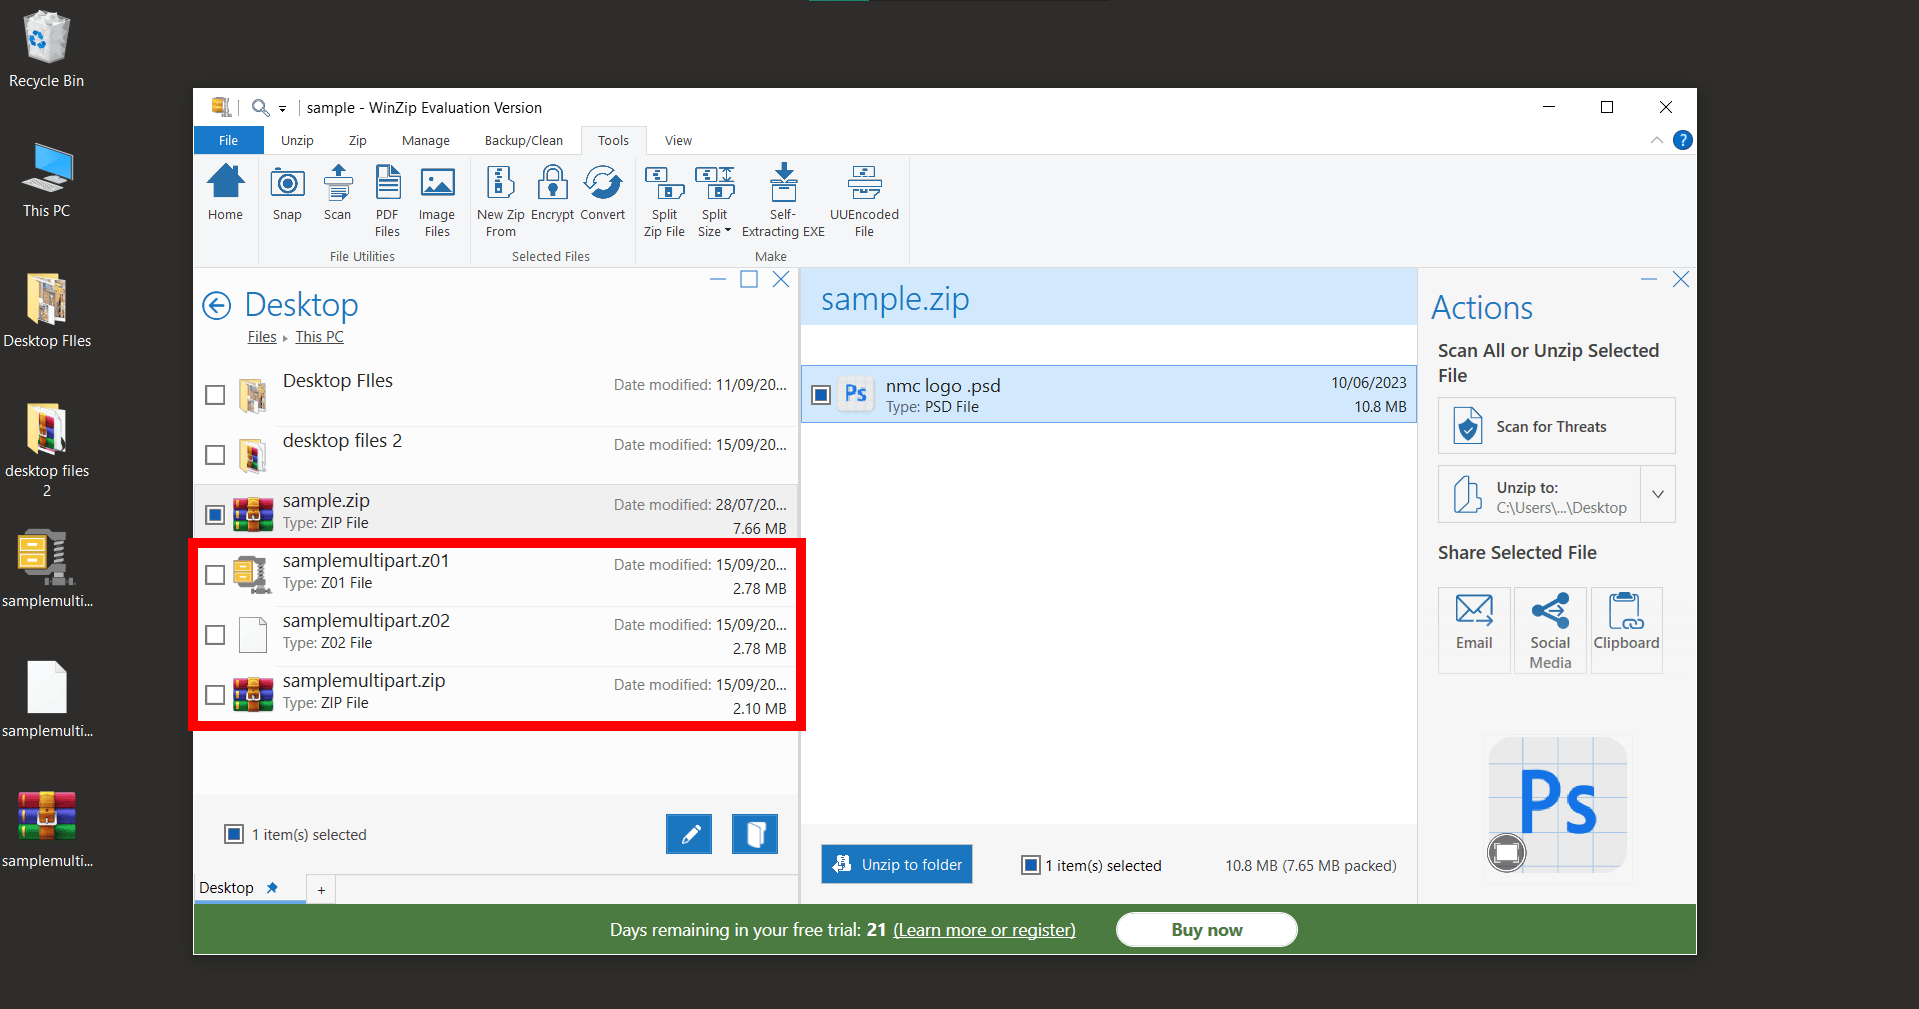 And there you have it! You’ve successfully created a multipart ZIP file using WinZip. Now, sharing or storing large files is as easy as splitting a banana bunch!
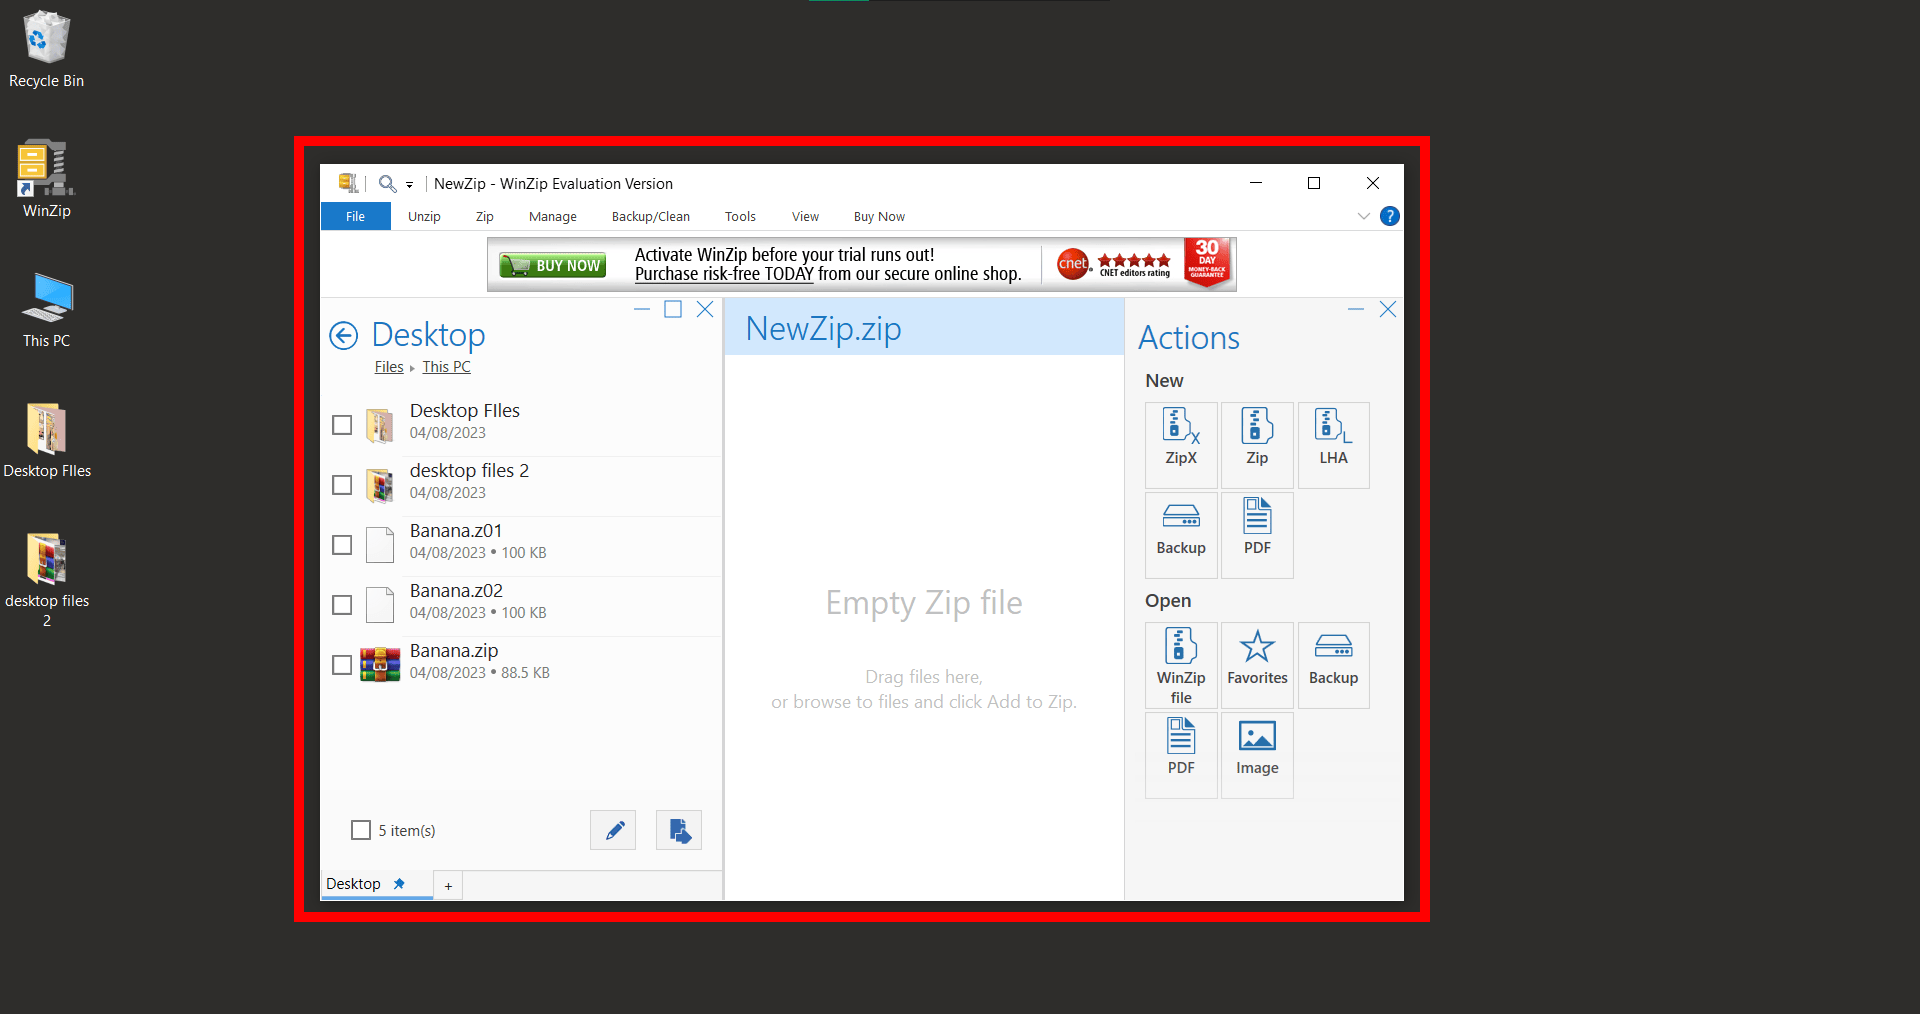
How To Open Multipart ZIP Files Using WinZip On Windows
Multipart ZIP files, also known as split or spanned ZIP files, are like a bunch of digital bananas bundled together. They’re essentially one large file that’s been divided into smaller chunks. But don’t worry, with WinZip, opening them is a breeze. Let’s dive in!
-
Download & Install WinZip: Follow the steps above to download and install WinZip on your computer.
-
Open WinZip: Once installed, open WinZip. It’s as simple as a monkey opening a banana.
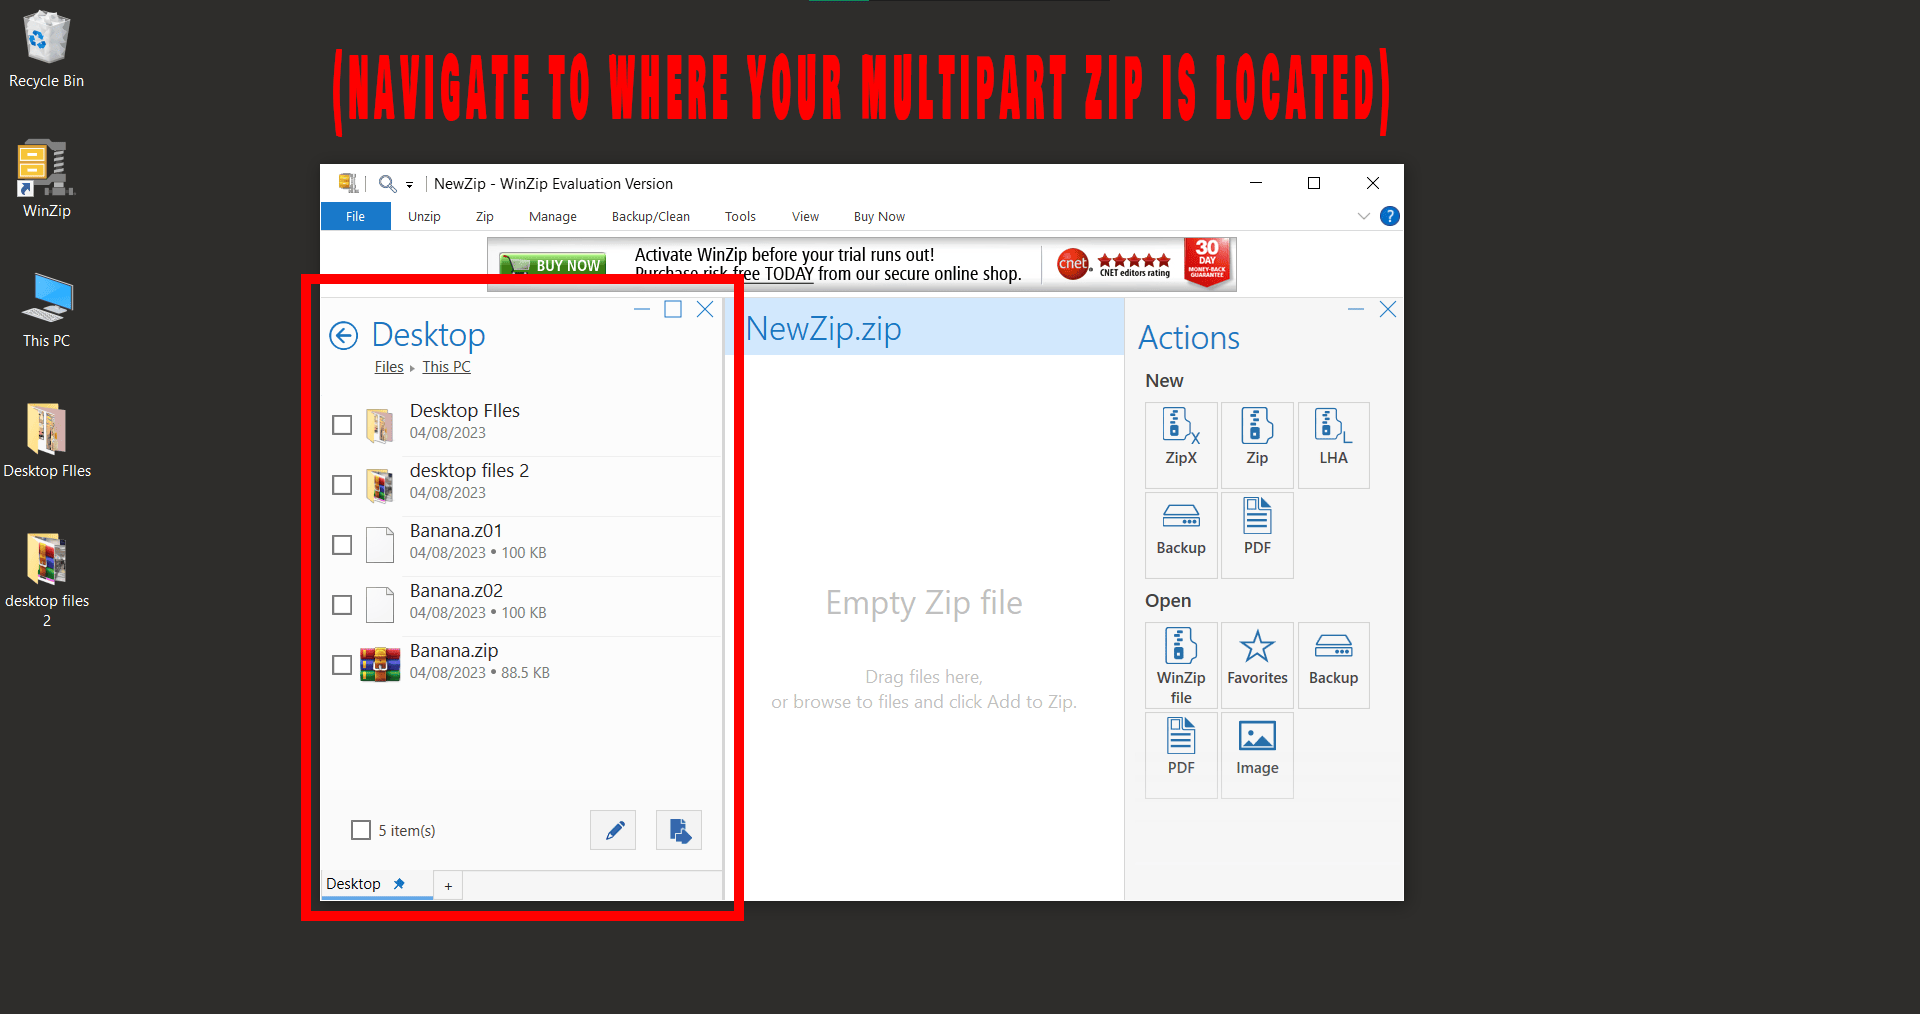
-
Navigate to your files: In the WinZip window, navigate to the location of the multipart ZIP files. They usually have extensions like .zip, .z01, .z02, and so on.
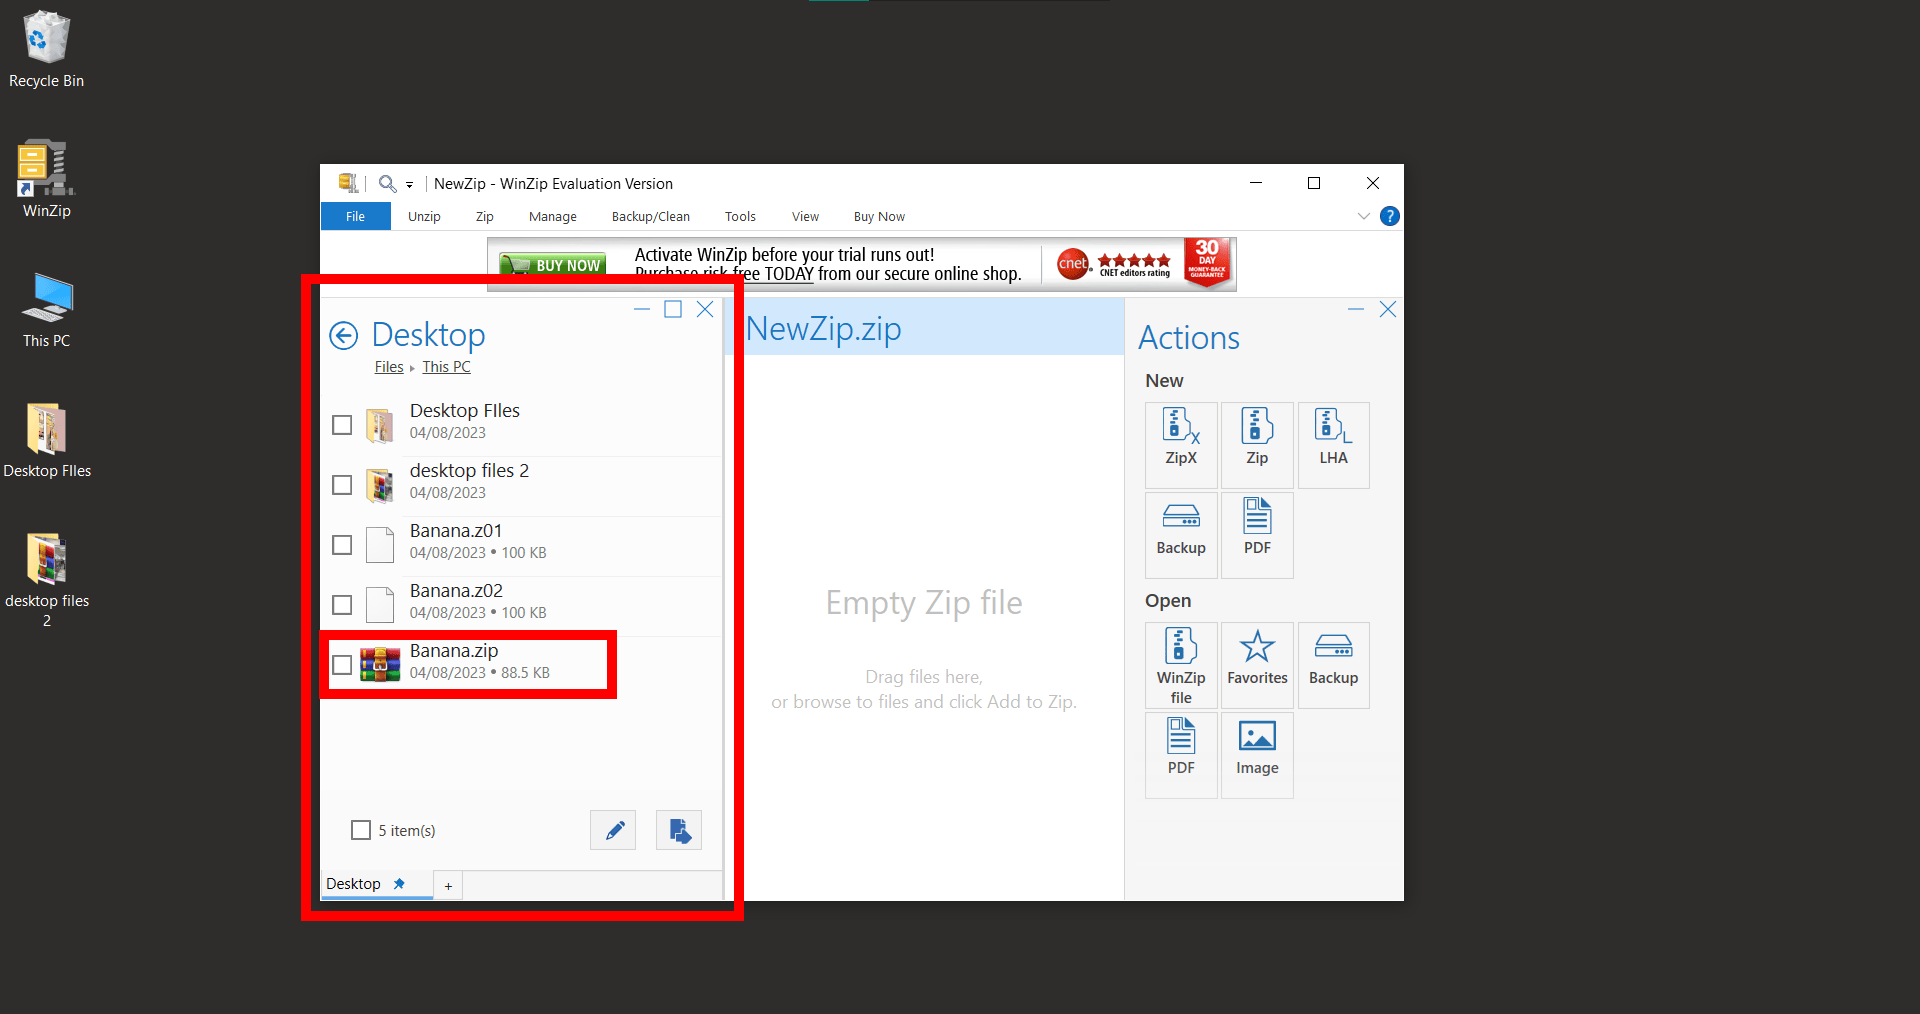
-
Open the first part: Double-click on the first part of the ZIP file (usually the one with the .zip extension). It’s like peeling the first banana from the bunch.
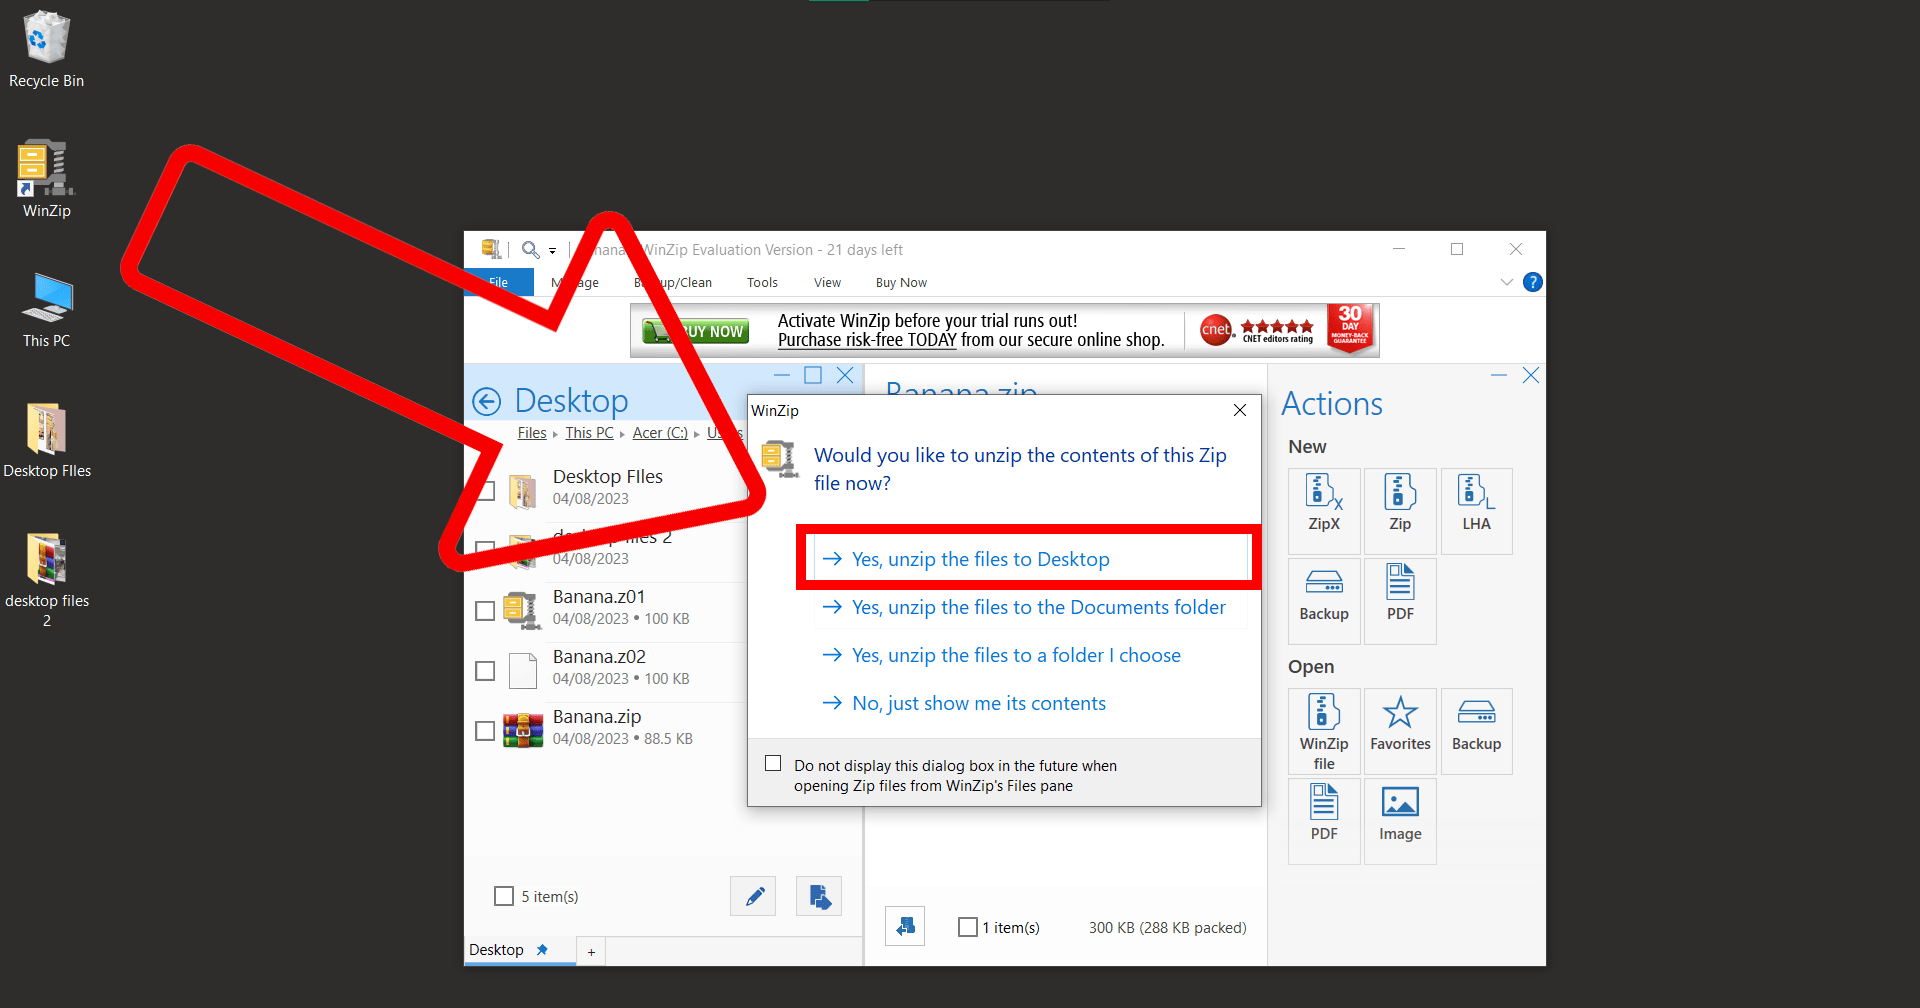
-
Extract the files: Choose where you want the files to be extracted to. It’s like deciding where to toss your banana peel.
And that’s it! You’ve successfully opened a multipart ZIP file using WinZip. No more monkeying around with confusing file parts; WinZip’s got it all zipped together for you!
How To Create SFX Files Using WinZip
Creating a Self-Extracting Archive (SFX) is like giving someone a banana that peels itself. 🍌 It’s a standalone file that can unzip its contents without needing any external software. Here’s how to create an SFX file using WinZip:
- Install WinZip: Follow the steps above to download and install WinZip on your computer.
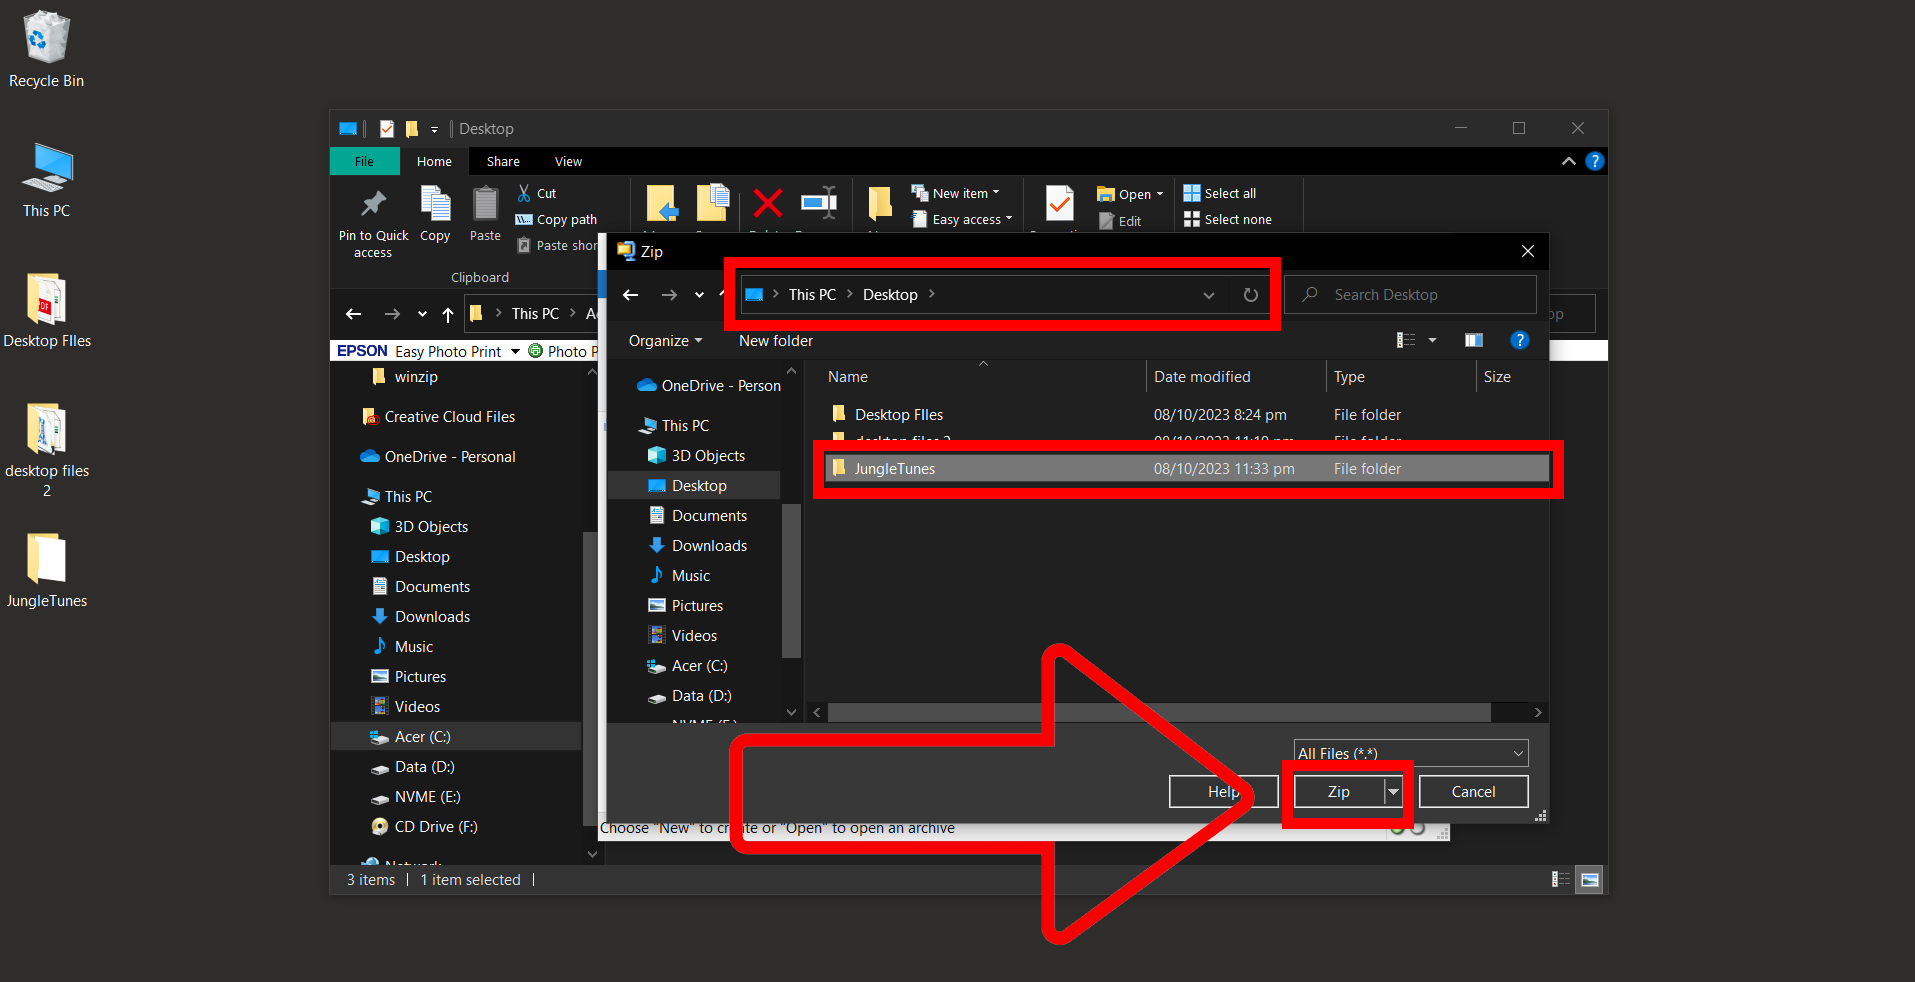
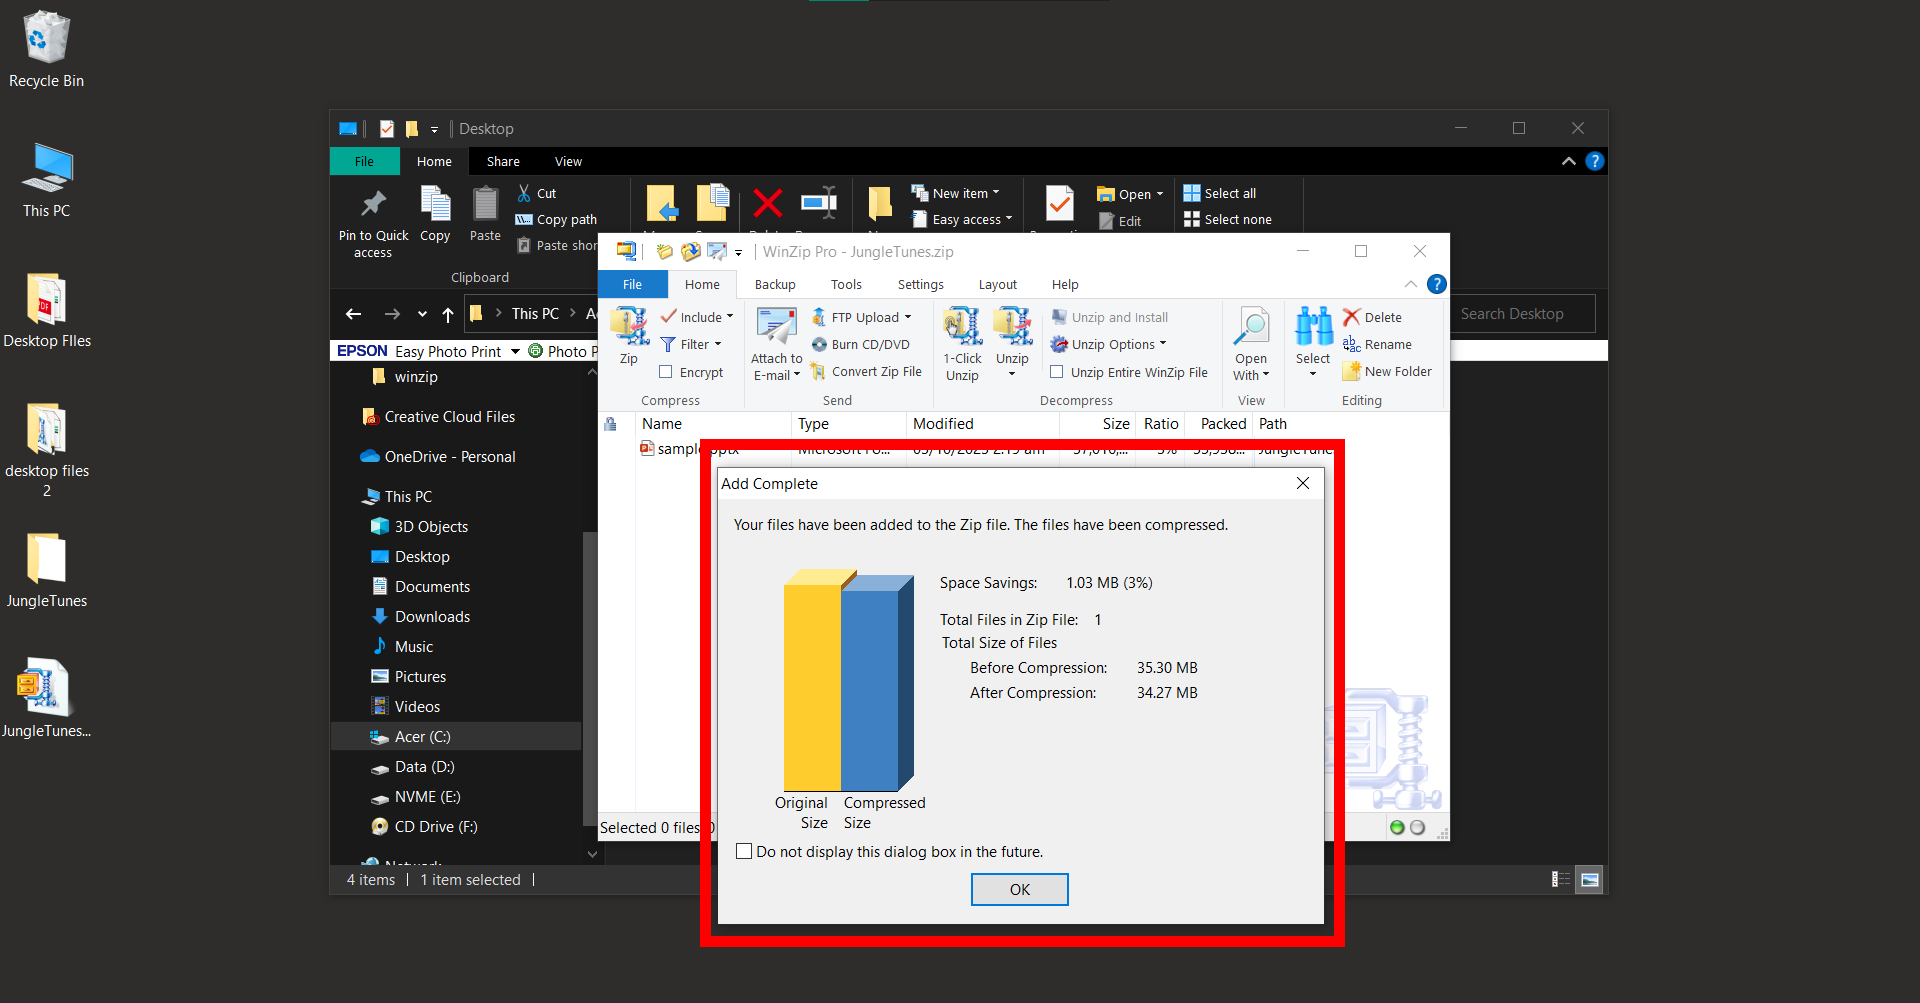
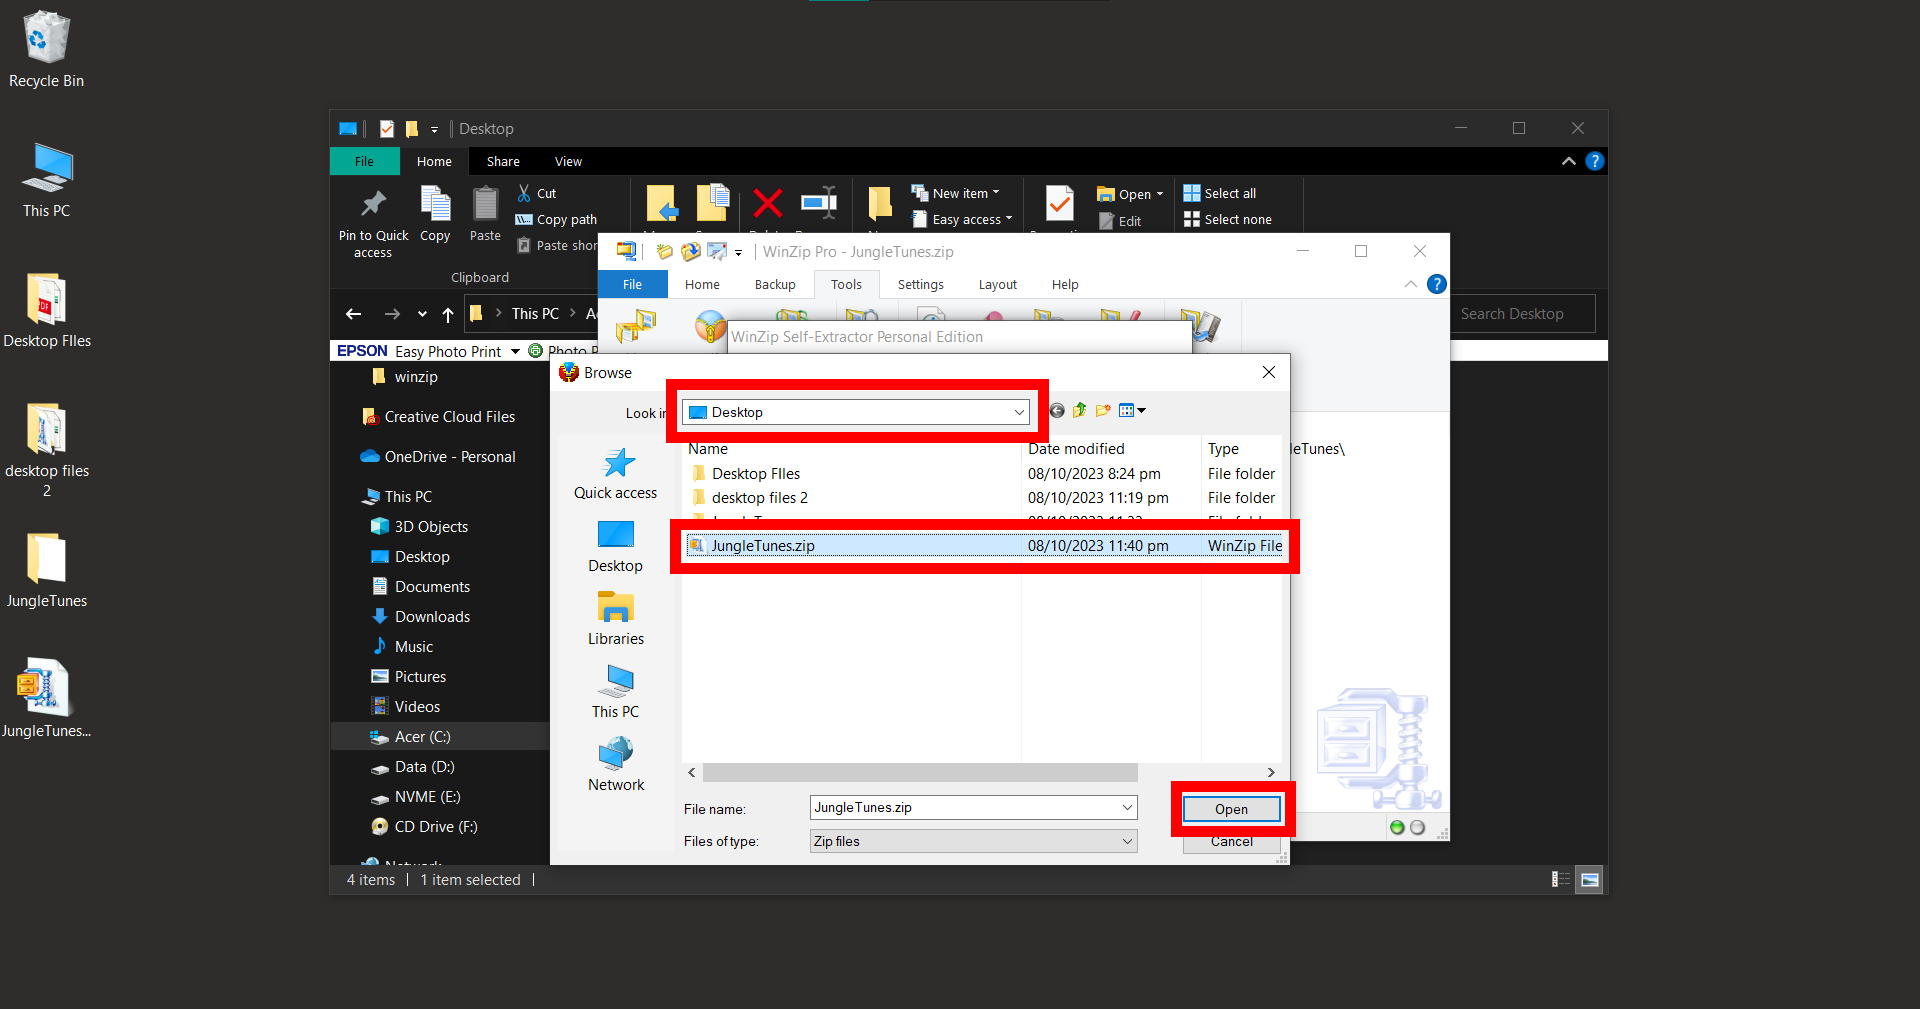
- Gather Your Files: When using Winzip you can only convert archive files such as rar/zip/7z into sfx files. So we will first create a zip file. Assemble all the files you want to compress into a folder. Let’s name it “JungleTunes” for a musical twist.
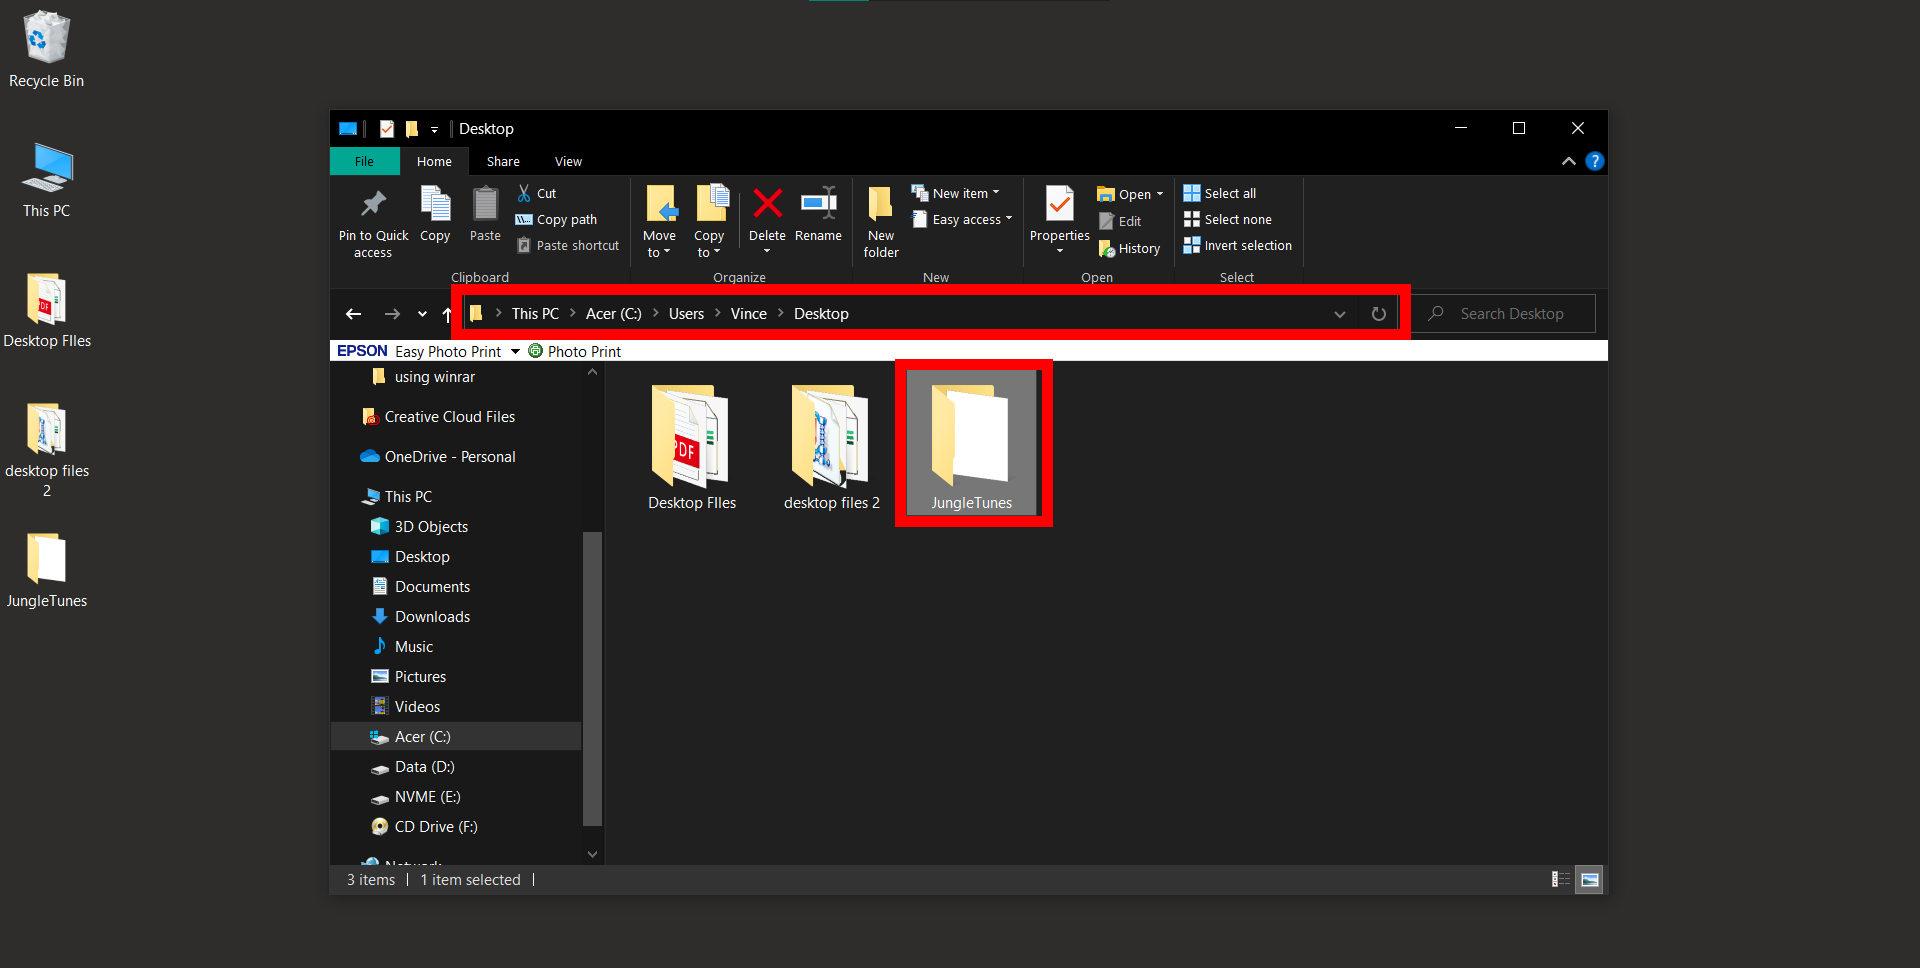
- Open WinZip: Launch WinZip and click on the “Zip” tab.
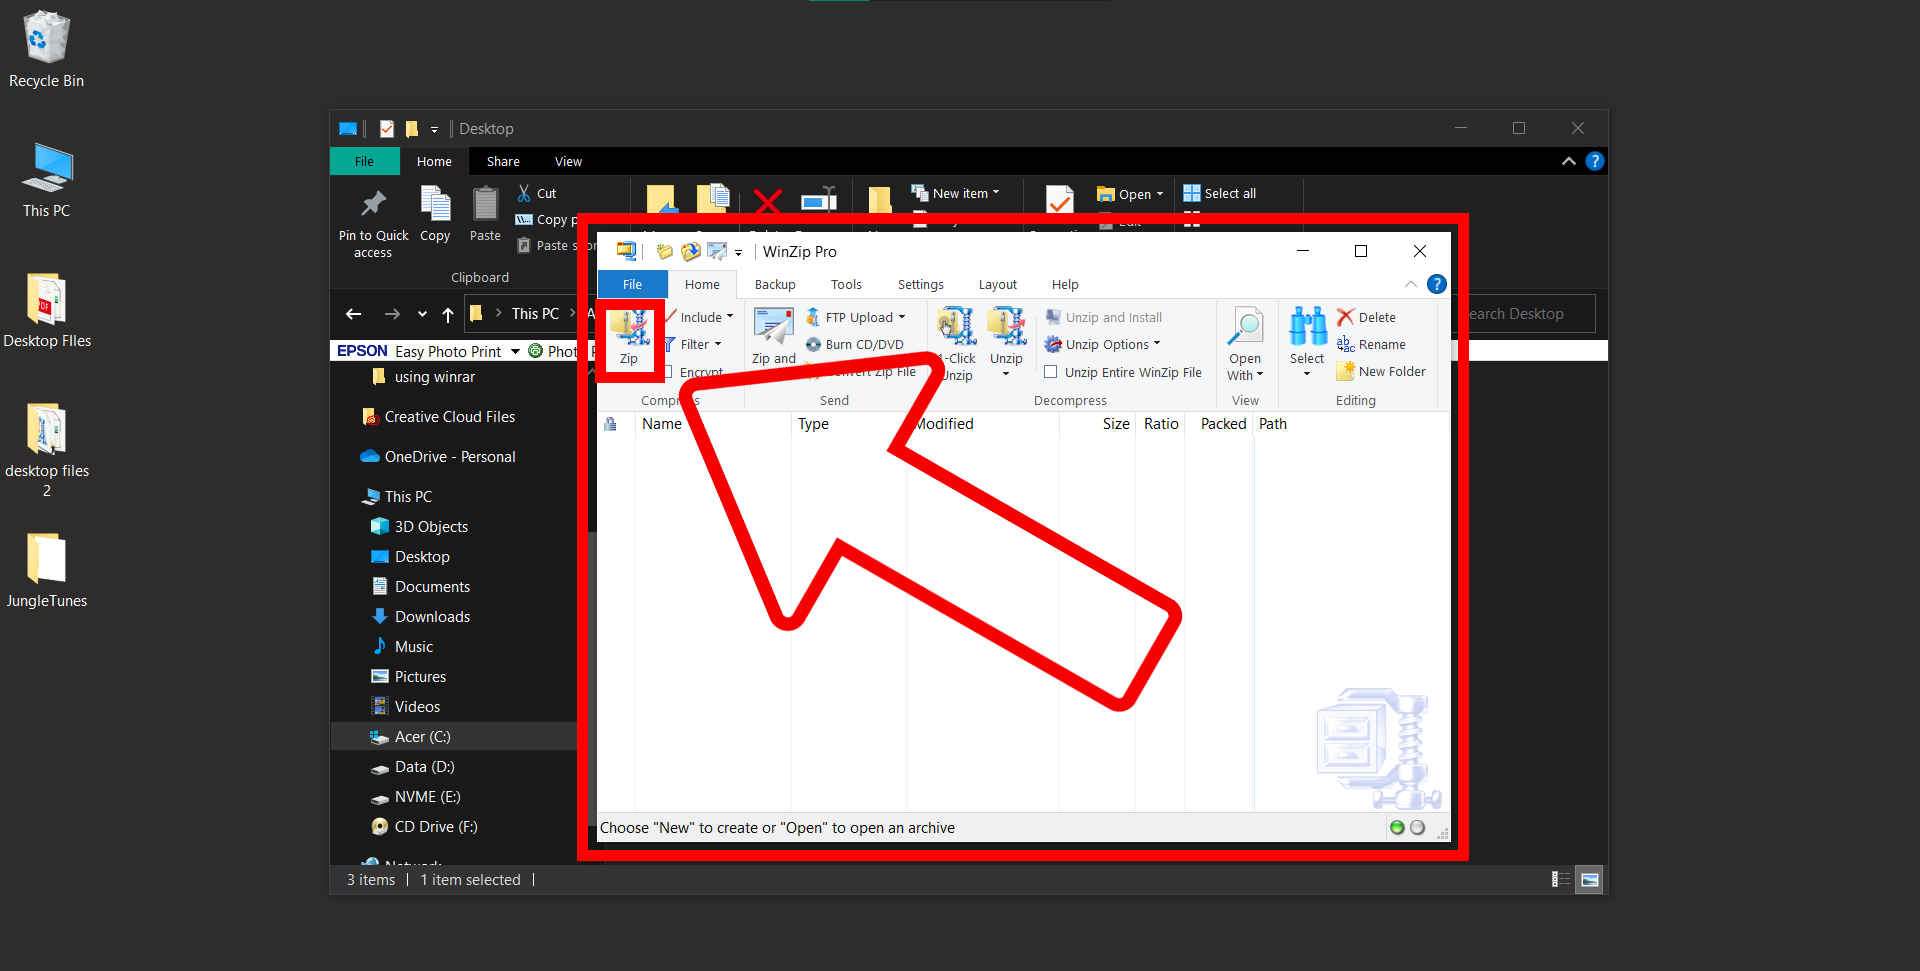
- Add Your Files: Select the “JungleTunes” folder to add it to the archive. Follow the pictures below for a visual guide.
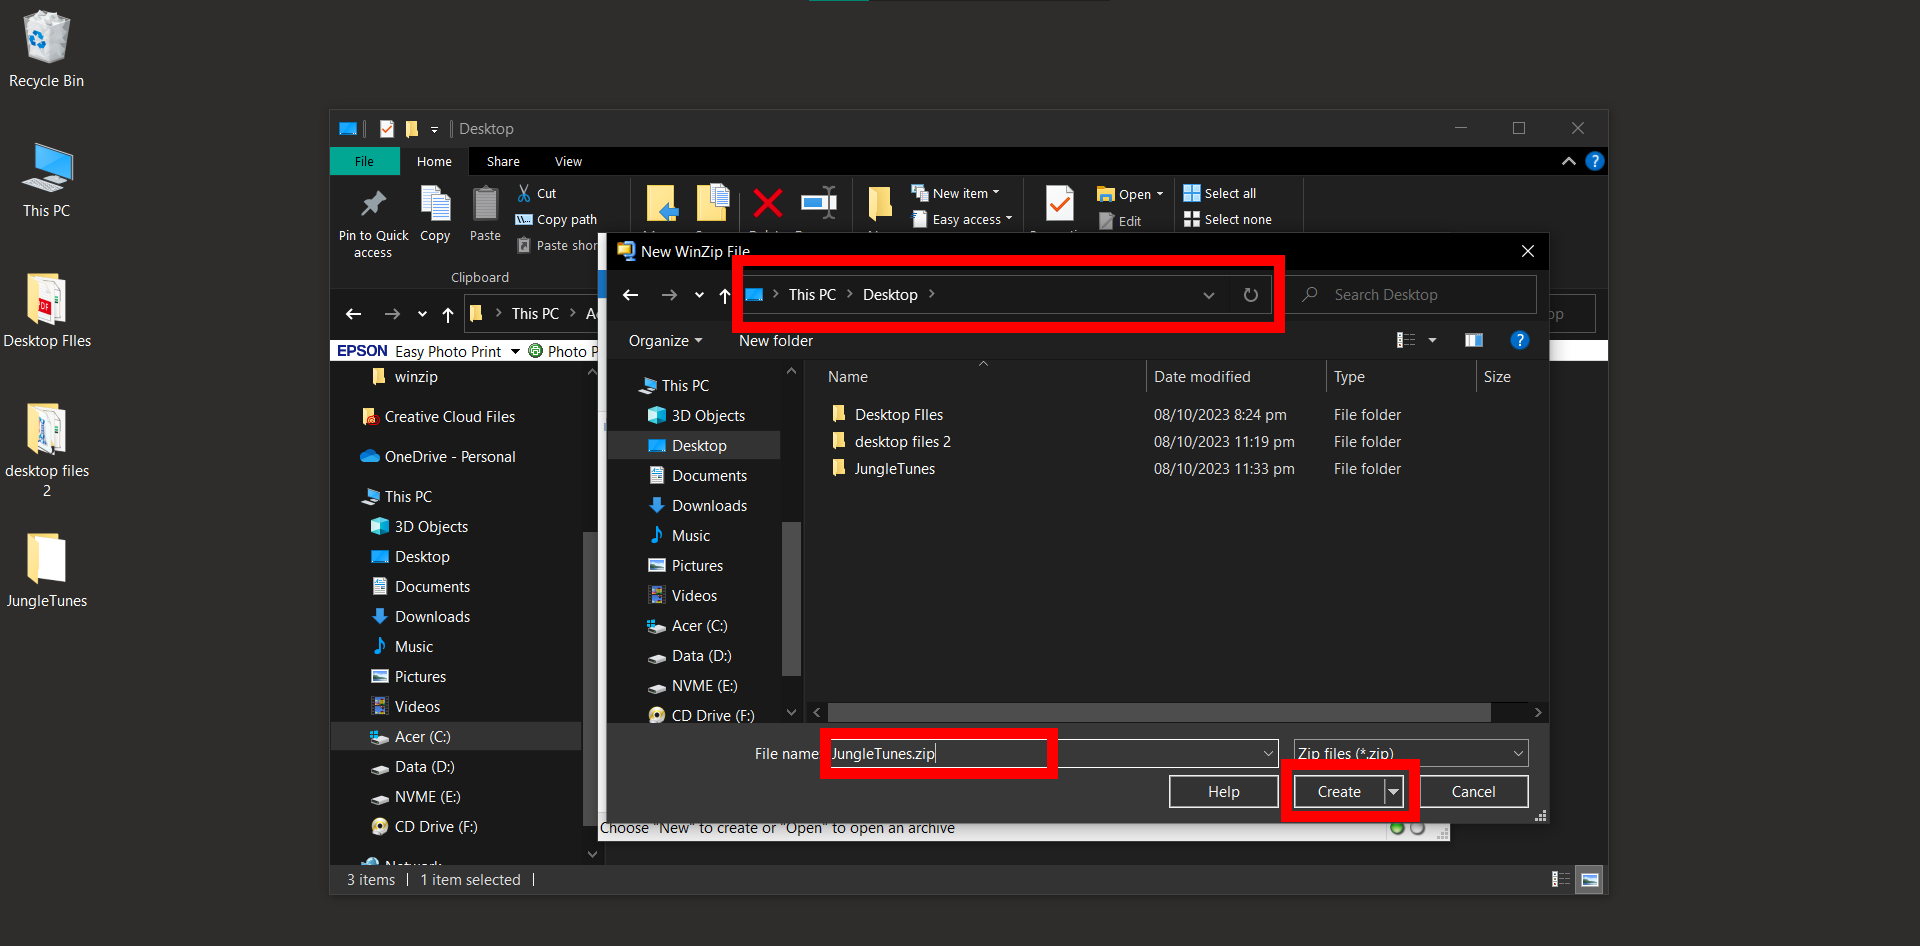
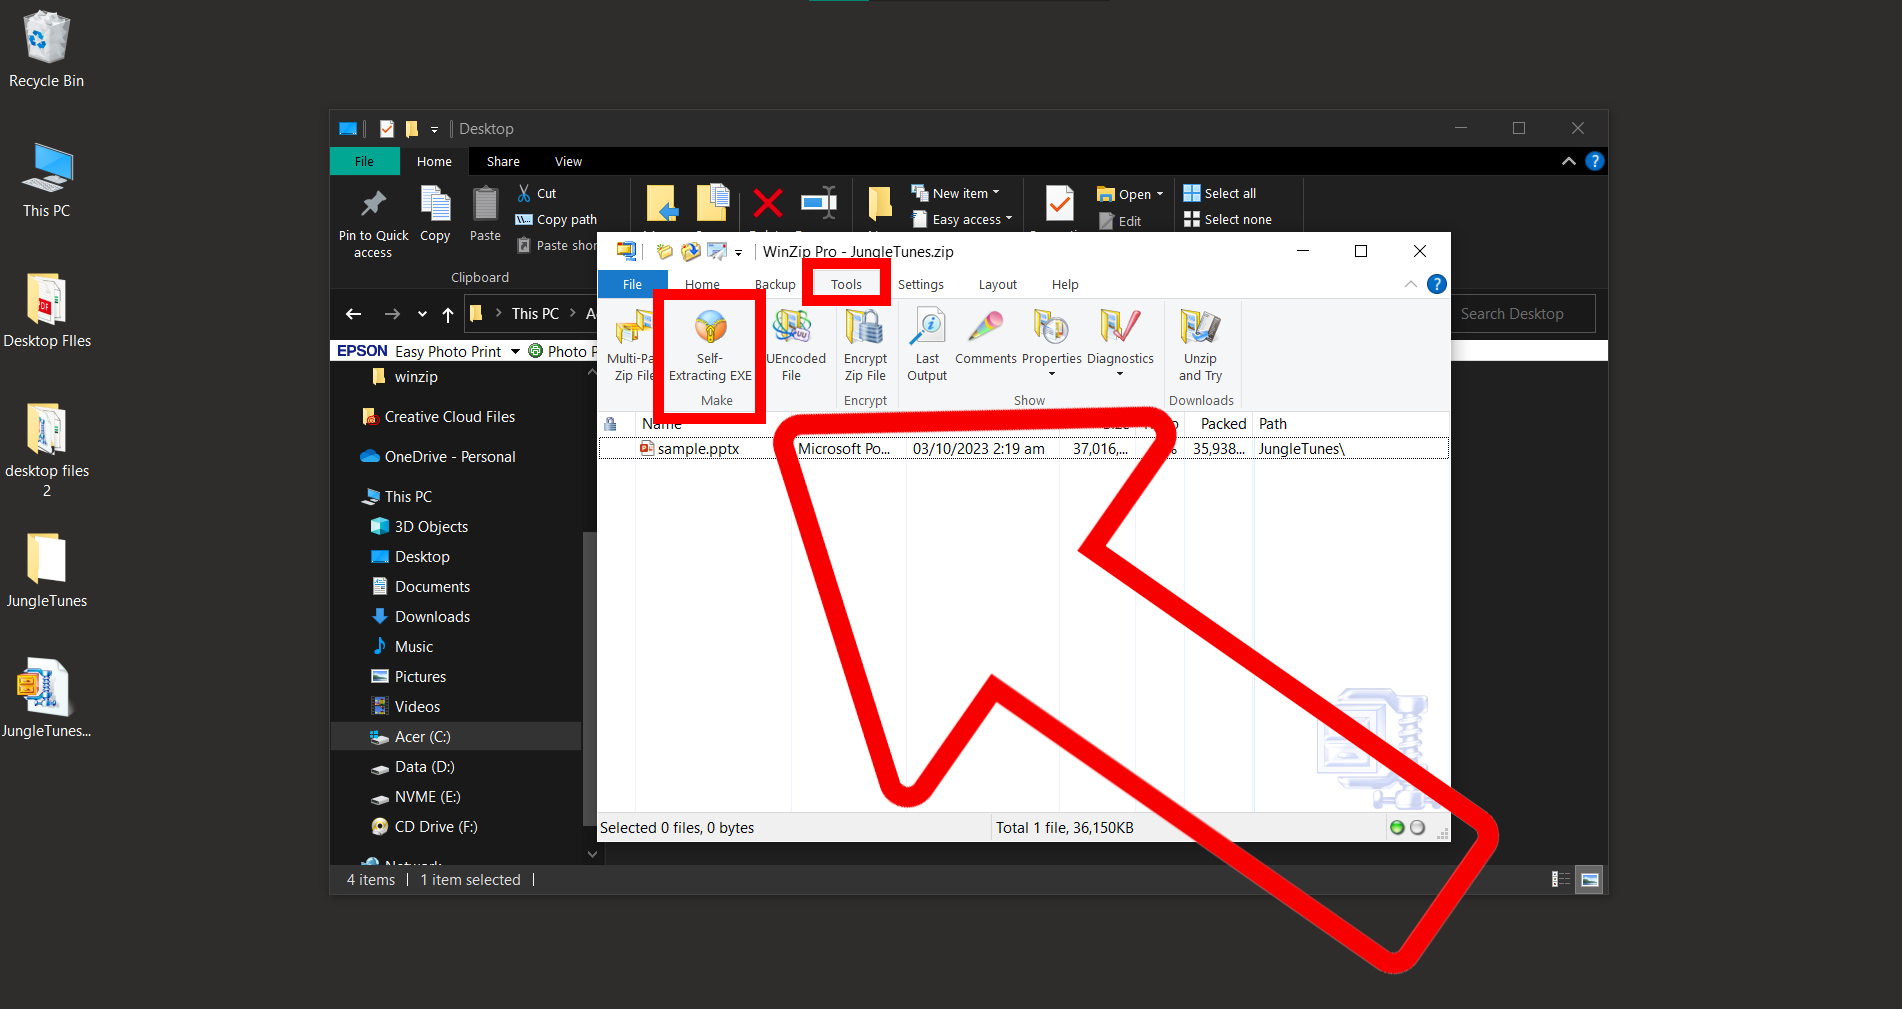
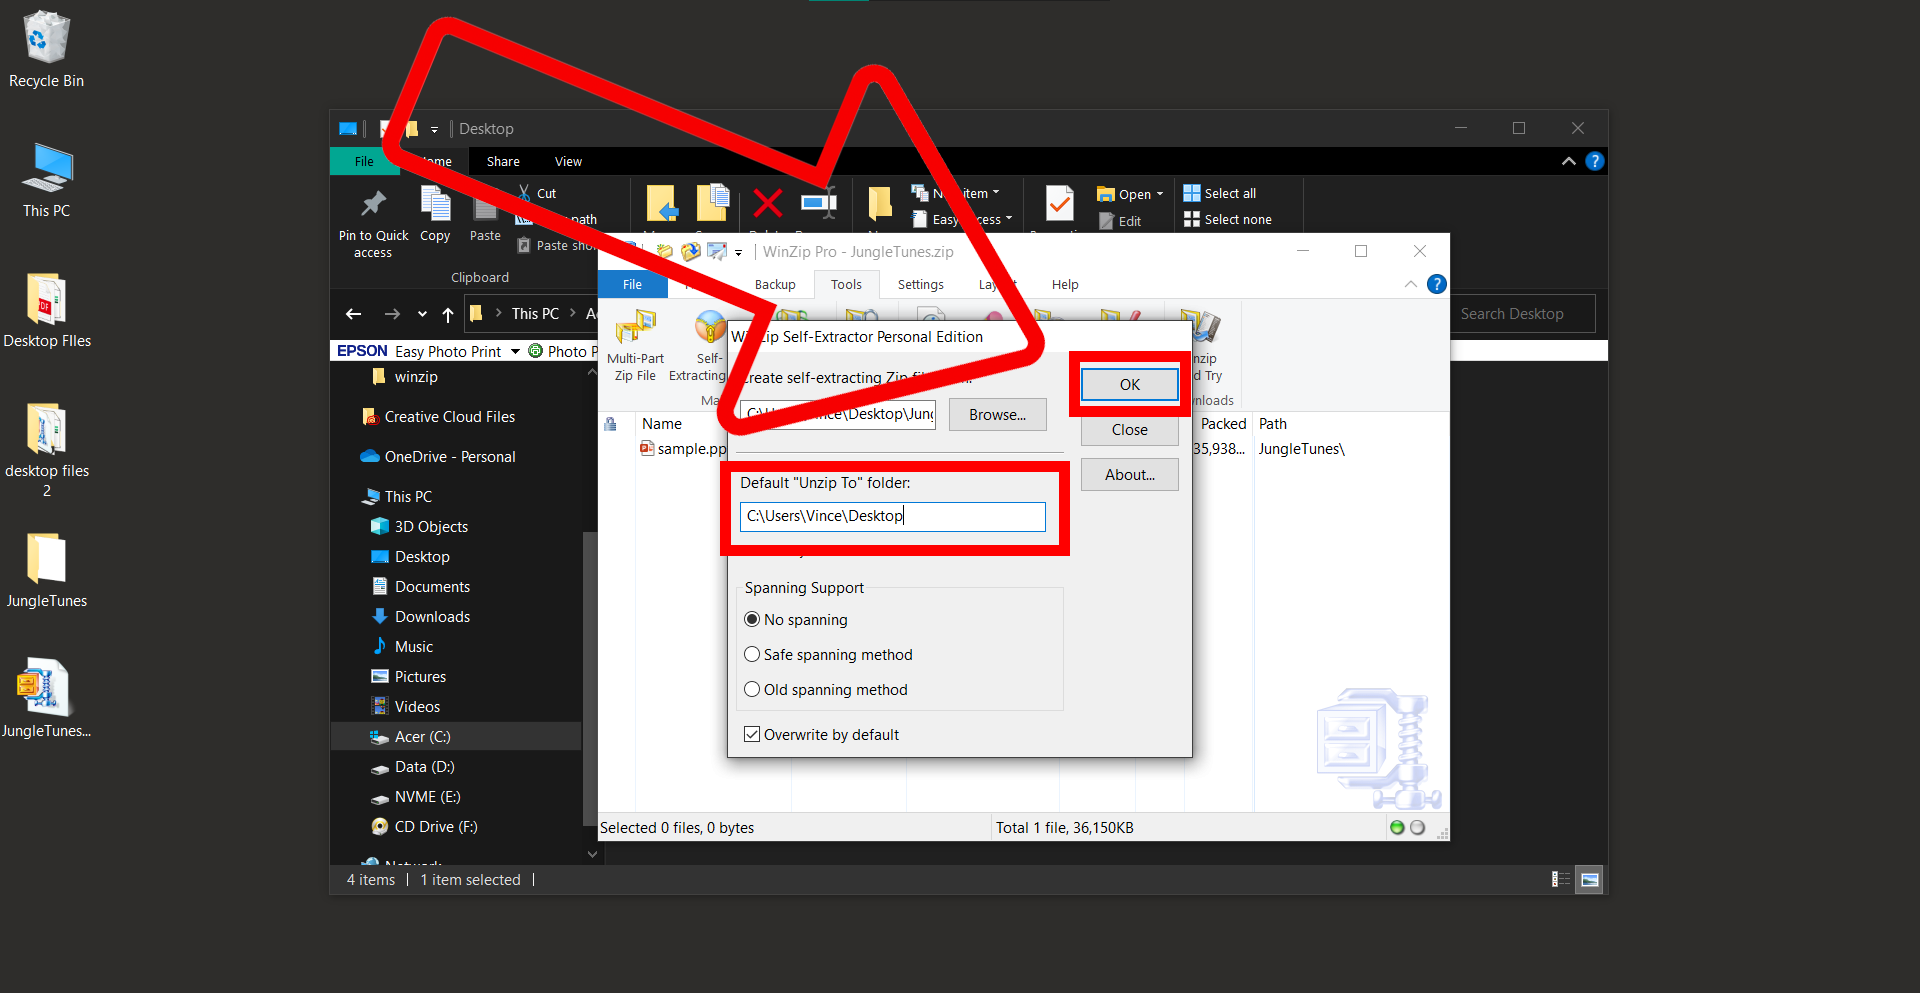
- Choose to Create a Self-Extracting File: In the “Create/Share” tab, find and click on “Self-Extracting EXE”. A new window will pop up.
- Configure Your SFX File: Find the file you want to create a SFX format for. Choose your settings, such as where you want the files to be extracted, and any optional message you want to include.
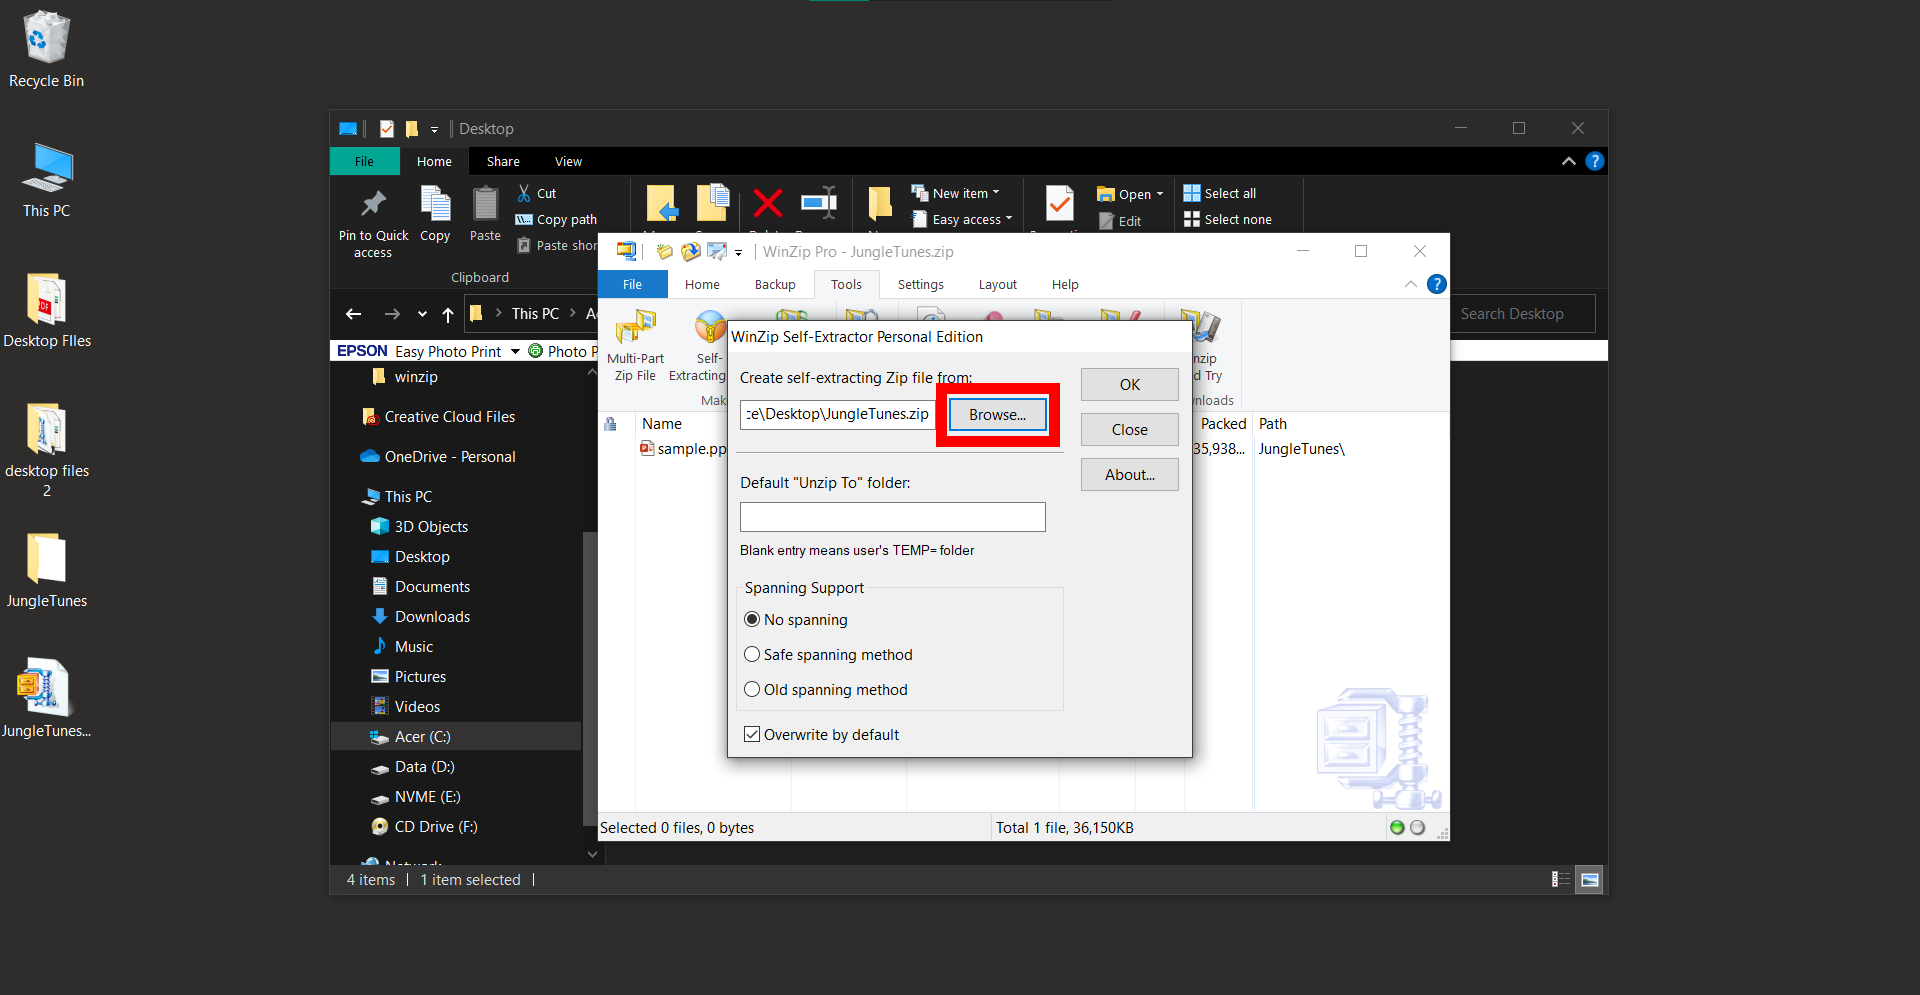
 Click “OK” and watch as WinZip compresses your files into a self-extracting archive.
- Send to Your Jungle Pals: Share your “JungleTunesSFX.exe” with your friends. They can open it and access the files without needing WinZip installed!
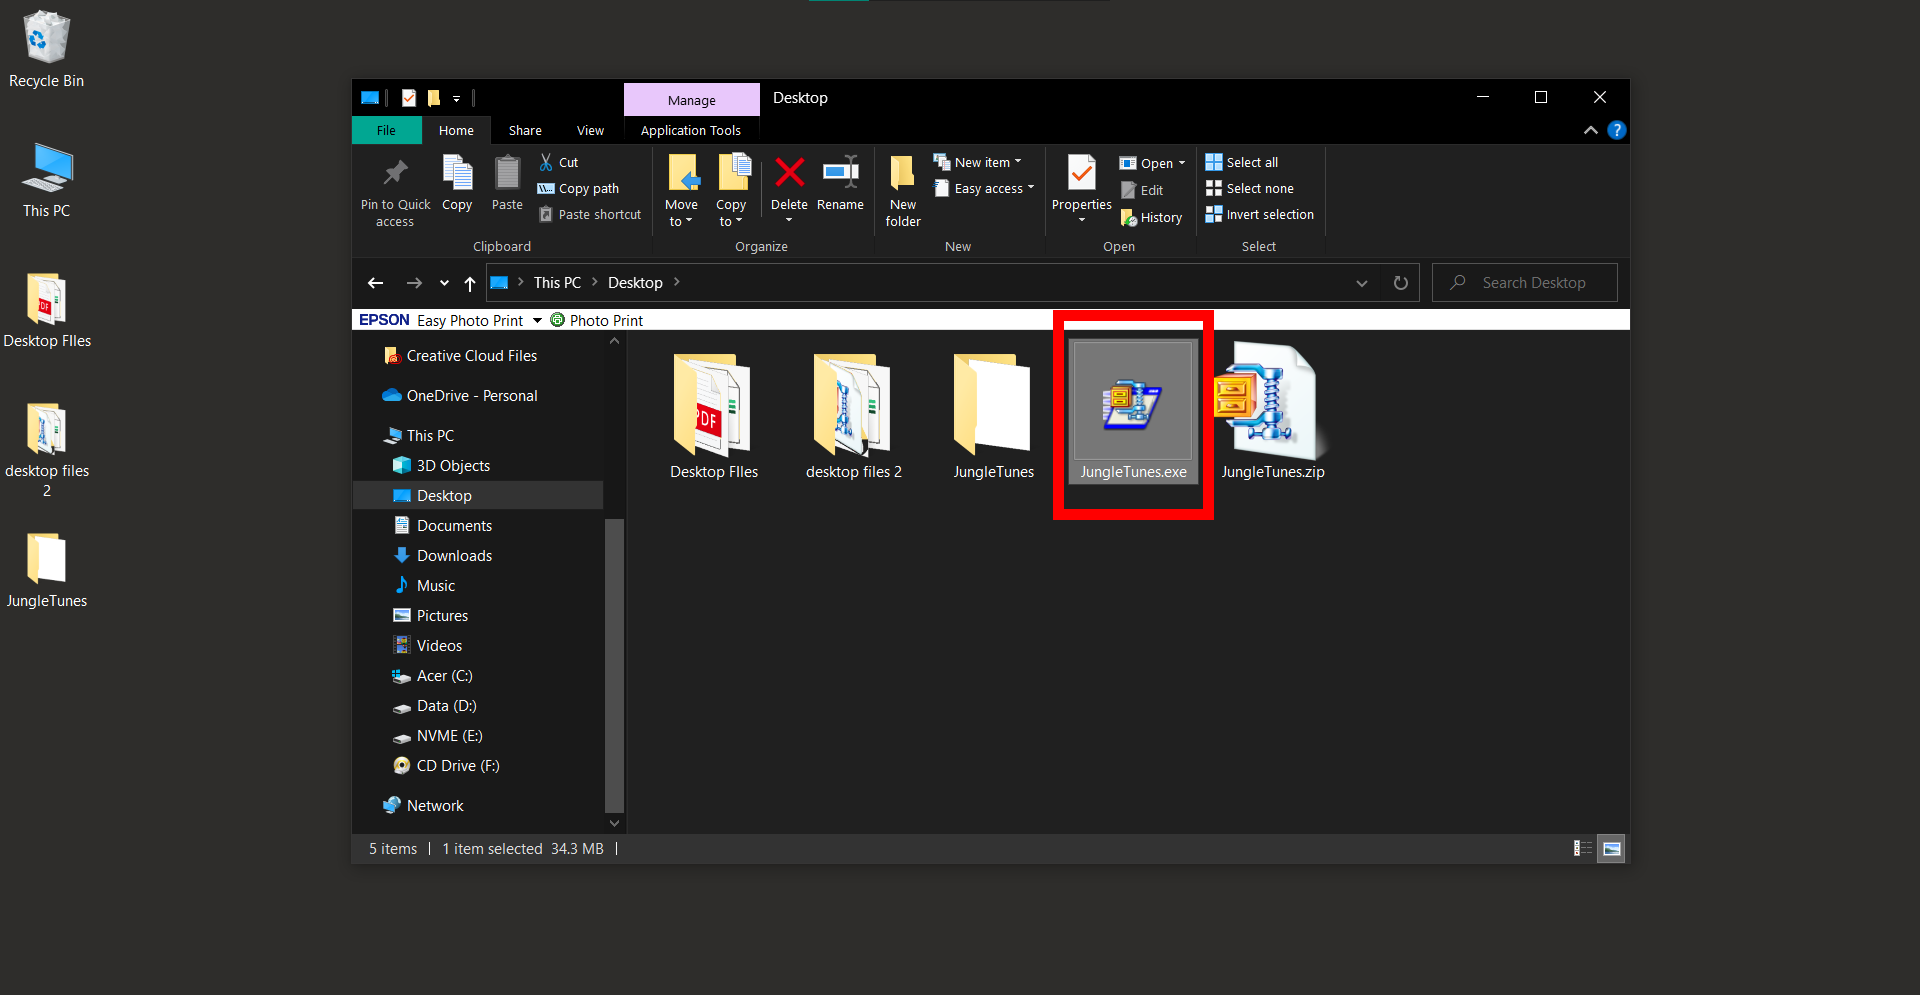 Voilà! You’ve just created a self-extracting archive using WinZip. Now, sharing files is as easy as handing over a self-peeling banana to someone. Enjoy the convenience!
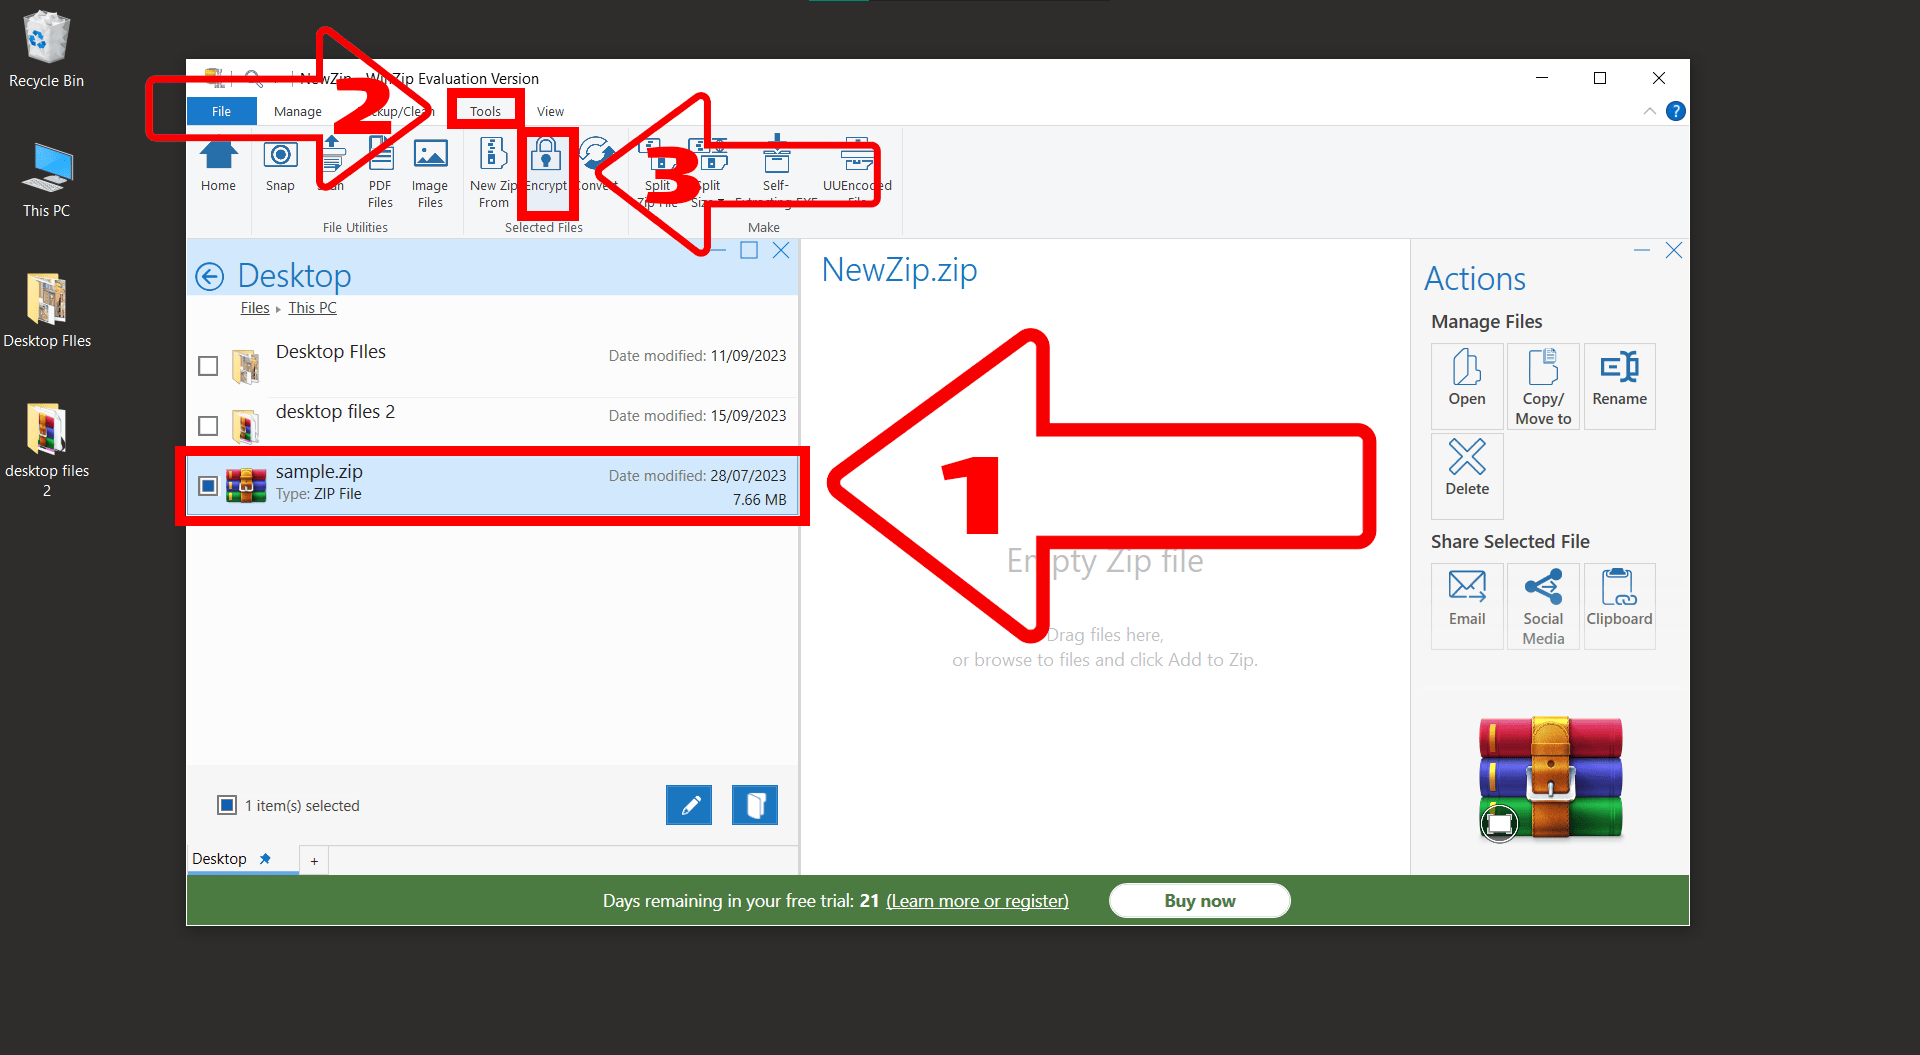
How To Add Password To Zip File Using WinZip On Windows
Securing a ZIP file with a password in WinZip is like hiding your favorite banana stash from other monkeys. 🍌 It ensures that only those with the secret code can access the goodies inside. Here’s how to do it:
- Download & Install WinZip: Follow the steps above to download and install WinZip on your computer.
- Create or Open Zip: Either create a new Zip file or open an existing one.
- Encrypt: Click on the ‘Tools’ > ‘Encrypt’ toggle in the Actions pane.
- Set Password: When prompted, type your desired password. Confirm it by entering it again.
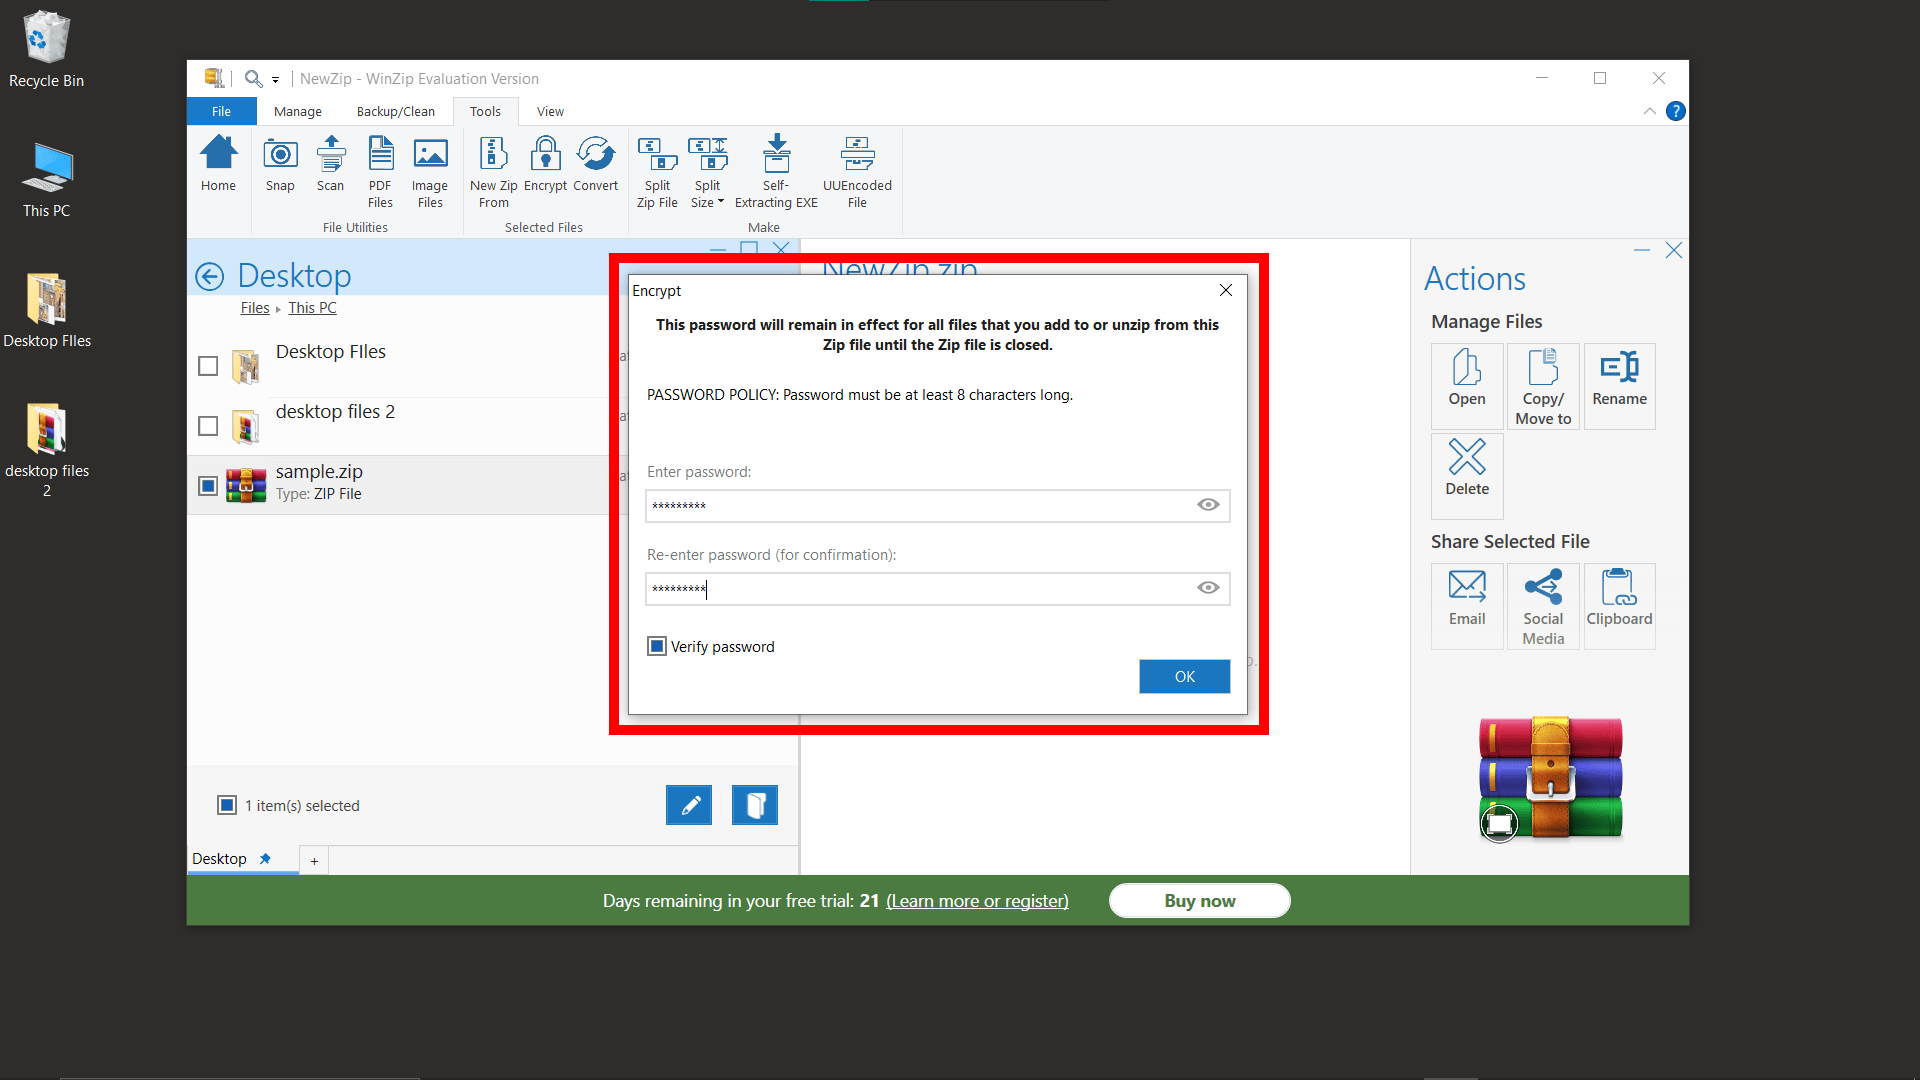
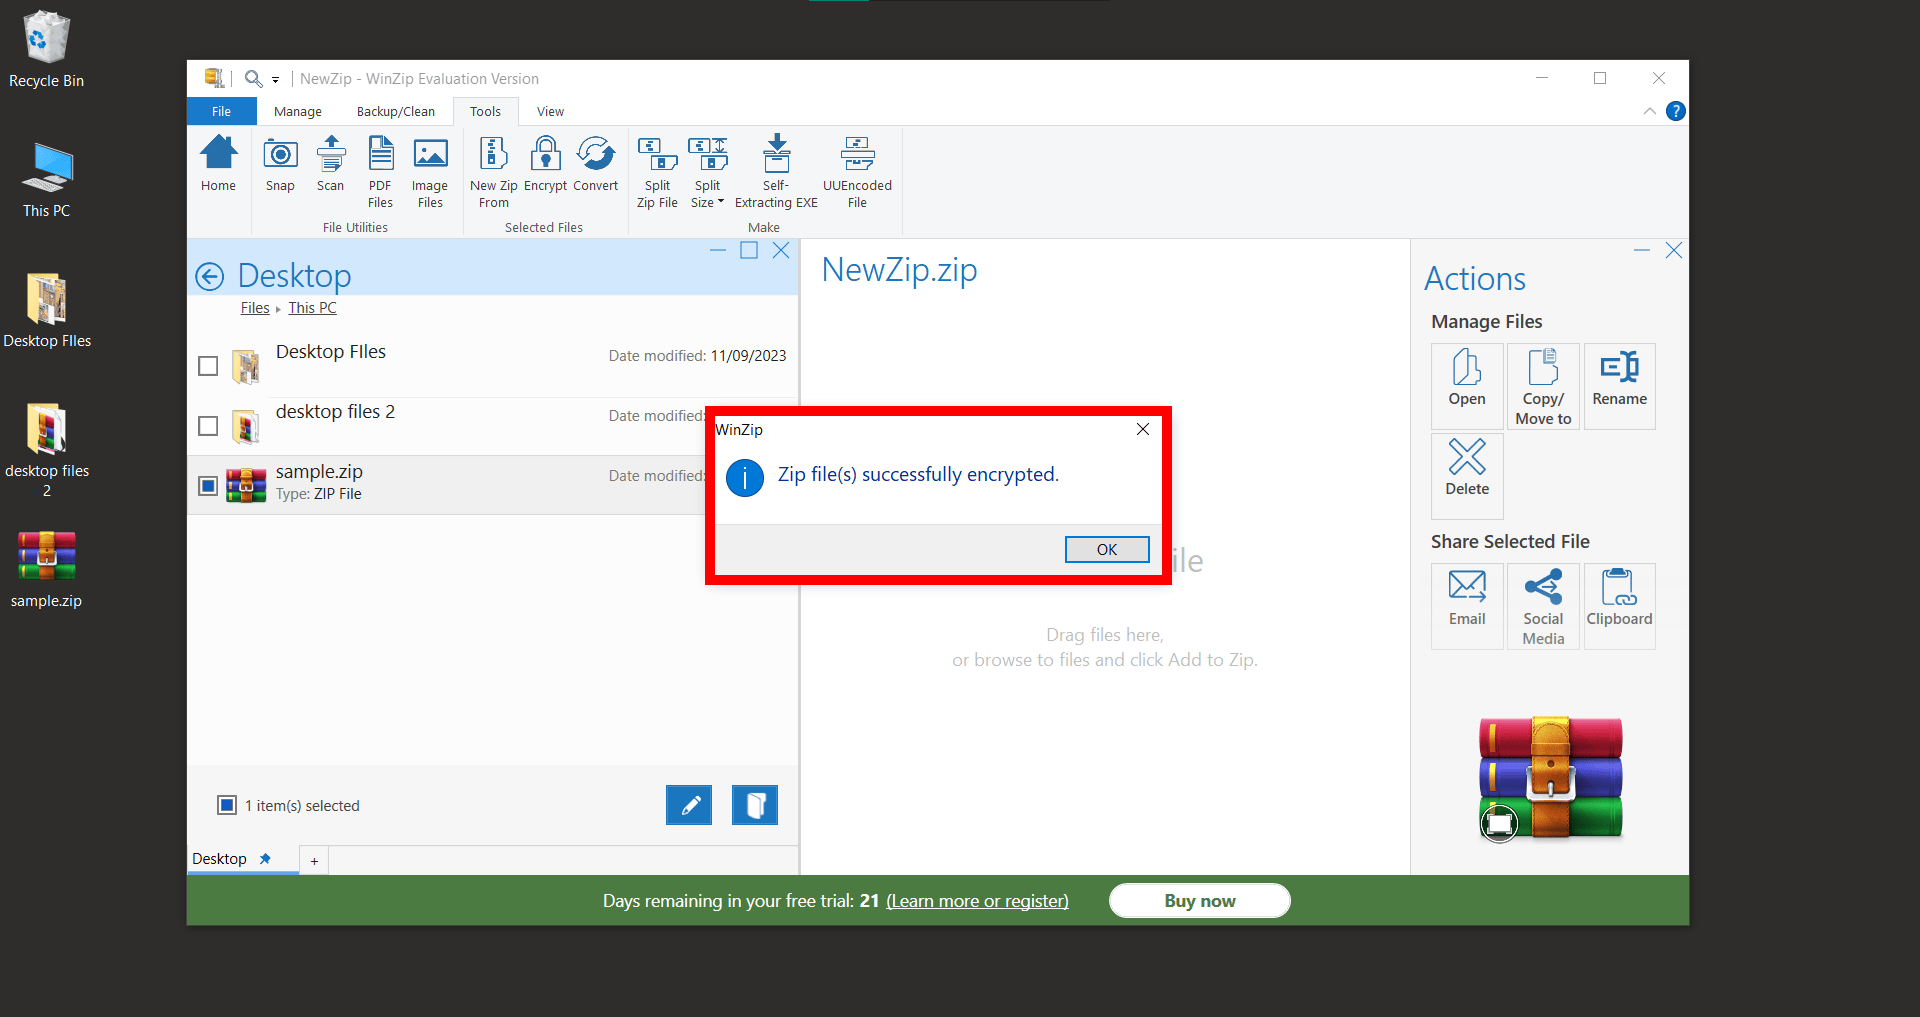
- Save: Save the Zip file to apply the password protection.
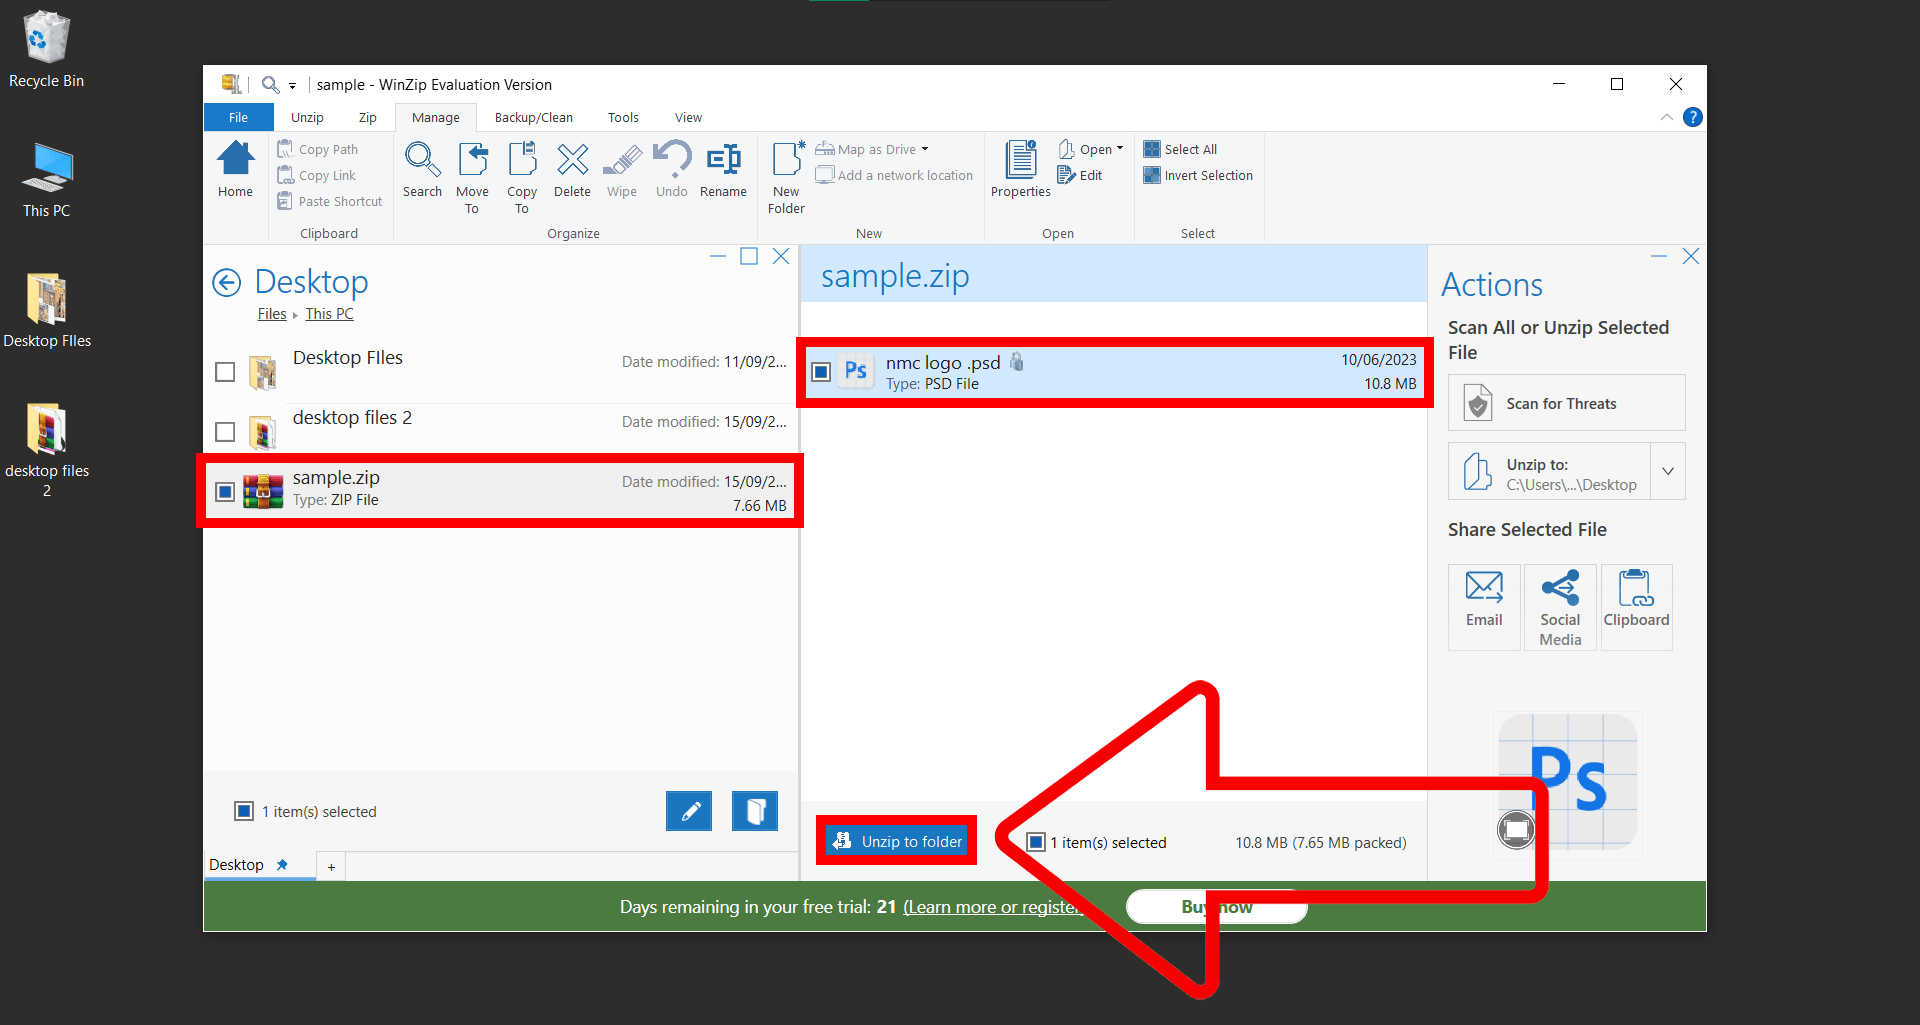
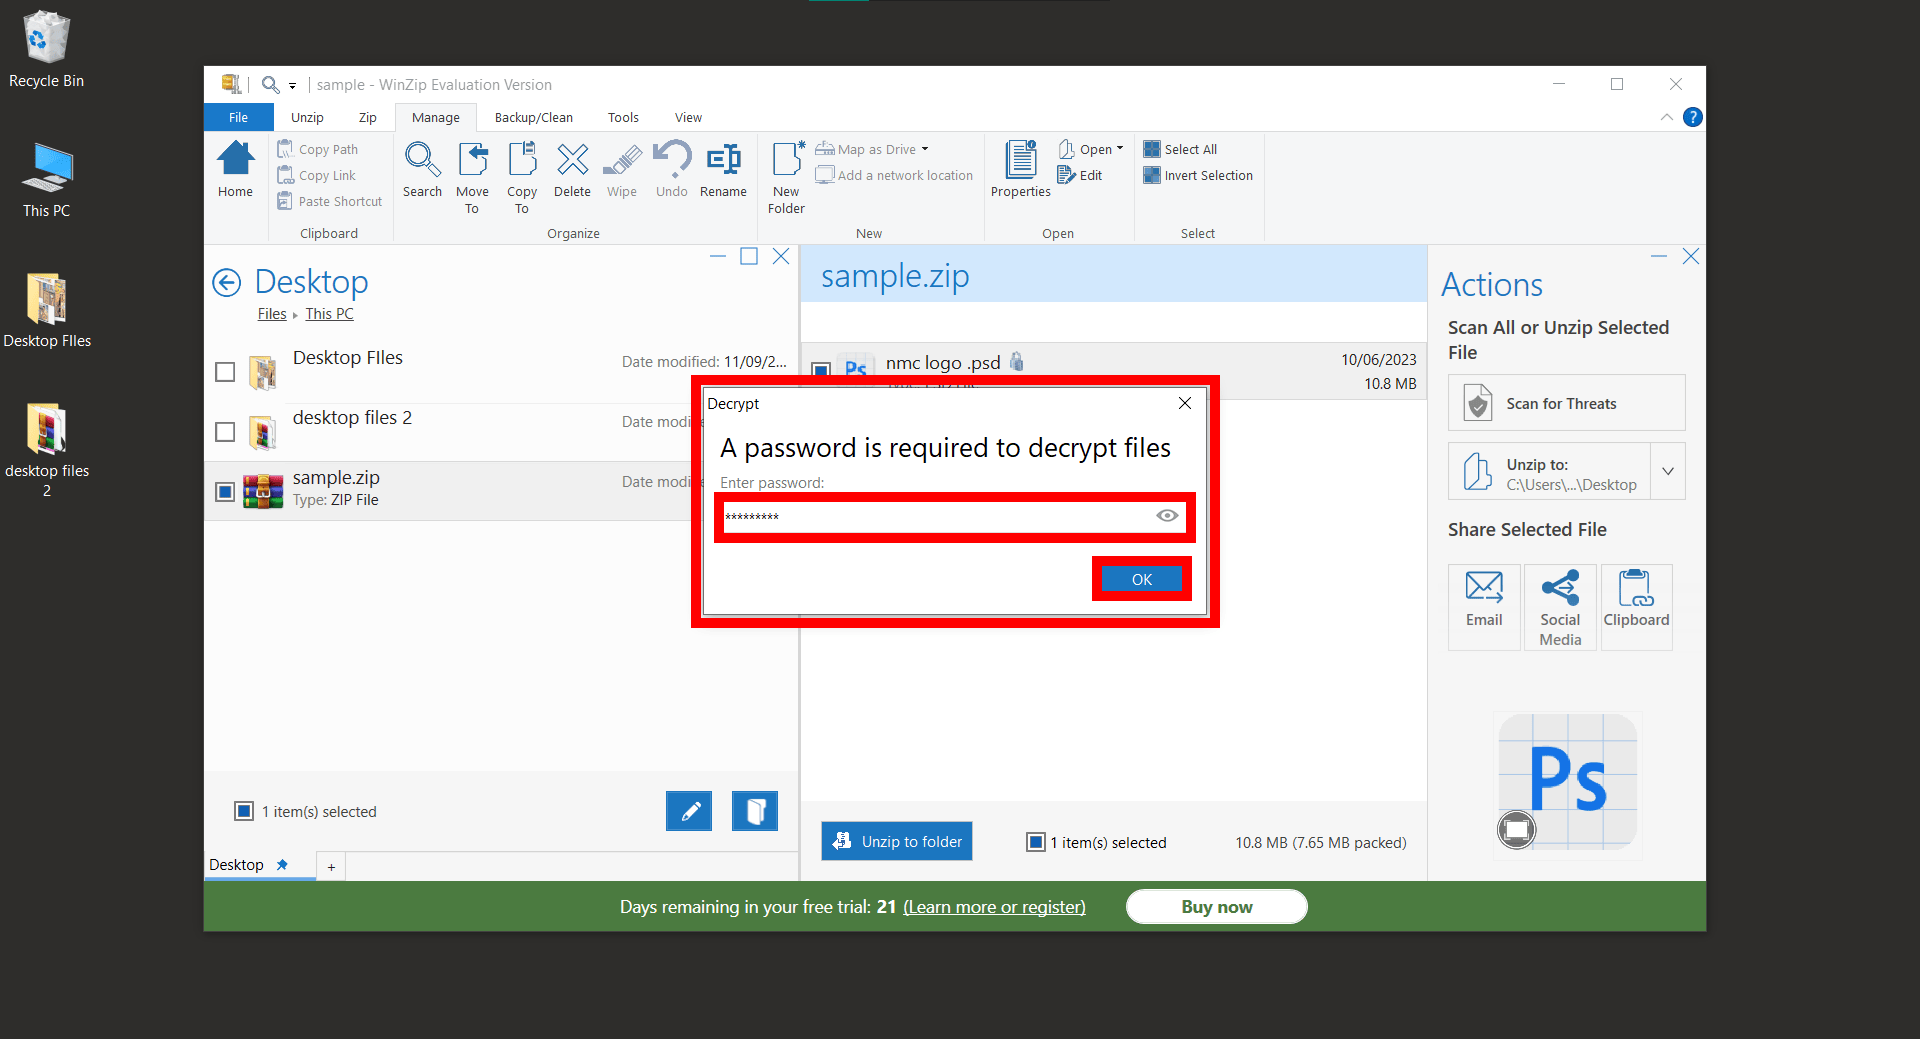
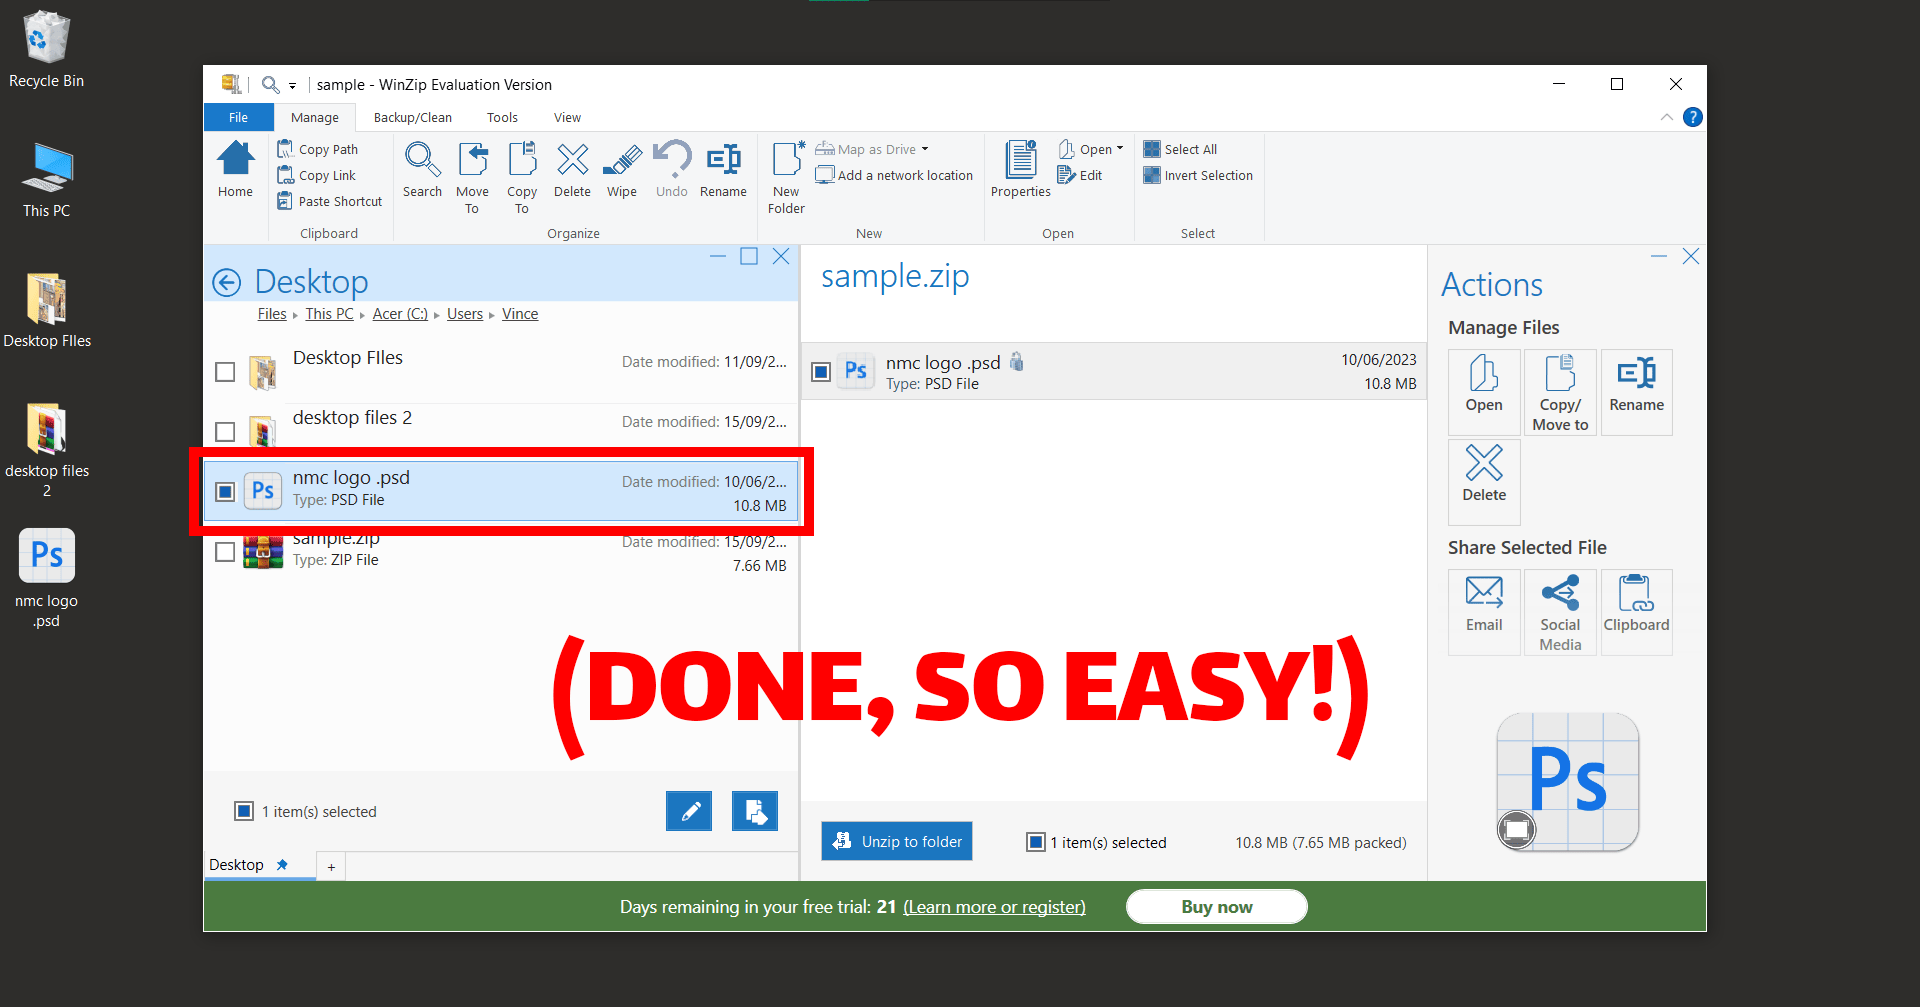
How To Open a Password-Protected Zip File Using WinZip On Windows
Unlocking a password-protected ZIP file with WinZip is like cracking open a banana with a secret handshake. 🍌 It requires a bit of insider knowledge (the password), but once you have it, the process is smooth. Here’s how:
-
Download & Install WinZip: Shimmer over to these steps to download and install WinZip.
-
Open Zip File: Locate, select your password-protected Zip file and click ‘Unzip to folder’.

-
Enter Password: When prompted, type in the password for the Zip file.
-
Access Files: Once the correct password is entered, you can access and extract the contents of the Zip file.
Conclusion
There you have it, my fellow jungle dwellers! With WinZip in your toolkit, you’re ready to tackle the wild world of files. Remember, when in doubt, just think: “What would a tech-savvy monkey do?” 🍌🐒 Happy zipping and unzipping!