
In the vast jungle of Linux, where the wild files roam free, there’s a tool as essential to survival as a monkey’s tail is for balance. Yes, we’re talking about the zip command – the Swiss Army knife for compressing and managing your files. If the thought of using the terminal makes you go bananas, fear not! We’re here to guide you through the zip command, making it as easy as pealing a banana. Whether you’re looking to free up some space or simply want to tidy up your digital treehouse, let’s zip through this guide together!
Table of contents
- Understanding the Zip Command Format
- How To Zip Files in Linux Using Command Line
- How To Unzip Files in Linux Using Command Line
- How To Zip A Directory in Linux Using Command Line
- How To Unzip A Directory in Linux Using Command Line
- Tips for Mastering the Zip Command
Understanding the Zip Command Format
Diving into the terminal might feel like jumping into a dense jungle without a map, but once you get the hang of the zip command format, you’ll be swinging from tree to tree with ease. The zip command, at its core, follows a simple structure that, when understood, can make you the Tarzan of file compression in the Linux jungle.
-
Basic Structure: The most basic form of the zip command looks something like this:
zip [options] archive_name file_namesHere’s how to break it down:- “zip” is your command to start compressing.
- “[options]” are the swinging vines you’ll use to navigate how you zip your files. Want to zip a whole directory recursively? “-r” is your vine.
- “archive_name” is the name of your zip file. Think of it as naming your jungle expedition.
- “file_names” are the items you’re packing for your journey. You can list one or more files separated by spaces.
-
Options Galore: The zip command comes with a toolbelt of options to customize your file compression adventure:
- “-r”: Recursively include directories. It’s like ensuring you leave no banana behind.
- “-q”: Quiet mode. For when you need to zip files stealthily, without the jungle knowing.
- “-v”: Verbose mode. When you want to hear every leaf rustle and bird tweet about what’s being zipped.
-
Examples in Action: Here are a few examples to see how the command format comes to life:
- Compressing a Single File: “zip packed.zip treasure.txt” - This is like packing your most prized banana into a bag.
- Compressing Multiple Files: “zip journey.zip map.txt compass.txt” - For when you need to ensure you have both the map and the compass for your expedition.
- Compressing a Directory: “zip -r campsite.zip campsite/” - When you want to pack up your entire campsite into one easy-to-carry package.
By understanding the zip command format, you’re now equipped to navigate the densest parts of the Linux jungle. Whether you’re packing light for a quick trip or need to compress an entire expedition’s worth of gear, the zip command has got your back. Happy zipping, and remember, in the world of Linux, you’re never alone with a good command by your side!
How To Zip Files in Linux Using Command Line
Getting your files compressed is a great way to make them lighter and easier to swing around the digital vines.
- Open Terminal: Like opening a map of the jungle, start by opening your terminal window.
- Navigate to Your Files: Use the cd command to move to the directory where your files reside. If your files are in the “Documents” folder, you’d type cd Documents.
cd Documents
- Compress a Single File: Type zip my-archive.zip my-file.txt; replace my-archive.zip with the name you want for your compressed file, and my-file.txt with the name of the file you’re compressing.
zip my-archive.zip my-file.txt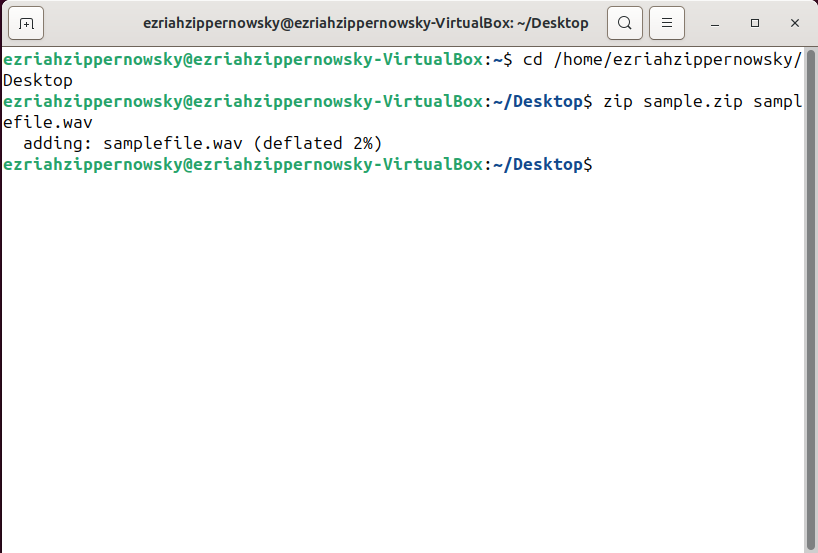
- Compress Multiple Files: If you’re trying to squish more than one file into that zip, just list them out: zip my-archive.zip file1.txt file2.txt file3.jpg.
zip my-archive.zip file1.txt file2.txt file3.jpg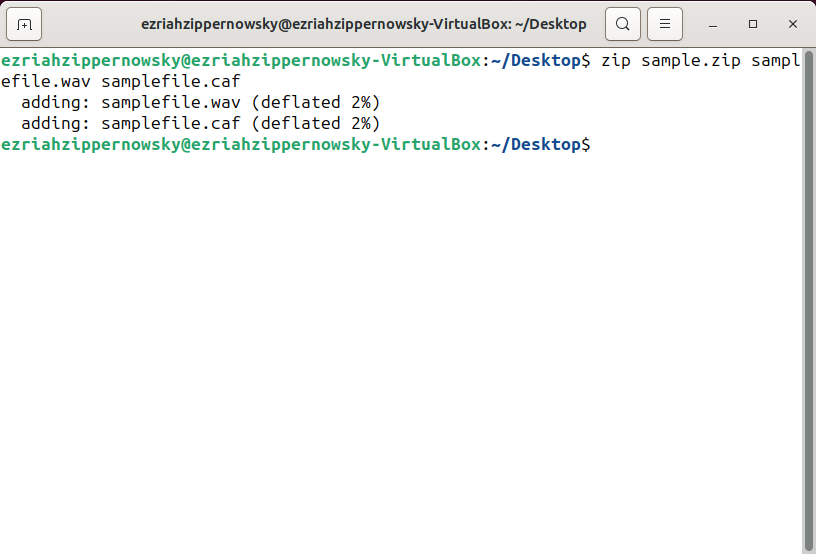
- Compress an Entire Directory: To compress all the bananas in the bunch (a.k.a. all the files in a directory), use the -r option: zip -r my-archive.zip my-folder/.
zip -r my-archive.zip my-folder/
How To Unzip Files in Linux Using Command Line
Found a zip file in the wild and curious what’s inside? Unzipping is like opening a treasure chest of bananas.
- Ensure Unzip is Installed: Most Linux distributions come with unzip installed. If not, you might have to install it first. On Ubuntu or Debian, you can swing through the terminal and run sudo apt-get install unzip.
sudo apt-get install unzip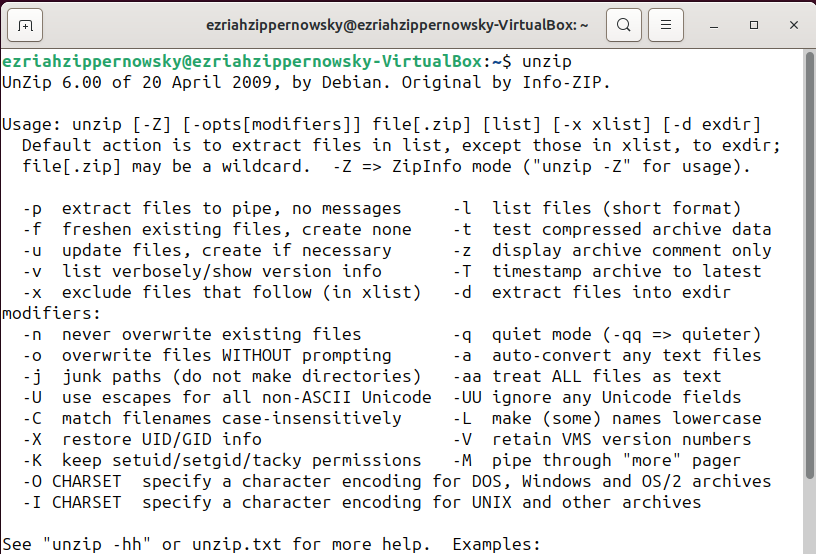
- Unzip a File: Navigate to the directory containing your zip file. If you want to unleash the contents of my-archive.zip, simply type unzip my-archive.zip.
unzip my-archive.zip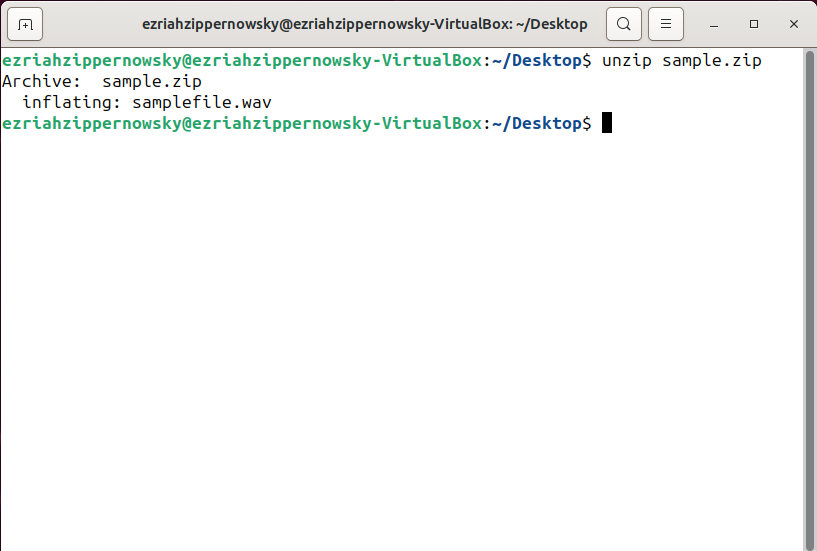
- Unzip to a Specific Directory: To direct your files to a specific spot, use the -d option like this: unzip my-archive.zip -d /path/to/destination.
unzip my-archive.zip -d /path/to/destination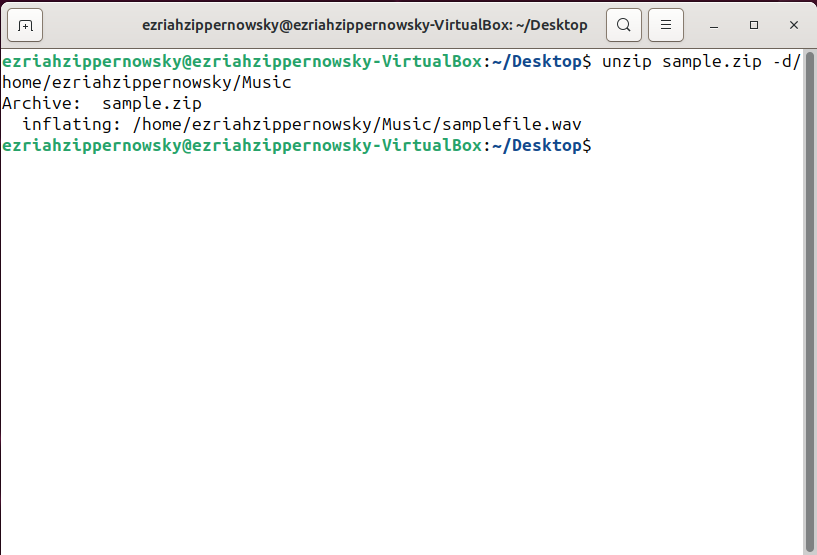
How To Zip A Directory in Linux Using Command Line
When you’re looking to pack up your entire campsite into one neat package, zipping a directory is the way to go.
- Navigate to Your Directory: Use the cd command to move to the directory you want to compress. If your directory is named campsite, you’d type cd campsite.
cd campsite - Zip the Directory: Once you’re in the right spot, use the zip -r my-campsite.zip ./ command to compress the entire directory. Replace my-campsite.zip with the name you want for your zip file.
zip -r my-campsite.zip ./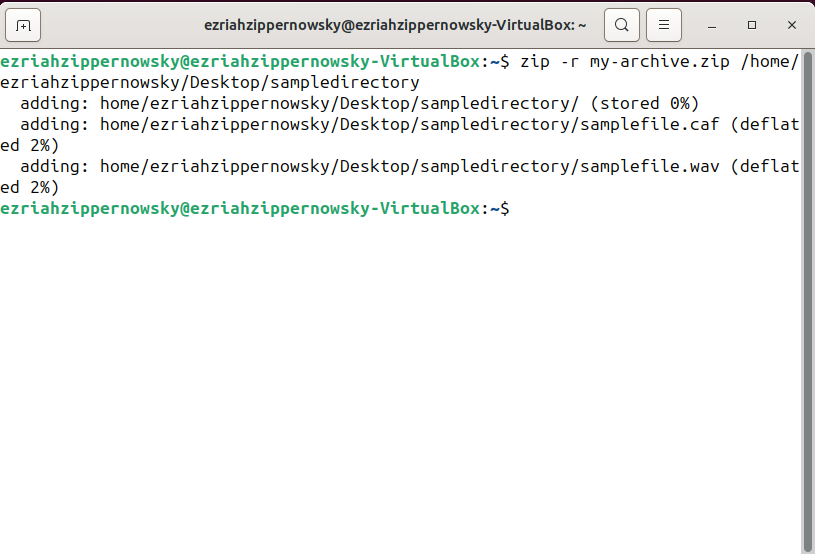
- Verify the Zip File: To ensure your directory is zipped up and ready to go, you can use the unzip -l my-campsite.zip command to view the contents without unzipping.
unzip -l my-campsite.zip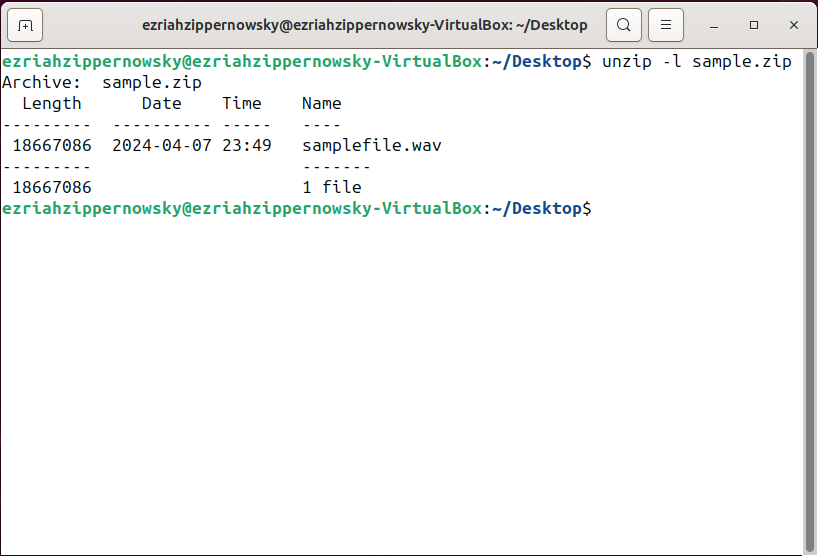
How To Unzip A Directory in Linux Using Command Line
When you’re ready to set up camp and unpack your gear, unzipping a directory is the way to go.
-
Navigate to Your Zip File: Use the cd command to move to the directory containing your zip file.
cd directory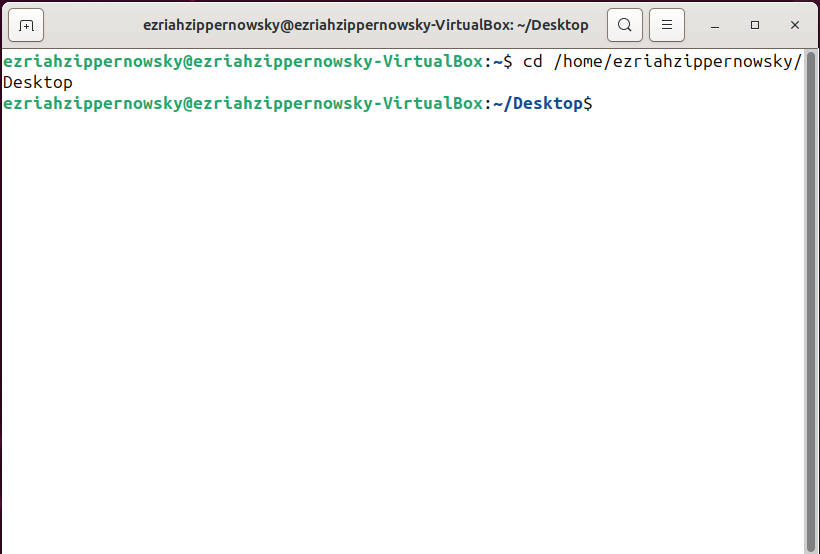
-
Unzip the Directory: Once you’re in the right spot, use the unzip my-campsite.zip command to unpack the entire directory.
unzip my-campsite.zip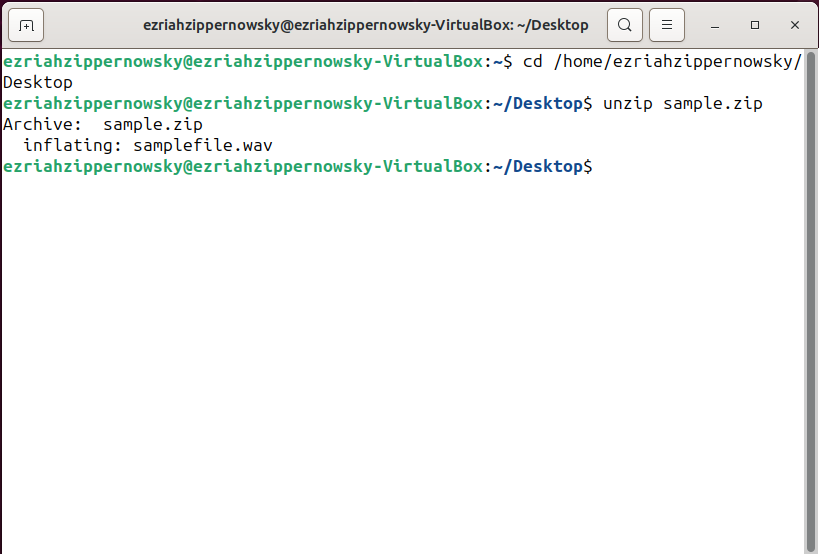
-
Verify the Unzipped Directory: To ensure your directory is unpacked and ready to go, you can use the ls command to view the contents of the directory.
Tips for Mastering the Zip Command
- View Contents Without Unzipping: Just like peeking through the leaves without disturbing the jungle, you can view the contents of a zip file with unzip -l my-archive.zip.
- Exclude Files: If you’re packing for a journey but want to leave behind a few bananas, use the -x option: zip -r my-archive.zip my-folder/ -x file-to-exclude.txt.
zip -r my-archive.zip my-folder/ -x file-to-exclude.txt
Remember, in the jungle of Linux, being able to compress and decompress files with the zip command is like having a handy multi-tool in your survival kit. No more monkeying around with file sizes or storage space; you’ve got it zipped! And when it comes to archiving software, remember – it’s a jungle out there, but with this guide, you’re well-equipped to navigate it. For more tips and tricks on mastering the zip command, swing by our related articles on extracting RAR files using the command line or creating RAR files on the command line. Happy zipping!